Homemade Pita Bread

by Mary Papoulias-Platis

Post image for Homemade Pita Bread

How often do you find yourself without bread for a special dish or dip? Try my easy and quick recipe for Homemade Pita Bread for your next party dish. I use pita in many of my dishes, just make a big batch and freeze the rest. It freezes well, and can be easily defrosted overnight or microwaved. Try adding seeds, spices, and fresh herbs to your bread before baking. Or they can be added when toasting your pita before serving. If you wish, you can use a standup mixer to make your dough. As you make this recipe often, change it up by trying different types of flour. Always try and use organic ingredients for a healthier bread.

Here are a few tips for baking bread.

  • Keep your kitchen warm when baking. A cold kitchen can keep your bread from rising.
  • Use fresh and the right yeast.
  • Proofing your dough is necessary. Take your time.

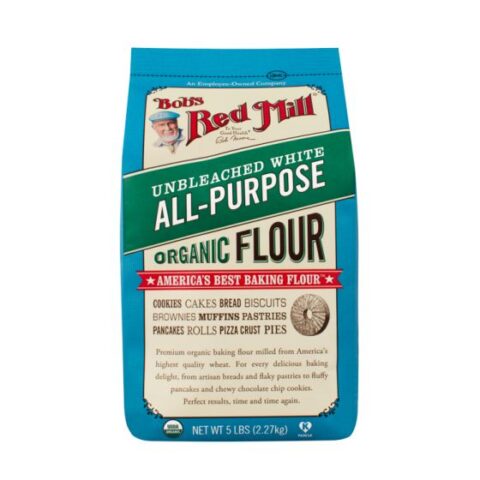
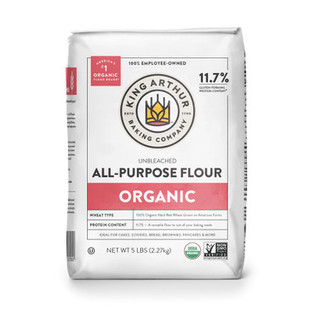
I do like to use certain organic brands for my bread and baking. King Arthur and Bob’s Red Mill.


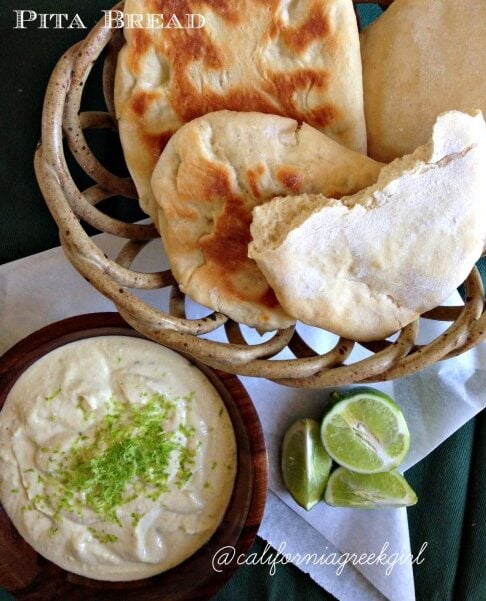
Here, I added a variety of seeds.

Toasted pitas with soices

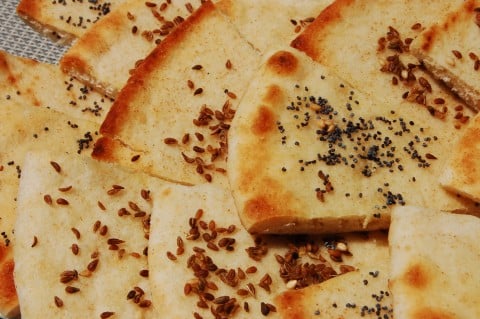
Be careful to watch your pita, so the seeds don’t burn.
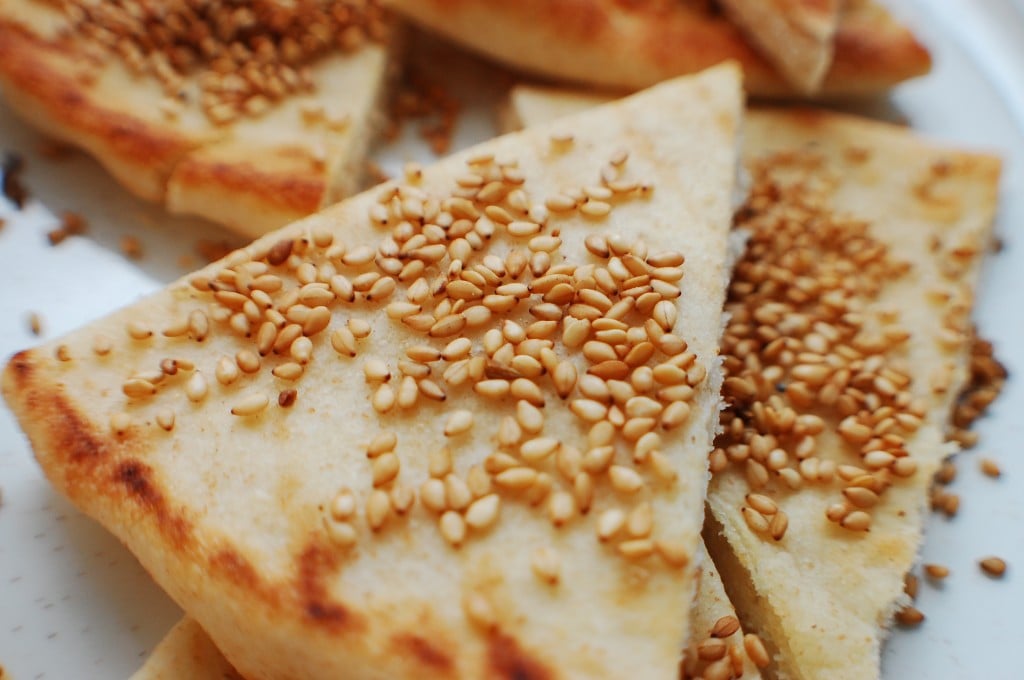
Pita with Seeds


Homemade Pita Bread

There is nothing better than the smell of fresh bread baking in your oven. This simple recipe is far better than store-bought bread. Add seeds, fresh herbs, and spices for a new twist.
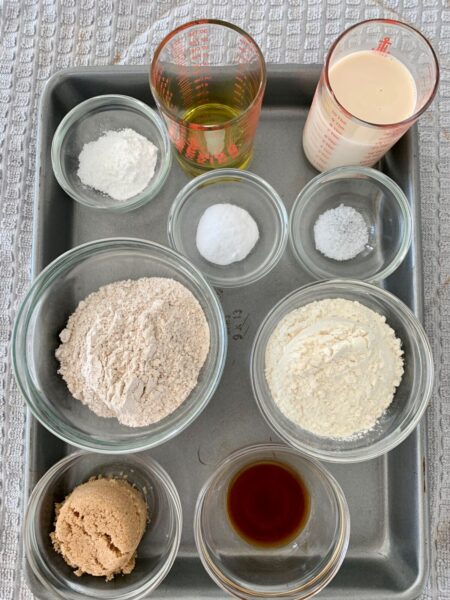
Course Bread
Cuisine California Greek
Keyword bread, Greek, homemade, pita
Author Mary Papoulias-Platis

Ingredients

  • 7 cups flour
  • 1 envelope active dry yeast, or 1 tablespoon
  • 2 teaspoons salt
  • 2 tablespoons olive oil
  • 1/4-1/3 cup water

Instructions

  1. In a large bowl, added the sifted flour, yeast and salt. Mix well.

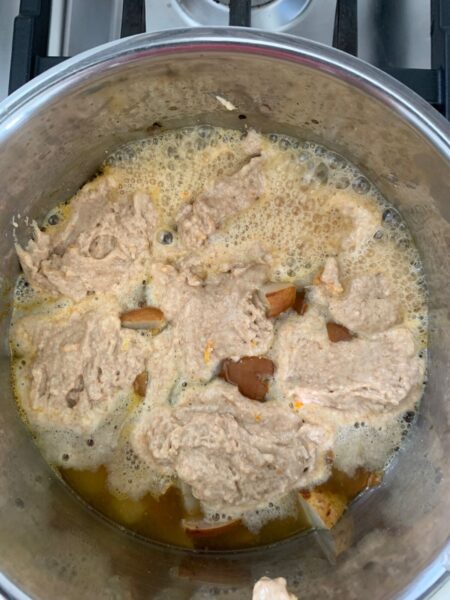
  2. Add the olive oil and mix in enough water to make a soft dough. Start with just 1/4 cup and add more if necessary.

  3. Turn dough onto a floured surface and knead for 10 minutes, or until smooth.

  4. Cut into 12 equal pieces. Roll each piece out into a ball, then roll into a 6-inch oval shape.

  5. Placed on a floured tray, cover with a towel and place in a warm spot for 1 hour to rise.

  6. Preheat the oven to 475 degrees. Oil the baking tray and place in the oven to heat.

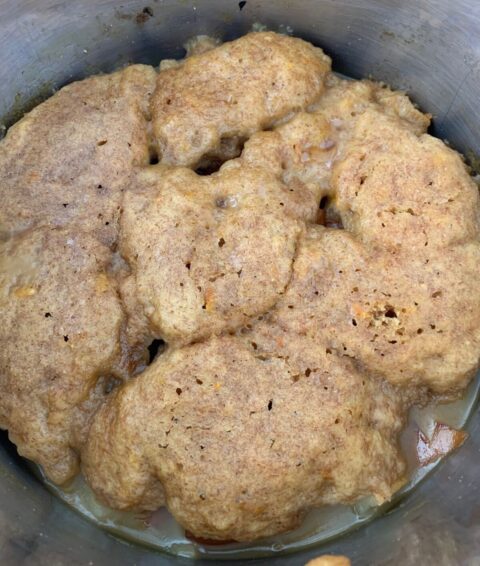
  7. Place three pitas on the tray and sprinkle with water. Bake 5 minutes or until puffed and lightly brown.

  8. Remove pitas and wrap in a clean cloth. Continue baking the remaining pitas.

You can use your pita breads in many of my other recipes:

Greek Garden Salsa with Pita Chips

Greek Summer Salsa with Pita

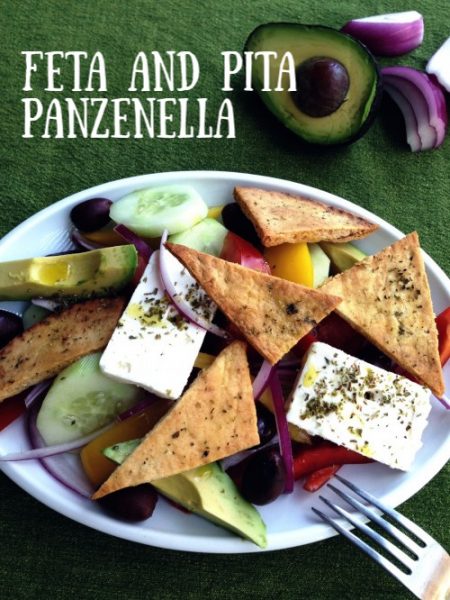
Feta with Pita Panzanella Salad

Feta and Pita Panzenella Salad

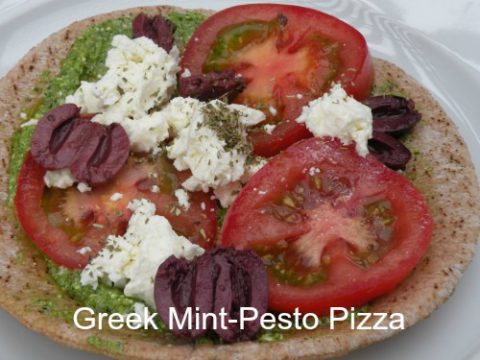
Fast and Easy Greek Pita Pizzas

Greek Pizzas


Happy Baking,

Mary 


{ 0 comments }

My Greek Lentil and Mint Salad

by Mary Papoulias-Platis

Post image for My Greek Lentil and Mint Salad

This salad is a refreshing change from your traditional Greek salad. Although, we eat many lentils in our cuisine they are normally served in soups, stews, and appetizers. I wanted to expand my salads to the Vegan cuisine for those in Lent or for those who follow a Vegan Diet. Lentils are naturally gluten-free as well and can help those who are seeking GF products for their diet. You may want to add lettuce, arugula, or a vegan feta cheese.

If your not familiar with lentils they are a powerful nutrient-dense food. This salad is a complete meal and will not leave you hungry! Once left in the refrigerator overnight, it marinates further for a wonderful left-over snack.

  • They have high level of fiber for your digestive tract.
  • Very rich in folate, iron, and manganese.
  • 1/2 cup of lentils = 12 grams of protein.
  • 1/2 cup of red lentils = 273 mg. of potassium.

How to Cook Lentils

Join me as I create my new Ethos Fresh Vegan culinary program.

I will be posting my recipes here, but you can find me on my Instagram Ethos Fresh. Under my culinary school, Ethos Culinary.


My Greek Lentil and Mint Salad

This salad is a complete meal with two varieties of lentils, vegetarian and vegan.

Course Main Course, Salad
Cuisine California Greek
Keyword lentils
Servings 2 servings

Ingredients

Salad

  • 1 cup green lentils, rinsed
  • 1 cup red lentils, rinsed
  • 6 cups water, divided
  • 1 fresh tomatoes, cubed
  • 1/2 cucumber, cubed
  • 1/2 cup kalamata olives, pitted
  • 4 green onions, sliced thinly
  • 2 teaspoons fresh mint, finely chopped

Dressing

  • 1/2 shallot, finely chopped
  • 1 clove garlic, minced
  • 2 tablespoons red wine vinegar
  • 1 tablespoon dijon mustard
  • 6 tablespoons extra virgin olive oil
  • 1 teaspoon honey
  • salt and pepper to taste

Instructions

Salad

  1. In a medium pot ( lentils expand so have a deep pan) add 3 cups of water and add the green lentils. Bring to a boil and cook for 15 minutes until softened. Drain and cool. Do not add salt to the water.

  2. Repeat the same method with the red lentils. They may need less time.

  3. Add your vegetables in a large bowl or on a serving platter. Add the dressing.

Dressing

  1. Add the shallot and garlic in a small bowl or jar. Add the vinegar and whisk together.

  2. Add the other ingredients and mix well.

  3. Toss the salad and add the dressing to coat well.

You may be interested in more of my lentil recipes:

Mom’s Lentil Vegetable Soup

Red Lentil Salad with Red Peppers, Oranges and Basil

Red Lentil with Turnip and Parsley

Make it a Lentil Night…

Mary 


{ 0 comments }

Quince Sauce with Spices

by Mary Papoulias-Platis

Post image for Quince Sauce with Spices

Quince is a fruit I grew up with in our Greek family. I had never seen a quince tree until we visited Greece in the Fall. I wanted to grab a box and fill it to to the brim with these hard unknown green fruits. But of course I couldn’t bring them home but I still dream of that old large tree I stood under in a small local village. Quince is an ancient Greek fruit rooted in Greek history for over 4,ooo years ago. Brides were presented with quince on their wedding day for a symbol of fertility.

Quince is a fruit with a bright green-yellow skin. It has been noted that it is an ancient fruit from 4,ooo B.C., and not commonly used here in the U.S. Similar to the properties of apples and pears in primitive form. They can be found today at your specialty markets or can be purchased from Melissa’s Produce Website.

A little about quinces:

  • Quince has a high level of pectin, often made into jams and spreads.
  • The unique sweet-sour taste is what makes quince so perfect for desserts, main  dishes, and sauces.
  • The flesh will change from white to a bright orange color.
  • This fruit is too bitter and hard to be eaten raw, so it must be cooked. Trust me.
  • Loaded with Vitamin C and Potassium.

Here you can see how the quince is beginning to change color. It deepens even more as it thickens.

NOTE: You may preserve the sauce in jars with a hot water bath, or refrigerate it for a cheese board, toast or a dipping sauce.


Spiced Quince

Quince is a fall fruit often used in a sauce or preserved and serve with cheese as an appetizer.

Course Dessert
Cuisine California Greek
Keyword appetizer, dessert, preserved, quince, Sauce
Servings 4 pints
Author Mary Papoulias-Platis

Ingredients

  • 10 quinces (5 lbs.)
  • 3 pounds sugar
  • 10 whole cloves
  • 4 sticks cinnamon (3- inch)
  • 2 lemons peel only, cut thin, finely chopped

Instructions

  1. Wash quinces, core, peel and slice thin. Cook covered, in a non-reactive pan with water to cover half way.

  2. Cook until fruit is almost tender, for about 10 minutes. Drain syrup in a bowl and save the fruit to another bowl. .

  3. Measure 2 cups of the syrup, combine the sugar, spices, and lemon peel. Boil gently, covered for 5 minutes. Add the partly cooked quinces and continue cooking slowly until fruit is soft, 10-15 minutes.

  4. Spoon into hot sterile jars, pour syrup to fill. Seal in a water bath. Makes 4 pints.

You may also enjoy:

Quince Paste with Vanilla 

Plant a quince tree!

Mary

{ 0 comments }

Quince Paste with Vanilla “Kythoni”

by Mary Papoulias-Platis

Post image for Quince Paste with Vanilla “Kythoni”

Quince is a favorite sweet in our Greek family. I remember my mother and aunt purchasing a full box of fresh quinces to make their spoon sweet called “Kythoni”.  After a long afternoon of prepping and stirring this fruit thickens into a jam-like consistency, needing to be cooled before sampling. Many times it was canned for future use, other times it was placed in a large jar and stored in the refrigerator. I can still picture myself as a little girl sneaking a large spoonful of this decadent preserve from her jar. A little note: Quince is an ancient Greek fruit rooted in Greek history for over 4,ooo years ago. Brides were presented with quince on their wedding day for a symbol of fertility.

This fruit cannot be eaten fresh. It needs to be cooked before eating. It’s similar to an apple and pear with the unusual scent of a pineapple and guava. Here, pictured is the pineapple quince, which is commonly seen in stores. They can also be ordered from Melissa’s Produce website.

A little about quince:

  • Quince has a high level of pectin, often made into jams and spreads.
  • The unique sweet-sour taste is what makes quince so perfect for desserts, main  dishes, and sauces.
  • The flesh of the quince as it cooks will change from white to a bright orange color.
  • This fruit is too bitter and hard to be eaten raw, so it must be cooked. Trust me.
  • Loaded with Vitamin C and Potassium.

Quince can be added to many of you home cooked dishes.

  • Make a tart with apples and quartered cooked quince.
  • Add to lamb or chicken stew, giving the quince time to cook.
  • Poach quince for a side served with cake, ice cream or simply alone with added syrup.
  • Serve on a cheese board with your favorite cheeses.

Here in this recipe, we will be making a cooked puree, baked and thickened into a paste and cut into logs often served with cheese.

Let’s get started!


Once cooked and pureed in the food processor, you’re ready to form the paste and bake.

As you can see here, it it slowly changing color, but soon turning a beautiful pink .

Check out this COLOR!

Here, the paste is ready for the oven. I tested the paste several times for doneness, when it doesn’t bounce back it’s ready.


Quince Paste with Spices "Kythoni"

Try quince for a new twist to a forgotten fruit and it's delicious flavors. Add the paste to your cheeseboard, stewed meats, or as a simple dessert.

Course Appetizer, Dessert, Jam, sauce
Cuisine California Greek
Keyword quince
Author Mary Papoulias-Platis

Ingredients

  • 2 lbs. quince, about 4, peeled, cored, and chopped- 3/4" thick
  • 1/2 vanilla bean, split, seeds scraped out
  • 2 strips lemon zest - each 1/2 by 2 inches
  • 2 cups granulated sugar, more or less if needed
  • 2 tbsp. fresh lemon juice
  • 1 tbsp. unsalted butter, softened

Instructions

  1. Place the quince, vanilla bean pod and seeds, and lemon zest in a 4 quart saucepan and cover with water. Bring to a boil over medium high heat. Reduce to a simmer, cover and cook until the quince are tender when poked with a knife, about 40 minutes.

  2. Drain the quince in a colander and discard the vanilla bean. Puree the fruit and lemon zest in a food processor. Measure the puree by volume, return to the saucepan, and add an equal amount of sugar. (If you have 2 cups puree, add 2 cups sugar.)

  3. Cook over medium-low heat, stirring with a wooden spoon until the sugar has dissolved, 1 to 2 minutes. Add the lemon juice and return the heat to low. Continue to cook, stirring occasionally, until the puree becomes a very thick paste, about 1-2 hours.

  4. Meanwhile, position the rack in the center of your oven and heat to 125 degrees F. If your oven doesn't go this low, use the lowest temperature, and expect a shorter cooking time. Line a 8x8 glass or ceramic pan with parchment paper, grease with the butter.

  5. Pour the quince paste (do not scrape the pot) into the dish, and smooth top with the wooden spoon. Bake until slightly dried and firm enough to slice, about 1 hour.

  6. Remove from the oven and let cool to room temperature. Invert onto a cutting board and cut quince into four 2-inch wide strips. Wrap each strip in plastic wrap and refrigerate. The quince paste will last up to one month.

A cheeseboard is the perfect way to present your quince past. Pair it up with your favorite foods. Here, I chose a goat cheese, and a hard Spanish cheese.

As a simple quick bite, cut into any shape, and roll in sugar and serve.

This recipe was adapted from Fine Cooking by Julissa Roberts.

Happy Fall Everyone,

Mary

{ 0 comments }

Honeycrisp Apple Pumpkin Bread

by Mary Papoulias-Platis

Post image for Honeycrisp Apple Pumpkin Bread

I wanted to make my first fall recipe using both pumpkin and apples, since they both are in season. I have several recipes for Fall desserts and salads on my blog, but just the aroma of these baking in my home, will excite me. My favorite type of day is planning new recipes alone in my kitchen where my creativity is taken to a different level. This recipe worked and my family quickly devoured it. This bread is perfect to enjoy in the morning with coffee, or with simple a cup of afternoon tea.

Loaf pan breads are generally a simple cake with the addition of nuts, fruit, and spices. More of a breakfast bread. Recently, I received these beautiful Honeycrisp Apples from Melissa’s Produce from their October Season’s Best List.  Apples and Pumpkins are both Fall companions, so why not place them together in any recipe. And it not only worked today, but it was just how I imagined it would taste. Warm and yummy!

I used Honeycrisp Apples in my recipe, but select whatever apple you may have on hand.  Remember to taste your apple beforehand to see if that is the flavor you want to add. And this recipe calls for one can of pureed pumpkin. If you would like to make your pumpkin puree, please visit my blog post on How to Roast a Pumpkin.

I suggest you measure all your ingredients ahead of time, to ensure you have everything included. They call this “Mise En Place” in the culinary world, everything in it’s place.

Mix all your wet ingredients until smooth. And slowly add the dry.

This is ready for the oven, and you can see I chopped the apples in 1/2 inch cubes.


Honeycrisp Apple Pumpkin Bread

This is a moist pumpkin bread with a smooth spice flavor, and a punch of apple chunks. This recipe makes two loaf pans one to eat and one to share.

Course Dessert
Cuisine American
Keyword apple, bread, pumpkin
Servings 6 servings
Author Mary Papoulias-Platis

Ingredients

  • 1 cup extra virgin olive oil
  • 2 2/3 cups sugar
  • 4 large eggs
  • 1 15-oz. can of pumpkin puree
  • 2/3 cup water
  • 1 teaspoon vanilla extract
  • 3 1/3 cups all purpose flour
  • 1/2 teaspoon baking powder
  • 1 teaspoon baking soda
  • 1 1/2 teaspoons salt
  • 1/2 teaspoon cinnamon
  • 1/2 teaspoon nutmeg
  • 2 apples peeled and roughly chopped ( I used honeycrisp)
  • 1 cup chopped pecans

Instructions

  1. Preheat oven to 350 degrees. Lightly grease two loaf pans. (9x5 size pan)

  2. In a large mixer, beat together the oil, sugar, eggs, pumpkin, water, and vanilla until well blended.

    ( You can use a hand mixer or just use a large spoon.)

  3. Sift the following in a large bowl, the flour, baking powder, baking soda, salt, cinnamon, nutmeg. Add to the wet ingredients and beat slowly until blended.

  4. Using a large wooden spoon carefully add in the chopped apples and pecans.

  5. Evenly, spoon the batter into the pans.

  6. Bake the breads for 60-80 minutes, or until a toothpick when inserted comes out clean. My loaves took around 80 minutes.

  7. Once the breads are ready, cool the breads on a wire rack. Remove from the pan, and serve, or wrap in plastic and freeze.

Recipe Notes

You can substitute the apples for pears, berries, or fruit of your choice. Nuts are optional in this recipe. But if you do add them, select your favorite for the recipe.

You may enjoy the many other pumpkin dishes on my blog, under my category “Pumpkins”.

Enjoy your Fall baking…

Mary


{ 0 comments }

Rhubard Onion Relish

by Mary Papoulias-Platis

Post image for Rhubard Onion Relish

What? A rhubarb relish! I love BBQ baby back ribs, and I thought this relish would be a great addition to the meal! So, I bought the ribs for dinner and asked the family to try this relish, and they all loved the sweet-tart taste. The addition of raisins did the trick. This relish can be used many different ways, which I listed below. Pair it with cheese, pasta, pork, chicken, or any grain salad. Rhubarb can be found locally now in many supermarkets today. But, the season is short, so don’t wait to buy when you see! You may also be interested in my Rhubarb Tart made with Phyllo on my blog.

How to Use the Relish:

  • Add the relish in a bowl and add to your cheese board.
  • Place on a party table as a condiment for your appetizers.
  • Slather on hot dogs or perfect for your bratwurst.
  • Spice up salads, grain dishes or bowls.
  • Spruce up your gourmet sandwiches.
  • Perk up pork your tenderloin as a topping.
  • Kick up vegetarian meals
  • Dress up your dips by adding them as a finished touch.


The supermarket and farmer’s market will sell you these long stalks, once home they need to be washed and trimmed.

Another option is ordering from Melissa’s Produce in this handy precut package.

Always try and start with everything measured out, which makes your cooking time easier and more enjoyable. Called Mise en Place, a cooking term for everything in place.

Sliced as you would slice celery.

Cook until softened and as a thick sauce.

Check to see if it has thickened, this needs more time.

Enjoy this recipe,

Mary 

Rhubarb Onion Relish

If you love BBQ, add this relish to your table for a new sauce!

Course sauce
Cuisine California Greek
Keyword BBQ, relish,, rhubarb, Sauce
Author Mary Papoulias-Platis

Ingredients

  • 1 cup brown sugar
  • 1 cup apple cider vinegar
  • 1 cup water
  • 1/2 teaspoon whole allspice
  • 1/2 teaspoon whole cloves
  • 1 4-inch cinnamon stick, broken in half
  • 1/2 teaspoon mustard seeds
  • 1/4 teaspoon celery seeds
  • 1 cup chopped onion
  • 1 1/2 cups sliced fresh rhubarb or thawed frozen rhubarb.
  • 1 cup seedless golden raisins

Instructions

  1. In a non-reactive pan, combine the sugar, vinegar, water, seeds and spices. Bring to a boil for 2 minutes.

  2. Add the chopped onions and rhubarb, cover and simmer for 30 minutes, or longer if needed. Stir with a wooden spoon frequently to prevent sticking.

  3. Add the golden raisins to the rhubarb mixture, and cook for 10 minutes uncovered until mixture has thickened.

  4. Remove from the heat and let cool. Serve cold. Or seal while hot in sterilized glasses. Makes about 2 pints.

Recipe Notes

If using frozen rhubarb thaw and drain well before adding to mixture.

{ 0 comments }

Rhubarb Phyllo Tart

by Mary Papoulias-Platis

Post image for Rhubarb Phyllo Tart

I’m a big tart fan when it comes to making a dessert for company or for my family. When I served this Rhubarb Tart at a recent gathering, they were amazed at it’s beautiful presentation. It’s a stunner! Some recognized the rhubarb right away, and stories began of grandmother’s pies, growing up on a farm with rhubarb and family recipes being shared. After making this recipe, I will never pass up rhubarb again. My mind is spinning with ideas.

This was my first time using rhubarb, so I was a bit nervous. But to me, it felt similar to celery. I was sent several stalks from Melissa’s Produce. I browsed many articles and cookbooks and I landed on the idea of a phyllo tart. I always have phyllo defrosted in my refrigerator, for recipes such as this one. Fillo factory has sponsored my cooking and blog for years. I consider their phyllo fool-proof. It’s always sized and cut to use directly onto your sheet pans with ease. You can find their phyllo online or at your local supermarket.

I always like to mention the health benefits of the produce that I cook with in my recipes, and I’m constantly amazed at the amount of nutrients available in a stalk-like vegetable such as this one.

  • Rhubarb is a good source of Vitamin K1 which is important for blood clotting, bone health and possibly heart health.
  • The stalks are high in fiber, similar to oranges and celery.
    Rhubarb is also a rich source of antioxidants. One study suggests that its total polyphenol content may be even higher than kale.

The stalks are quite thick, just trim the edges and cut stalks or in half. Cut into 1/8-inch slices.

Here, Melissa’s has trimmed the stalks. All you do is wash and cut.

I used an 9×13 sheet pan for my tart. I first cut my large sheets in half to fit the smaller pan. As I layered the phyllo sheets into the pan, I buttered each one.

You may need to use more phyllo sheets according to the thickness of your sheets. Recipe below.

Place in a quarter sheet pan overlapping slightly.

Bake and set aside to cool on a rack.

Brush the reduced syrup onto the top of the tart. Sprinkle with lime zest.

Rhubarb Phyllo Tart

You cannot pass up Rhubarb season! This tart is a crowd-pleaser and easy to assemble.

Course Dessert
Cuisine California Greek
Keyword fillo, phyllo, rhubarb, tart
Author Mary Papoulias-Platis

Ingredients

  • 1 cup fresh orange juice
  • 1 tablespoon fresh lime juice
  • 1/2 cup sugar
  • 3-5 stalks rhubarb , thinly sliced -1/8 inch
  • 1/2 teaspoon grated lime zest
  • 6 full sheets defrosted phyllo sheets ,cut in half.
  • 1/2 cup melted unsalted butter
  • 1 cup heavy cream, whipped for topping

Instructions

  1. Preheat oven to 375 degrees with rack in the middle.

  2. In a flat glass pan, stir together the orange juice, lime juice and sugar. Add the sliced stalks for 10 minutes. Set aside.

  3. Using a quarter ( 9x13) sheet pan, brush the bottom of the pan with melted butter. Cut full sheets in half if needed. That will give you 12 layers for the tart. Layer phyllo dough onto the pan, buttering each layer until all the layers are used. Butter the top layer.

  4. Strain and pat dry the stalks, keeping the juice for the glaze.

  5. Layer the stalks, overlapping slightly.

  6. Place the tart in the oven and bake until bottom is golden, for 30 minutes, cover with foil if phyllo edges has browned. Continue baking. Test the rhubarb for doneness with a toothpick. Remove and place on a rack to cool.

  7. In a small saucepan, add the reserved juice and simmer until reduced to 1/4 cup. Once thickened, similar to maple syrup, remove and cool slightly.

  8. Brush syrup over tart and phyllo, sprinkle with zest. Serve with whipped cream.

I encourage you to visit your farmer’s market or supermarket and bring home rhubarb!

Best in Health,

Mary  


{ 0 comments }

Vegan Fall Pear Slump

by Mary Papoulias-Platis

Post image for Vegan Fall Pear Slump

What the heck is a pear slump?

It’s a one pot dessert, that can be used with just about any fruit. I chose California Pears. I received a shipment of three varieties of pears from the California Pear Advisory Group. The pears were beautifully wrapped with three varieties grown in California. From Bosc pears, (the brown ones), to the Bartlett (the yellow-green pears) to the vibrant Red pears!

When I bake a crisp, pie or slump feel free to mix your pears. And I do leave the peel on my pears with these recipes. Once you decide on your fruit choice for this recipe, may it be blueberries, apples or pears, a biscuit-like topping is added and cooked, all in one pot! It can be served for breakfast as well as a dessert!

Pears have many wonderful health benefits and should be added to your daily diet. Here’s why.

  • Low in calories
  • Contain no fat, cholesterol or sodium
  • A delicious source of energy (carbohydrates)
  • High in fiber
  • A good source of vitamin C
  • Contain natural antioxidants

Vegan Fall Pear Slump

This one pot pear dessert includes a biscuit topping that can be used with any seasonal fruit. One recipe that can be used year around. And it's vegan.

Course Dessert
Cuisine California Greek
Keyword dessert, pear, slump, vegan
Author Mary Papoulias-Platis

Ingredients

Filling

  • 4 cups roughly chopped pears ( I kept the skin on) or any fruit
  • 1/3 cup maple syrup or organic cane sugar
  • 1/2 cup fresh orange juice
  • 1/2 cup water
  • 1/2 teaspoon cinnamon
  • 1/4 teaspoon nutmeg

The Slump Topping

  • 1/2 cup whole wheat pastry
  • 1/2 cup unbleached all-purpose flour
  • 1/4 cup maple syrup
  • 1 teaspoon baking powder
  • 1 teaspoon baking soda
  • 1/4 teaspoon sea salt
  • 1/2 cup almond, oat or soymilk
  • 1 1/2 tablespoons extra virgin olive oil
  • 3/4 teaspoons pure vanilla extract
  • 2 teaspoons finely grated orange zest
  • maple syrup and sugar for brushing the cooked biscuits

Instructions

  1. In a 8-9 inch medium saucepan with a lid, add the pears, maple syrup or sugar, orange juice, cinnamon, nutmeg, and water.

  2. Place over medium heat and bring to a full boil, stirring often. Lower the heat to simmer, cover for 4-5 minutes.

Slump Topping

  1. In a medium bowl, whisk the flour, sugar, baking powder, baking soda, and salt together.

  2. In a small bowl, combine the milk with the oil, vanilla and zest. Pour the wet mixture into the dry ingredients and stir with a wooden spoon, just until the batter is mixed thoroughly.

  3. Using a large spoon, about 2 tablespoons, carefully drop the batter onto the fruit mixture. Cover the saucepan and bring to a simmer.

  4. Cook over low heat for 25 minutes. The biscuits when ready should feel firm and slightly brown.

  5. Using a pastry brush, lightly coat the top of the biscuits with maple syrup.

  6. Cool for 15 minutes before serving. Serve non-dairy ice cream or vegan whipped cream.

Here are a few tips for starting your dessert.

This is a dessert you may want to have everything ready before cooking the fruit.

In culinary terns this is called “Mise En Place”. Everything in Place.

This type of organization makes the process so much smoother and enjoyable.

Here’s a before and after of the dough as it cooks.

This is how the dough should look when it’s ready. Firm and brown in color.

It puffs up and becomes a very light topping. Press down with your finger to feel the crust.

Don’t  pass up the maple glaze on top!

It’s Fall and this is the perfect easy dessert!

Enjoy, Mary 


{ 0 comments }

Papaya and Black Bean Salsa

by Mary Papoulias-Platis

Post image for Papaya and Black Bean Salsa

Papayas are so refreshing when you need a cooling appetizer for your next summer affair. I chose to use black beans and a lime accent to serve with these brightly colored papayas, that happen to be sent to me by Melissa’s Produce. Papayas are on their Season’s Best List for August, which is perfect for this dish. Take this Papaya Black Bean Salsa to any party or BBQ, it has a very light dressing which holds up well in the heat. By the way, did you know they have a delicious flavor and exceptional nutrient profile?

Here are a few facts:

  • Papaya seeds contain a variety of essential micronutrients.
  • They’re especially high in polyphenols and flavonoids, two compounds that act as antioxidants to help promote your health.
  • Antioxidants fight disease-causing free radicals to prevent oxidative stress and ward off chronic diseases.
  • Papaya seeds pack a good amount of healthy monounsaturated fatty acids, including oleic acid
  • Lastly, papaya seeds supply a hearty dose of fiber.


These fruit has large seeds that need to be removed before chopping them cubes.
But don’t throw them away they are edible!

How to use papaya seeds
  1. Scoop seeds from papaya. Rinse seeds under cold running water, then dry well with a tea towel.
  2. Line a baking tray with baking paper. Place seeds on the prepared tray.
  3. Bake in the oven for an hour until dry.
  4. Transfer to a mortar and use a pestle to coarsely crush the seeds.
  5. Crush them in a plastic bag, and use them as peppercorns in a dressing or toppings.


Cut the papaya with skin into wedges. Then carefully with a sharp knife remove the flesh.
Cut into small cubes and add to a bowl. Discard skins.

Papaya and Black Bean Salsa

Take this refreshing and delightful salsa anywhere this summer! You won't be disappointed, I promise.

Course Appetizer
Cuisine California Greek
Keyword black beans, papaya
Author Mary Papoulias-Platis

Ingredients

  • 6 1/2 ozs. cooked black beans
  • 1 papaya, cut into small dice
  • 5 1/4 oz. small diced red pepper
  • 3 1/4 oz. small-diced red onion
  • 2 jalapenos, seeded and minced
  • 3 tablespoons chopped cilantro
  • 2 teaspoons dried oregano
  • 2 tablespoons minced ginger
  • 1/4 cup olive oil
  • 1/4 cup lime juice and zest for topping
  • 1 teaspoons ground black pepper
  • 2 teaspoons salt

Instructions

  1. Combine all the ingredients and adjust seasoning. Serve immediately or cover and refrigerate until needed.

  2. Serve with chips, sliced bread, or crackers.


Add all your ingredients and enjoy this incredibly nutritious and delightful salsa.

Best of Health!

Mary


{ 0 comments }