Greek Coffee Affogato with Riki

by Mary Papoulias-Platis

Post image for Greek Coffee Affogato with Riki

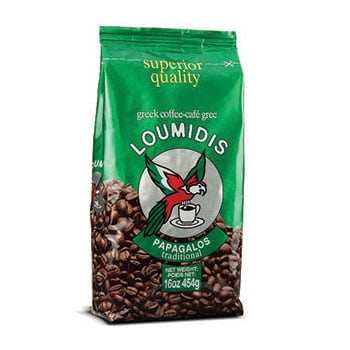
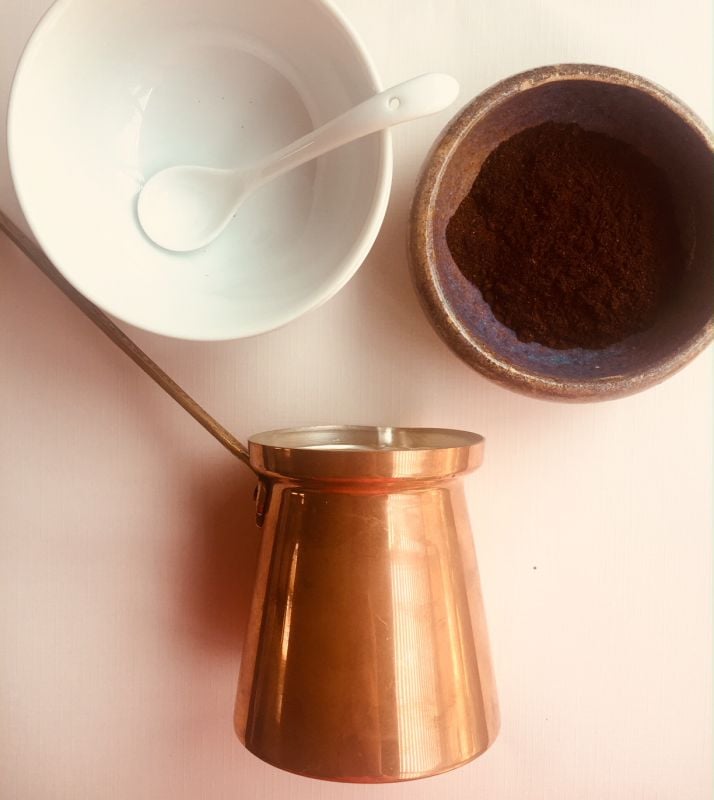
I make one good cup of Greek coffee. When it comes to Greek coffee there is no need for any fancy machines, at least not in a Greek home. All you need is our version of a coffee pot called a “briki”. One thing you may not know about me is that I worked at a popular kitchen store for years. After many years of working there, the one question most often asked was, “What is the best way to make a cup of coffee?” At home, I use a French press for my American coffee. Watching my mother make coffee every morning the Greek way, I can now understand why it’s so important to use the right vessel. Only three ingredients are needed water, sugar, and Greek coffee. Greek coffee can be found in Middle Eastern or Greek markets. Online it’s available through many different brands, here is one example on Amazon.

One Greek coffee company

How To Make Greek Coffee

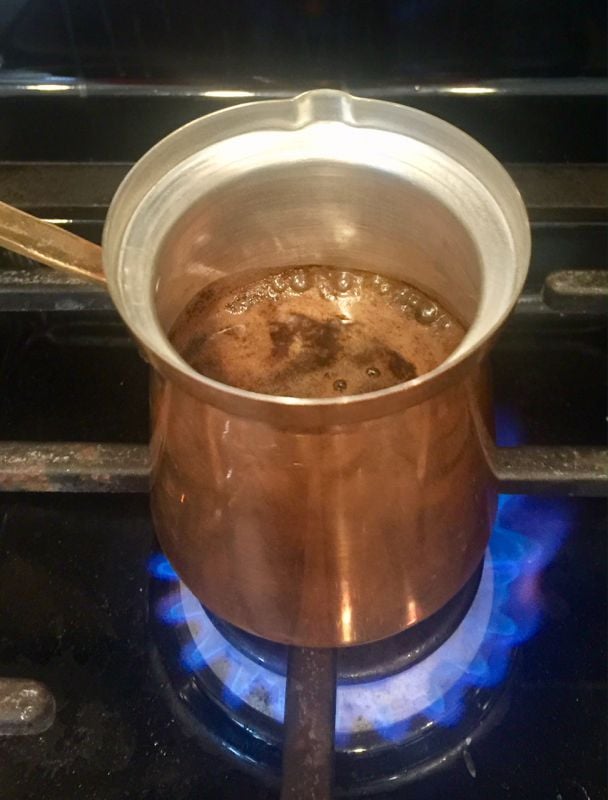
Greek Coffee is made by heating up water and adding the coffee grounds directly into a Greek coffeepot called a briki.  You will see these pots in every Greek kitchen. They are made of bronze and usually will serve 4. This coffee is very strong and served to your guests in the afternoon with a pastry or after dinner with water. This drink is sipped slowly. Afterwards the coffee grounds are read if someone in the room has the talent to do so. The briki can be found at most Greek or Middle Eastern stores. You can change the amount of sugar to your liking or per your guests request.

Greek coffee and pot

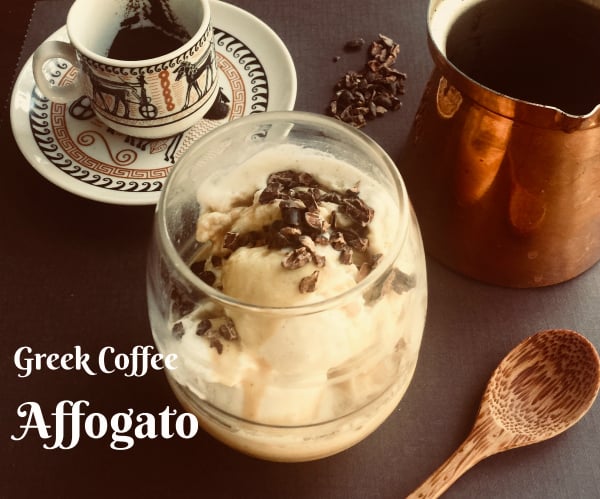
For the holidays, I wanted my coffee to have more of a punch, so I decided to take the famous affogato from the Italians and make it Greek-Style. Affogato just means a shot of espresso over vanilla gelato or ice cream. Simply that.

There are some rules to flavoring a hot drink:

  1. When flavoring a hot drink pour the flavoring in first, the add the brewed coffee.
  2. No stirring is required since the the syrup will dissolve.
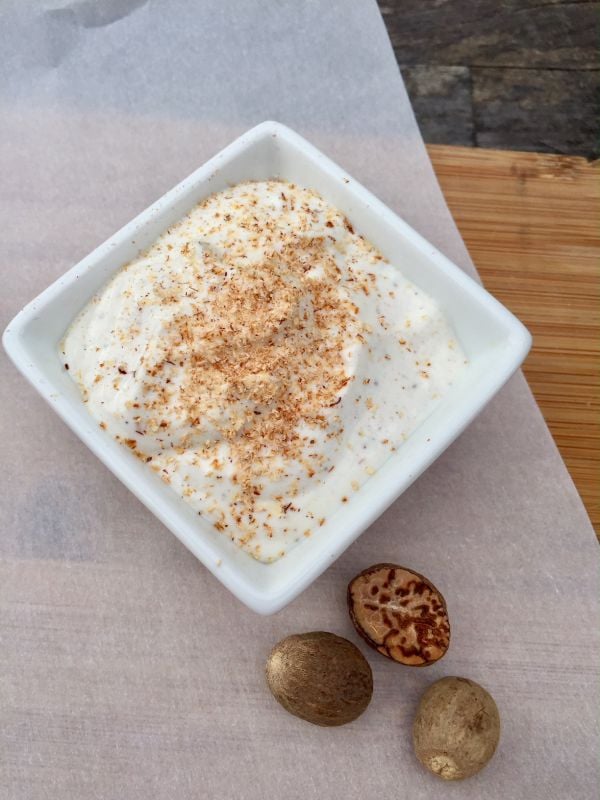
  3. Drinks can be flavored with spices. such as nutmeg, cinnamon, clove allspice and cardamon.
  4. It’s not recommended to brew the spices with the coffee.
  5. Look for the froth and remove quickly from the stove top. Repeat two more times.

Greek coffee pot

Growing up in the Greek community, it’s a form of hospitality to offer coffee to your guests served with a cookie or biscuit.

Greek Coffee Affogato with Riki

This special coffee is a twist on the Italian dessert, in which you pour espresso on ice cream or gelato. I switched it up a little with a shot of Greek coffee made in a briki!

Course Dessert
Cuisine California Greek
Servings 4 people
Author Mary Papoulias-Platis

Ingredients

  • 4 heaping teaspoons Greek coffee
  • 1-4 teaspoons sugar (will vary on the strength you want)
  • 4 demi-cups cold water
  • 1/4 teaspoon nutmeg or cinnamon - optional
  • 1/4-1/2 cup liquor of your choice -optional
  • 1/4 cup cocoa nibbs or shaved chocolate
  • 1/2 gallon Vanilla Ice Cream or Gelato

Instructions

  1. In a tall and narrow sauce pan or briki, add the water and sugar and bring to a boil. Add the coffee and bring to a boil until the froth rises to the rim. Remove from the heat. Repeat two more times.

  2. While coffee is heating up bring out your cups and add 2-3 scoops of ice cream to each cup. Place into the refrigerator until ready to serve.

  3. Remove from the heat and add the spices and/or liquor. First pour the froth over the ice cream and divide the coffee among the four cups.

  4. Serve in coffee cups or dessert cups. Sprinkle with cocoa nibs or shaved chocolate.

Recipe Notes

When using a liquor or flavored coffees, check the label for ingredients. Spices may be included. You may want to skip the spices. 

Rikki Brandy

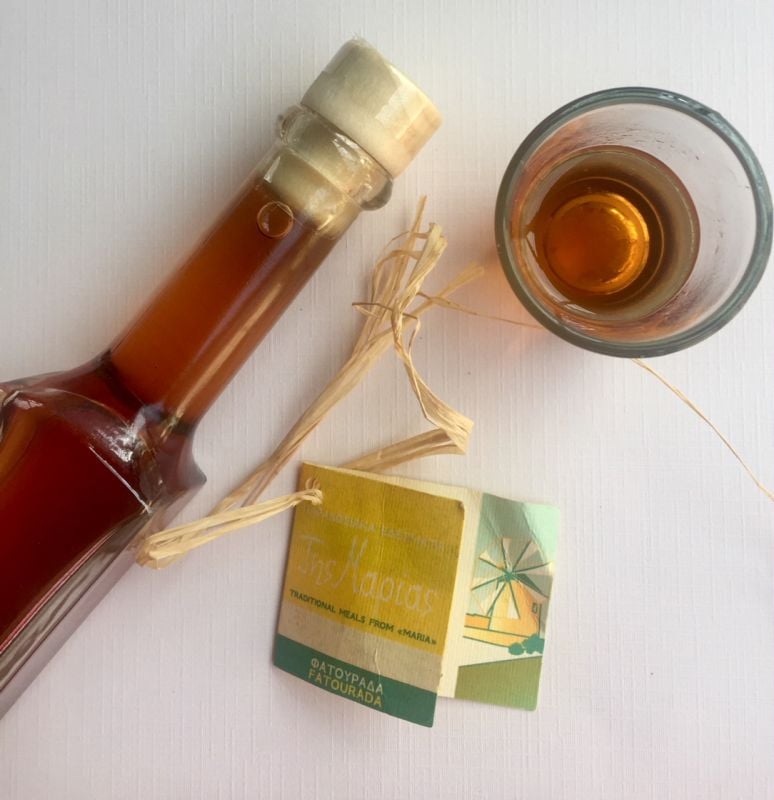
This is a traditional alcoholic sweet drink of Kythira, extract made from raki, cinnamon and clover. I picked up this liquor in this sweet shop called Maria’s on the island of Kythera. Any liquor of your choice will work. This was one of my favorite stops on the island of Kythira. This incredible bakery had everything I ever had wished for in a pastry shop. Here is where I bought jams, jellies, home baked cookies and local honey. In fact, I found my husband Mike in the back of the bakery enjoying melomakarona with Maria’s yiayia.

Our Kythera Bakery in Greece - Maria's

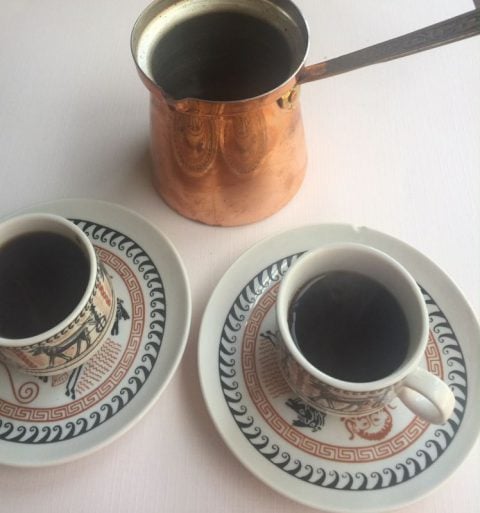
Greek coffee is served in very small portions, basically for a quick “pick me up”. These are demitasse cups I received as a wedding present from Greece from my aunt. They hold enough for two or three small sips. That’s all you need! When ordering coffee in Greece or here in the states, you can request it by the following names. By the way, milk and cream is never served with Greek coffee.

  • With foam it’s called “kaimaik”.
  • Straight and bitter, called “Pikro”.
  • Without sugar, “Sketos”.
  • Medium with 1/2 teaspoon sugar, “Glyko”.
  • With heavy sugar, 2 teaspoons, “Variglyco”.

Cocoa Nibs

I topped my affogato with these delicious cocoa nibbs from Melissa’s Produce. You can also top your dessert with shaved chocolate, chopped nuts, or whipped cream.

Enjoy your Holidays!

{ 0 comments }

Post image for Spatchcocked Greek Lemon Chicken with Potatoes

I love a basic chicken recipe that I can cook up on a weeknight and make it a quick dinner. This is a variation of cooking an entire chicken in the oven which takes roughly 1-1/2 hours. I found the spatchcocked method so much easier, and it puts dinner on the table quickly.

This spatchcocked Greek chicken presentation is beautiful and it can be served to guests. All the chicken is browned evenly and you will be happy it’s done in one sheet pan. You can do this method with any bird, even a turkey.


This doesn’t even need a recipe but the ingredients list is:

One organic Chicken or Turkey – I buy Mary’s chicken or any Air-Chilled Bird.
Baking Potatoes
Olive Oil, Herbs, Oregano, Garlic Cloves and Lemons, Salt and Pepper
One Sheet Pan

Wash and clean your chicken and pat dry. (remove giblets and neck from inside)
Preheat your oven to 375 degrees.

Prepare as many potatoes as you wish. Cut in fourths and add lemon juice, salt and pepper, oregano, and garlic cloves. I also added thyme, parsley and basil from my garden. And you can see I added a few lemons. Be generous and add olive oil to the potatoes and mix with your hands to cover all the potatoes.

Using a sharp knife or kitchen shears, first cut the backbone off the back side running your knife down both sides.

Next, turn the chicken over, and cut down the center of the breastbone, splitting the bone. Not all the way through the chicken. With your hands flip over and flatten the chicken.

Rub extra virgin olive oil on the entire bird. Season with salt, pepper and dried oregano. Add the juice of 1-2 lemons to the bird.

Add the bird skin side up to the potatoes. Top with fresh herbs, garlic cloves and lemons and lemon juice. Lots of it!


Bake in the oven for 45-55 minutes or until it reaches 160 degrees. (always use a thermometer) Remove and cover and let sit for 15-20 minutes to rest. This allows the juices to return to the bird.


Enjoy one of my favorite Greek meals!

Mary


{ 0 comments }

Kima Greek Meat Sauce with Pasta

by Mary Papoulias-Platis

Post image for Kima Greek Meat Sauce with Pasta

When we were kids this meal was our most requested dish for dinner, a simple meat sauce called “Kima”. We begged our mother to make this dish for us weekly. I’m sure she didn’t mind, it was quick and easy with simple pantry ingredients.

It’s similar to the meat texture of a sloppy Joe sandwich, (which we never got) but served with our favorite pasta. She mostly used ground beef, but would surprise us occasionally with a lamb version of Kima.  I had never had the Italian meat sauce version, that was so popular until much later in life when I could go out for Italian food with my girlfriends.

( My mother Voula with the three of us in our backyard in La Mesa.)

As we walked home from school and were approaching the house, if she was cooking kima we could smell the onions, with cinnamon cooking and would run home hoping it was this meat sauce with pasta!

(I’m in the middle with my two brothers Tom and Toss. How I survived those two, only God knows.)

The smells from my mother’s kitchen growing up, was a fine memory and the one reason I made sure my kid’s experienced the same memories coming from my kitchen. And it was the easiest dish my mother and I could have ever made in minutes and enjoyed by our families.

Greek cooking can be simple and delicious, with just a few ingredients and this recipe is one of many.  I bet you would not see this on the menu of a Greek restaurant.  But ask any Greek child and I bet you get the same response, it’s hard to beat.

Kima Greek Meat Sauce with Pasta

You can't go wrong with this simple meat sauce for your weekly meals. Once you make this you can find many uses for it.

Servings 4 people
Author Mary Papoulias-Platis

Ingredients

  • 1/2 cup minced onion
  • 2 teaspoons minced garlic
  • 3 tablespoons butter
  • 1 pound organic beef or lamb
  • 1 teaspoon salt
  • 1/2 teaspoon pepper
  • 1 cup tomato sauce
  • 1/2 cup water
  • 1/2 teaspoon cinnamon
  • pinch of ground cloves
  • 1/2 cup red wine
  • 1 pound cooked pasta
  • grated cheese such as Parmesan or Greek cheese

Instructions

  1. In a large skillet add the butter and place on medium heat. Add the onions and garlic and saute until softened.

  2. Add the ground meat into the mixture and brown thoroughly. Season with salt and pepper.

  3. Add the tomato sauce and water and bring the mixture to a low boil. Add the cinnamon and cloves and simmer for 45 minutes, stirring often.

  4. Add the wine and simmer for another 15 minutes.

  5. Serve over pasta of your choice.

Can’t say anything more but to just enjoy the simplicity of this recipe. Serve it with your favorite pasta and salad.

Kema is Greek meat sauce.

Try and use fresh grass fed beef, here I used Sun and Fed Grass Fed Organic Beef for this recipe. I find it in the frozen section of grocery stores.

Kali Orexi,

Mary


{ 0 comments }

Fresh Pumpkin Patties with Nutmeg Sauce

by Mary Papoulias-Platis

Post image for Fresh Pumpkin Patties with Nutmeg Sauce

When I was in college and off to classes everyday I relied heavily on my mother’s recipes. I had a Greek church cookbook I would browse and find my dinner recipes from. My mother only cooked Greek food, so my collection included just that. Once, I was married I received two cookbooks all brides received and they were Betty Crocker and Good Housekeeping. And that’s how I learned to cook.

The church cookbooks were the best source of recipes for me as a student. As I traveled around to several yearly church bazaars and festivals, I collected many and my collection grew. This recipe comes from Georgia Swisher, a wonderful cook and friend of my mothers.

I’m obsessed with pumpkin everything! I love the process of taking my Halloween pumpkins and roasting them to a puree in a preparation for my Thanksgiving pies and breads. In this recipe I used a small sugar pumpkin.

Let’s begin… with gathering all your ingredients before beginning.

With a sharp knife cut pumpkin in half. Clean out seeds and strings.

Cut the pumpkin in wide 1-1/2 inch strips. Cut off ends to make squares. Grate pumpkin by hand, no worries it goes very fast.

Place everything in the bowl and stir gently. You are now ready to form the patties.

Shape into balls then flatten slightly to form a patty.


You can see the edges browning and that’s when you can flip them over.

Fry up until the insides are fully cooked. Test by taking one out to taste.

Make the sauce with yogurt or sour cream. I added nutmeg, but you can add cinnamon, ginger, cloves, or any flavors of fall.

Nothing replaces freshly ground nutmeg. Use a grater or a microplane and watch your fingers while grating into the sauce. Nutmeg is strong so a little goes a far way.

Fresh Pumpkin Patties with Nutmeg Sauce

What a great use of your pumpkins after Halloween. These patties are easy to make and can be added to your appetizer table for the holidays. Serve with a yogurt sauce or sour cream with a sprinkle of freshly grated nutmeg.

Course Appetizer
Cuisine Greek
Servings 4

Ingredients

Pumpkin Patty Ingredients

  • 2 cups freshly grated pumpkin (1/2 of a small pumpkin)
  • 1 onion finely chopped
  • 1 large egg, beaten
  • 1 cup flour
  • 1/4 cup extra virgin olive oil
  • 1/2 cup fresh mint, finely chopped
  • 1/2 cup fresh parsley, finely chopped
  • 2 teaspoons baking powder
  • salt and pepper to taste
  • additional extra virgin olive oil for frying

Yogurt Nutmeg Sauce

  • 1 cup Greek yogurt
  • 1/4 teaspoon freshly grated nutmeg

Instructions

Pumpkin Patties

  1. In a large bowl combine all the ingredients for the patties. Gently stir to combine. 

  2. With your hands, form a ball and flattened to form a patty and set aside. Continue until all the mixture is used. 

  3. In a skillet add the extra virgin olive oil and heat on medium high. 

  4. Add the patties and fry on both side until golden brown and cooked all the way through, around 6 minutes. You will know when to flip the patties when the edges have browned. 

  5. When cooked, place the patties on a plate covered with a paper towel to drain oil.

  6. Serve with the freshly grated nutmeg yogurt sauce or sour cream.

Yogurt Sauce

  1. Freshly grate the nutmeg into the bowl of Greek yogurt. Mix and serve with the pumpkin fritters. You can substituted sour cream for the yogurt.

Have a wonderful Thanksgiving,

Mary


{ 2 comments }

Refreshing Deepa’s Secrets Cookbook

by Mary Papoulias-Platis

Post image for Refreshing Deepa’s Secrets Cookbook

I received a copy of Deepa’s Secrets to review from Melissa’s Produce, and I must say right off the top, the presentation and stunning photos grab your creative juices instantly! The author Deepa Thomas, first generation from New Delhi, India did not hesitate when accepting a marriage proposal from her husband of 40+ years and leaving her native home to arrive in America, two years later into their relationship.   After cooking for her husband for many years and developing her passion for a healthier slow carb and healing foods, she developed the New Indian Cuisine. The cookbook is perfect for a beginning cook and as she mentioned that the book is “peppered with shortcuts, substitutions, additions with basic techniques”.

The book is filled with many wise quotes you are sure to love and remember such as “Fortunes favor the brave” and “Food is meant to be shared”, a few of my favorites. Not only is this a cookbook,  but it’s a lovely tribute to her family’s legacy. She also interweaves her family’s history through family photos and writings, that are not to be missed!

One chapter I cherished was the Kitchen Essential section which included listings of spices, sauces, pastes, and snacking recipes she developed over years in the kitchen and are the basics needed for her recipes. I felt she took the mystery of Indian food to a new easy level in this chapter for a Greek girl like me.

As you begin to explore the cookbook for new recipes ideas, Deepa has covered everything from Soups, Stews, Fish, Chicken, Meat and Savory Vegetables. I chose the beet salad to make, because it combines my favorite ingredients Greek yogurt, fennel and beets.

Roasted Beets and Shaved Fennel Salad

Deepa writes she ate tons of beets growing up. When roasted they tasted like candy! I never had to suffer from the canned beets, there were no canned foods in New Delhi.  I enjoyed this salad and will be making it on a regular basis. Don't skip the fresh fennel it adds a fresh clean anise flavor to the roasted beets and yogurt.

Course Salad
Cuisine Indian
Servings 4 people
Author Deepa Thomas

Ingredients

  • 4 small red beets
  • 6 small yellow beets
  • 1 teaspoon salt
  • 1/2 teaspoon black pepper
  • 1 cup Greek yogurt, whipped with a hand blender
  • 1 teaspoon wild orange honey
  • 1/2 teaspoon salt
  • 1/4 teaspoon ground pepper
  • 1/4 teaspoon fennel seeds, toasted and ground
  • 1/4 teaspoon cumin seeds, toasted and ground
  • 1 cup fennel, thinly sliced or shaved
  • 1 teaspoon lemon juice
  • 3 tablespoons extra virgin olive oil
  • 1/2 teaspoon chaat masala
  • 1 cup pistachios, lightly toasted rough chopped

Instructions

  1. Preheat the oven to 400 degrees. Wrap the beets (I like to wrap them individually but you can put them together) in foil and roast for 40-45 minutes until tender. Cool to room temperature. Peel and cut roasted beets into segments. Season with salt and pepper.

  2. While the beets are in the oven, combine the yogurt, honey, salt,and pepper together with a whisk. Check seasonings and set aside.

  3. Pool the whipped yogurt on a salad plate. Should extend to 1-inch from the edge of the plate). Sprinkle the yogurt with toasted and ground fennel and cumin.

  4. Slice the fennel as thinly as possible. Immediately, toss the slices with lemon juice to prevent them from turning brown.

  5. Arrange a generous pile of beet segments on the salad plate with the pool of yogurt. Top with fennel slices and fronds.

  6. Drizzle with olive oil, dust with chaat masala, and top with a shower of chopped pistachios.

Here are a few more recipes I would highly recommend to make at home:

Toot Sweet Snack
Mango Lassi
Chop Chop Lamb Chops
Fisherman’s Prawns
Avocado, Tomato and Plum Salad

My favorite Quote from the Book:

“Don’t look for approval. Approval comes on the day you are successful, and not one day before.

Bon Appetit!

Mary


{ 0 comments }

Zesty Olive Oil Lemon Curd

by Mary Papoulias-Platis

Post image for Zesty Olive Oil Lemon Curd

I recently was invited to attend the 2017 LDEI Annual Conference that was held at the Island Hotel in Newport Beach. It was hosted by the Los Angeles/Orange County chapter, and its theme was “California Dreaming: Experiencing California Cuisine from Farm to Table.” I wanted to showcase California Olive Oils, so I invited San Diego Dame Sue Robers from North County Olive Oil to join me.

Along with the book signing I always try and include a small bite from our cookbook or an olive oil recipe as a treat. I decided to make this unique and delicious olive oil lemon curd for the day and serve it with crackers or in a small cup. Boy, was I brave or what?  I knew most of the gals would not have had an olive oil curd before, and that it would make a great conversation piece with the ladies.

If you would like to learn to cook with olive oil, I wrote my cookbook Cooking Techniques with Olive Oil, to help you to use olive oil daily in your cooking. I teach you cooking techniques such as braising, marinating, poaching and many more tips that you can incorporate into your family meals, adding a more healthier approach.

BUY COOKBOOK HERE


If anyone could judge this recipe it would be these food experts, chefs, nutritionists, recipe developers and teachers who were among this group. It turns out they all loved it. But the bad news is I ran out of recipe cards so I’m posting the recipe so they have access to it. And you don’t need to be an expert to make and enjoy this new and delicious olive oil recipe.

Once you make the curd what can you use it for?

You can serve it with on a cracker or any bread product. Use the curd to top any slice of cake and serve with fresh berris on the side.  A casual but impressive presentation would be to a layer a butter cake with the curd in a rustic style without frosting. You can also add it to your cheese plate, or use it as a gift at your next dinner party.

When making any curd, in my experience there are a few good tips to follow.

  • Use the freshest of ingredients, and when serving a crowd buy pasteurized eggs for safe use with babies or seniors.
  • When cooking the curd use a wooden spool to stir the mixture. It also helps to determine when the curd is ready.
  • By dipping the spoon in the curd, run your finger across the back of the spoon with your finger, and if you see a clean line the curd is ready and immediately remove it from the heat. Or you can use a thermometer and bring it to 180 degrees.
  • Never bring the curd to a boil, it will cook the egg yolks.
  • Make the curd when you can be by the stove-never leave it alone.
  • Prepare the sterilized dish or jar before making the curd.
  • ALWAYS strain the curd using a fine mesh strainer, to leave any cooked egg behind. This makes your curd smooth to the tongue.

Once you make this curd, you can experiment with other juices such as blood orange, cranberry, grape and grapefruit.


Zesty Olive Oil Lemon Curd

Smooth and delicious this lemon curd takes the butter out and adds in the flavor of mild extra virgin olive oil. Use with crackers, biscuits, or in between your layer cake for a wonderful new twist!

Course Jam
Cuisine California Greek
Author Mary Papoulias-Platis

Ingredients

  • 3 ounces extra virgin olive oil
  • 3/4 cup sugar
  • 1/2 cup fresh lemon juice
  • 3 tablespoons finely grated lemon zest
  • pinch of salt
  • 6 egg yolks

Instructions

  1. Place olive oil in a heavy non-reactive saucepan over medium heat until oil becomes slightly hot.

  2. Remove from heat and whisk in sugar, lemon juice, zest and salt.

  3. Whisk in egg yolks slowly until completely incorporated.

  4. Place back on a medium-low heat and cook egg mixture. Continue stirring with a wooden spoon until thickened and coats the back of the spoon. Do not allow the mixture to boil.

  5. Strain curd into a bowl and cool to room temperature, stirring every 10 minutes.

  6. Refrigerate covered until ready to use. The curd can be transferred to sterilized jars or stored in any glass container.

Recipe Notes

Best when made one day ahead. Makes 1 1/2 cups.

Enjoy just on crackers, oh my!

Mary

This book makes a great gift for a friend or family member.

If you would like to learn more about olive oil, I have written a cookbook teaching you all about cooking, preserving and caring for your olive oil.

BUY YOUR COPY HERE


{ 0 comments }

Garlic Goodness with Olive Oil

by Mary Papoulias-Platis

Post image for Garlic Goodness with Olive Oil

Have you ever wanted your house to smell so good the neighbors would be asking, “What’s Cooking Mary?” Well, with the cooking of any onion, especially garlic this can be a very inviting experience. My house smelled for days…that’s a good thing in a Greek home. The only drawback is everyone must have some of your dish!

Most people put out an intoxicating candle, or spray a mist of canned aroma, but being Greek it’s all about the garlic, roasting in a stew, with a Sunday Leg of Lamb, or herb scented potatoes baking away, it’s all good.

I bet if they had a garlic perfume on the market, it would sell out because I would buy it by the case.

And don’t forget garlic has many health benefits, let alone it’s culinary uses.

  • Manganese, Vitamin B, Vitamin C, Selenium and Fiber. 

So, I set out to bake a batch of garlic bulbs, with what we call the poaching method with extra virgin olive oil. Poaching is defined as low and slow. There’s no need to fully cover the bulbs with extra virgin olive oil, just add enough to fill the pan half-way up the sides. Half-way through poaching just turn the bulbs.

Garlic Goodness with EVOO

There's nothing like the smell of garlic poaching in extra virgin olive oil. Use it on toast, in stews and soups and in your dips and spreads.

Course Side Dish
Cuisine California Greek
Author Mary Papoulias-Platis

Ingredients

  • 9 or more garlic bulbs
  • 8 whole black peppercorns
  • 4 sprigs Greek basil or rosemary, thyme
  • peel of one fresh lemon
  • 2-4 cups extra virgin olive oil

Instructions

  1. Preheat the oven to 350 degrees.


  2. In an oven-proof pan place the garlic bulbs root side up. Add the peppercorns, herbs of your choice, lemon peel and olive oil. 


  3. If you choose to use the olive oil afterwards, I would cover the bulbs completely with olive oil. To use less olive oil fill half way up the pan. It is not necessary to cover the bulbs, turn them half way during the cooking time.

  4. Place in oven uncovered and poach for 15-20 minutes. According to your oven's temperature, adjust the temperature if oil is bubbling. Lower to a simmer. Don't leave unattended.

  5. Test a bulb, by inserting a knife in the center to check for doneness. The clove should be soft. Carefully, remove pan from oven and let completely.

  6. Remove the bulbs with a large spoon or tongs and strain the oil into a sterilized jar and save for dressings, topping pizza, toasted appetizers or simply for dipping.

  7. Squeeze each bulb, releasing the toasted cloves and place in a covered container in the refrigerator. Enjoy on your salads, roasted vegetables, pastas, pizzas and bread. 

Other recipes you may be interested in on my blog:

Garlic Potato Sauce with Beets

Greek Roasted Garlic Potatoes

If you are into garlic like I am and in California don’t miss the Gilroy Garlic Festival in July every year. Everything imaginable is made there with this incredible bulb.

I have recently published an olive oil book for you the consumer to learn how to cook with olive oil at home. The chapters are cooking techniques to help you cook along. I have everything from braising, marinating and baking with olive oil.

BUY COOKBOOK HERE

There’s an old saying ~ If you are to eat garlic, then everyone in the household must too! 


{ 0 comments }

YiaYia’s Poached Pears in Sauternes

by Mary Papoulias-Platis

Post image for YiaYia’s Poached Pears in Sauternes

Poached pears is a must on my table for any Fall meal. Both my mother and mother in-law were big lovers of pears, fresh and poached, which they served often in our homes. Most Greeks love their fresh fruit as an ending to their dinners especially in the summertime. This recipe is one of my favorites to serve along with our stews and soups in the cooler nights of Fall. The pears will soak up whatever liquid you select, so you may want to vary the poaching liquid and spices to your liking.

Poaching is a technique which means to cover the food with a liquid and slowly cook in the oven or stove top until tender. Simple and delicious as a quick dessert and don’t forget the scoop of ice cream! Alternatives to using Sauternes can be red wine, ciders, flavored waters, or a simple syrup. I added cloves to the wine to give it a Fall flavor but you can use any spice to brighten your liquid.

Why Sauternes?

  • This is a sweet French wine from Bordeaux which can be made from Semillon, Sauvignon, and Muscadelle grapes.
  • The taste is the result of a noble rot, which causes the flavor to become a concentrated, flavored wine.
  • In the U.S. you can find a generic label similar to the French wine known as sauterne.

The pear you choose must have a sturdy flesh so it can hold up to the poaching method. The Anjou pear is perfect for poaching. An don’t forget the health benefits of pears with Vitamin C, Fiber and Potassium.

I added a ground vanilla by a company called Tahitian Gold Co. as a fresh touch to the pear as a topping, and a crunch with toasted almonds. And please don’t forget the reduced sauce with a scoop of vanilla ice cream. It’s delightful!

Yiayia's Poached Pears in Sauternes

I have always loved poached pears, a dessert made by my mother and very Greek. Fruit has always been the dessert choice in my home and in most Greek homes. You can poach in any liquid of your choice, add spices and you have a perfumed pear dish to serve your family. 

Course Dessert
Servings 6
Author Mary Papoulias-Platis

Ingredients

  • 6 large Anjou pears, peeled and cored
  • 2 tablespoons lemon juice
  • 1 bottle Sauternes
  • 3 tablespoons organic sugar
  • 4 whole cloves
  • 6 scoops vanilla ice cream
  • ground vanilla for topping
  • toasted almonds for topping

Instructions

  1. In a medium bowl, toss the peeled pears in lemon juice, to prevent the pears from turning brown.

  2. In a large shallow nonreactive pan, combine the Santernes, sugar, and cloves.

  3. Bring to a boil on medium heat and add the pears.

  4. When the liquid returns to a simmer, reduce the heat to low and cook until the pears are tender when pierced, 8-10 minutes. 

  5. Carefully, remove the pears and set aside. Discard the clove.

  6. Boil the remaining liquid over medium heat , for 8-10 minutes. Remove from the heat and let cool slightly.

  7. Place the pears on individual dishes, add 2-3 tablespoons of poached liquid. You may need to slice a small piece of the fruit, off the bottom side of the pear in order for it to stand up.

  8. For toppings: Sprinkle with ground vanilla, toasted almonds, and add a scoop of  good quality vanilla ice cream on top and serve.


Enjoy these perfumed and delicious pears,

Mary

{ 2 comments }

Post image for October Unprocessed and a Recipe for Fruit Pastes

I can’t believe this the 7th year of October Unprocessed.

It’s has been continuous for many years and run by extraordinaire Andrew Wilder, from the blog Eating Rules. This is my 6th year participating, and it never gets old. I have learned new tricks, tips and cooking techniques from this challenge, each and every year! This year I chose to write about the convenience of fruit pastes. An alternative to processed white sugar in your baked goods, and dishes.

But before you read any further, STOP and join us in this challenge! Won’t you take the challenge to go without processed foods for the month. It’s quite easy with the hundreds of recipes on the October Unprocessed site. I also have collected them on my Pinterest boards over the years. So, glance around the site and look for all the past years.

This last year as I completed my Plant-Based Program, I felt a post on limiting your processed sugar intake can be useful! I have made these fruit pastes several times and everyone was surprised at the intense flavor of these dried fruits.  I like to keep them on hand, or freeze them in a cube tray for instance flavor boosters.

Fruit paste can come in many flavors not just the ones I have shown here. Easy to make ahead they can be added to your cereals, sautes, and dressings. Made from dried fruit, you can be creative with the main ingredient and consider using other dried fruits such as pears, pineapple, prunes and plums.


For the recipe see this post here at October Unprocessed 2017.

There are no excuses in getting stated. Here is a FREE MEAL PLAN for you  so there’s no thinking or running around to do you stated. You can go to the site and pick it up here!

Join now and take the challenge!

Mary

{ 3 comments }