Pollo en Crema Chicken Recipe

by Mary Papoulias-Platis

Post image for Pollo en Crema Chicken Recipe

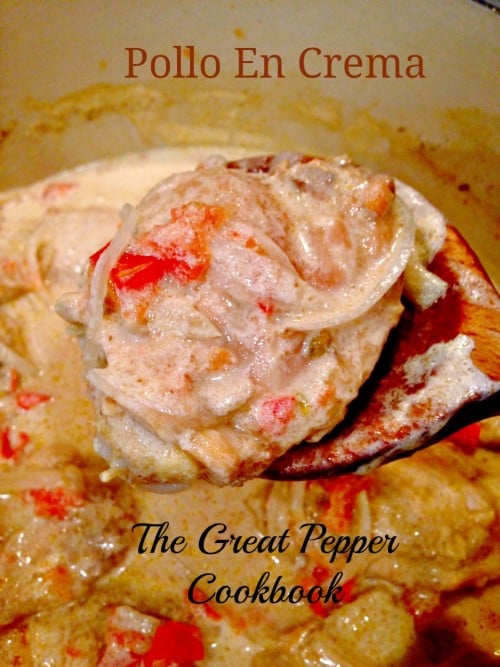
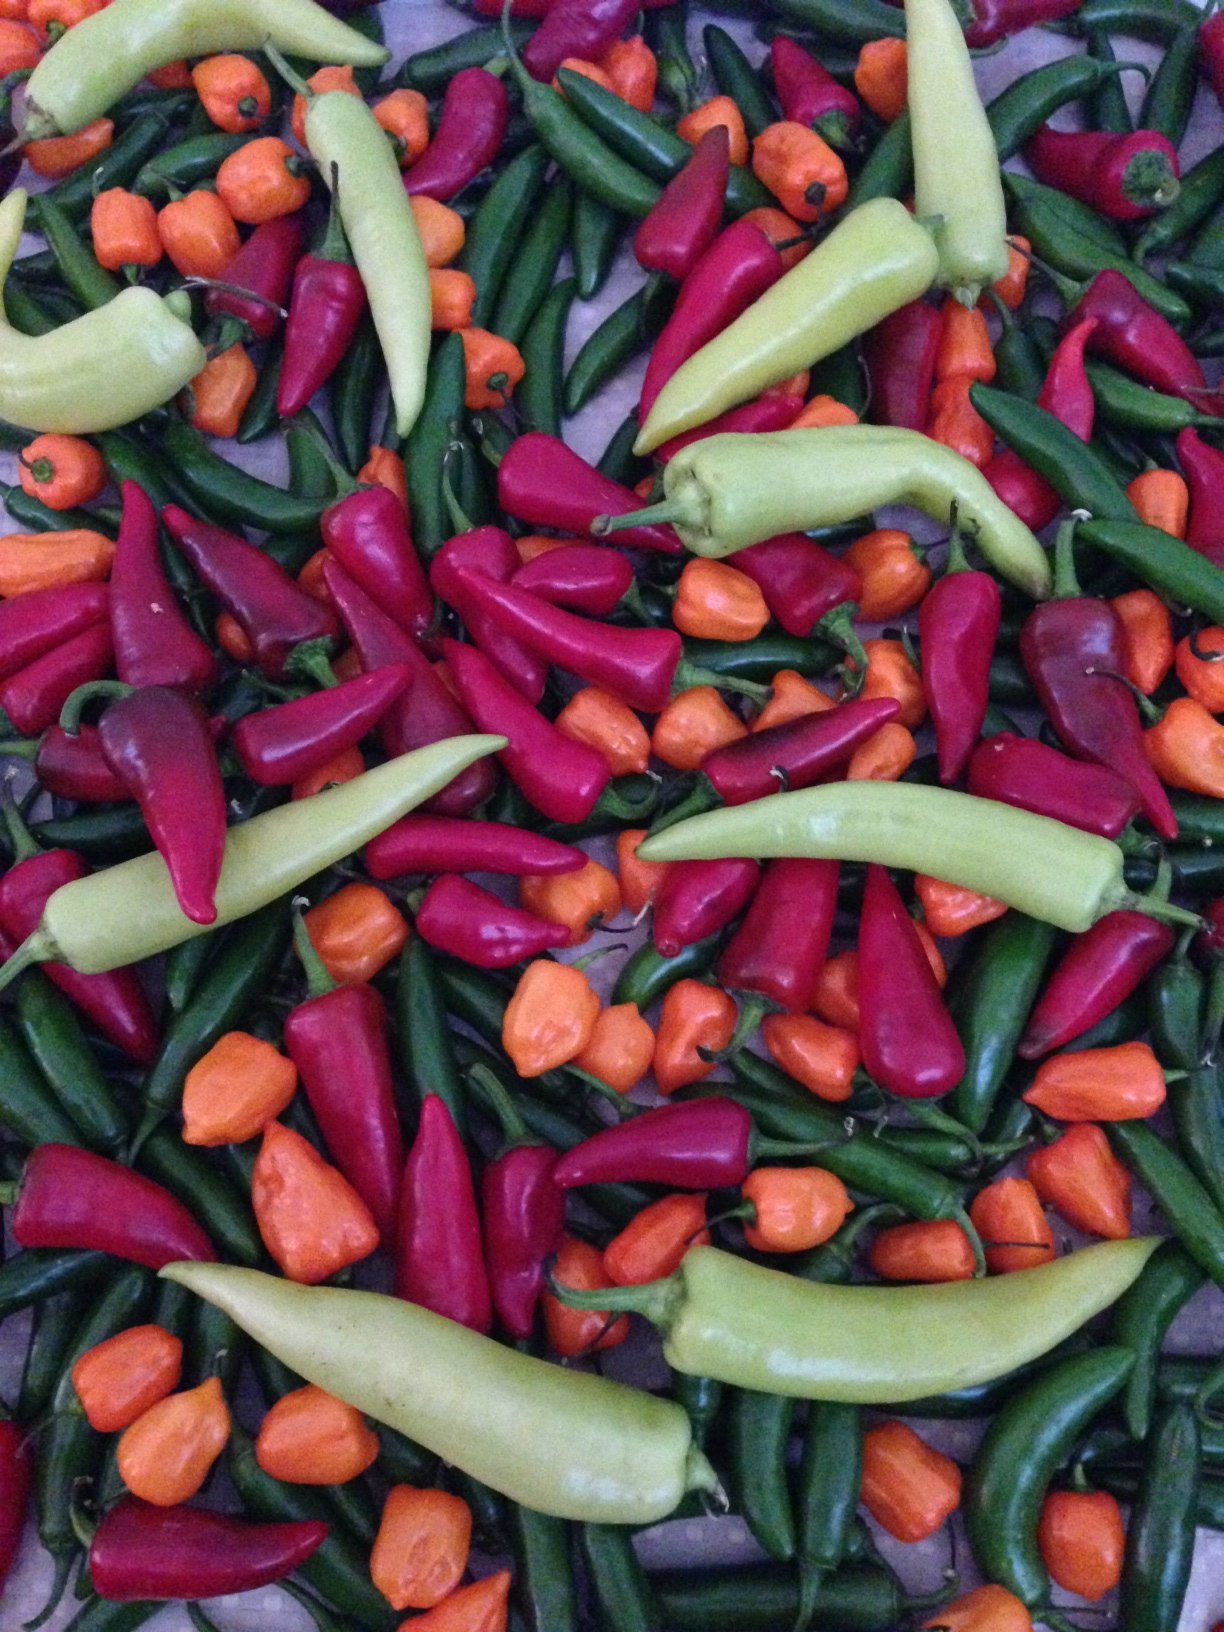
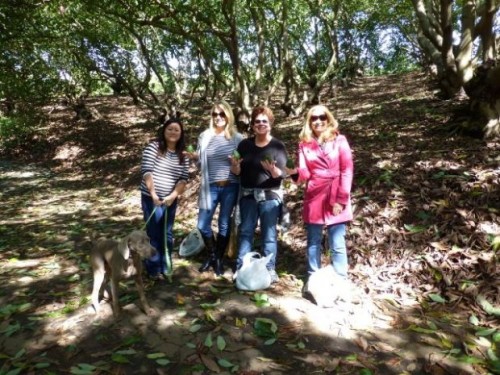
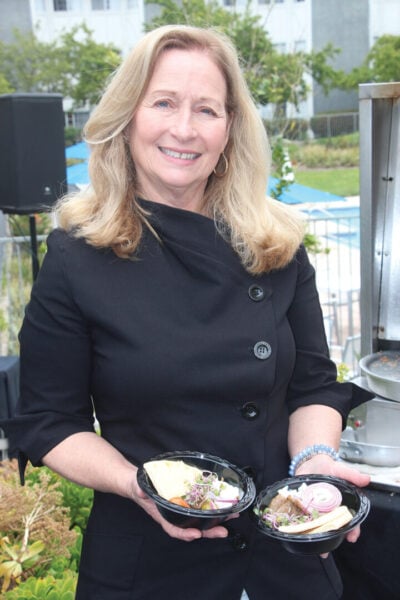
I know you may find this strange for a Greek girl attending a chili pepper luncheon, but I did and I love it! Melissa’s Produce is a strong supporter for food bloggers and food media. This was my first trip to Vernon where the warehouse is located.  And boy was it worth it. I learned so much about chili peppers I never knew exsisted. Choosing the Pollo en Crema Chicken recipe to feature was the perfect dish, because for me the smoky flavor with the dried chilpotle peppers with the crema was a perfect flavor match and winner for me!

Pollo en Crema

melissas chilpote

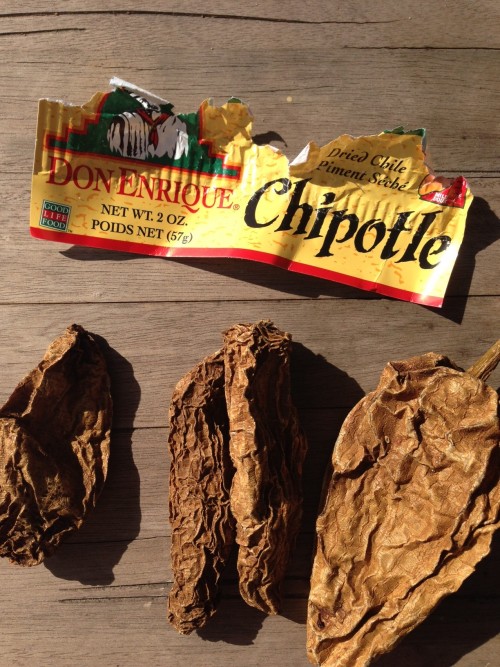
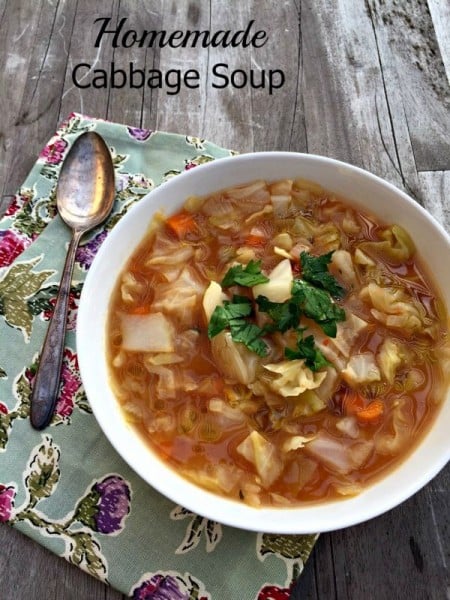
Dried chilies can be prepared many different ways and the book goes into more detail on prepping chilies for your recipes. But, in the pollo recipe they are braised with the chicken as it slowly cooks to impart the smoky flavor.


Everyone here is watching the chef prepare the dessert for us in a cooking demo. Melissa’s entertained the group with a hilarious book trailer, Robert’s presentation on chile peppers, and a book signing from the authors. The book can be purchased on Melissa’s Website.

The Great Pepper Book

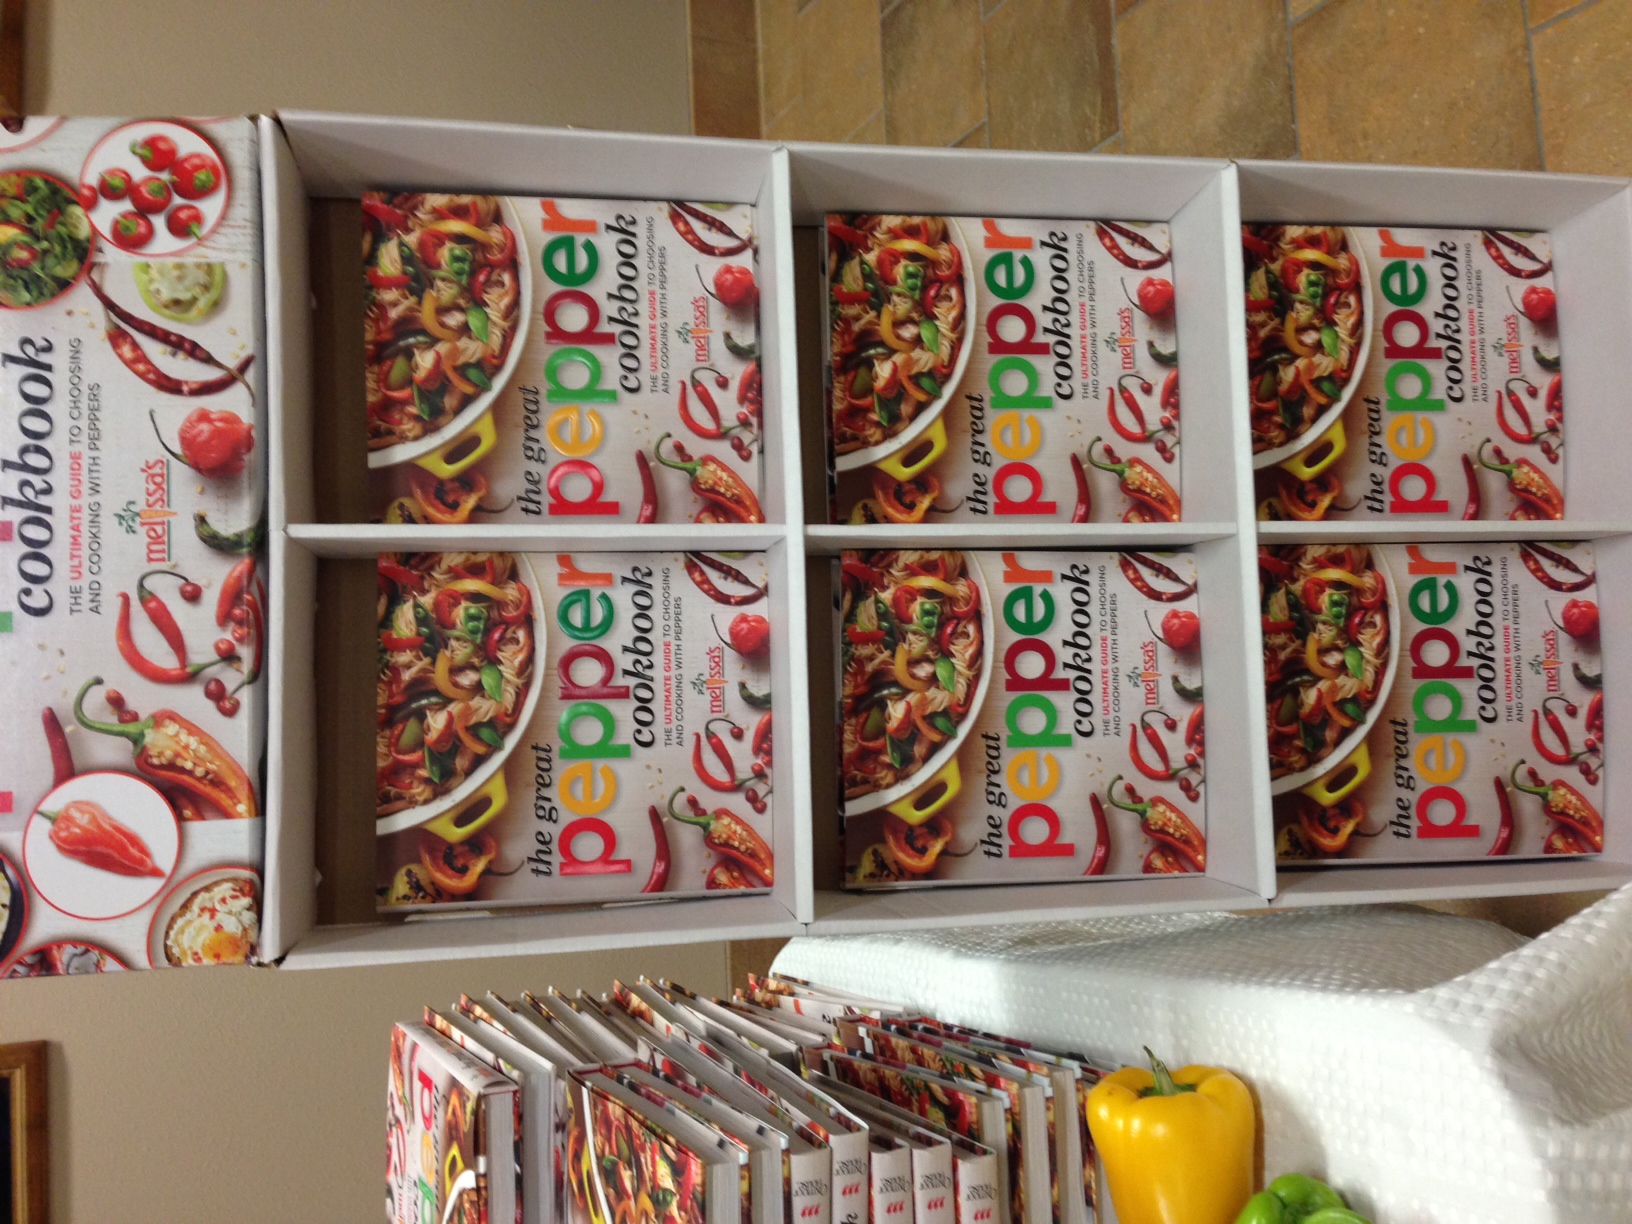
Melissa’s invited many food enthusiasts to view and eat from their new cookbook The Great Pepper Cookbook. And what a spread they put out for us! All these recipes are from their colorful and beautifully photographed cookbook.

melissa's carrots

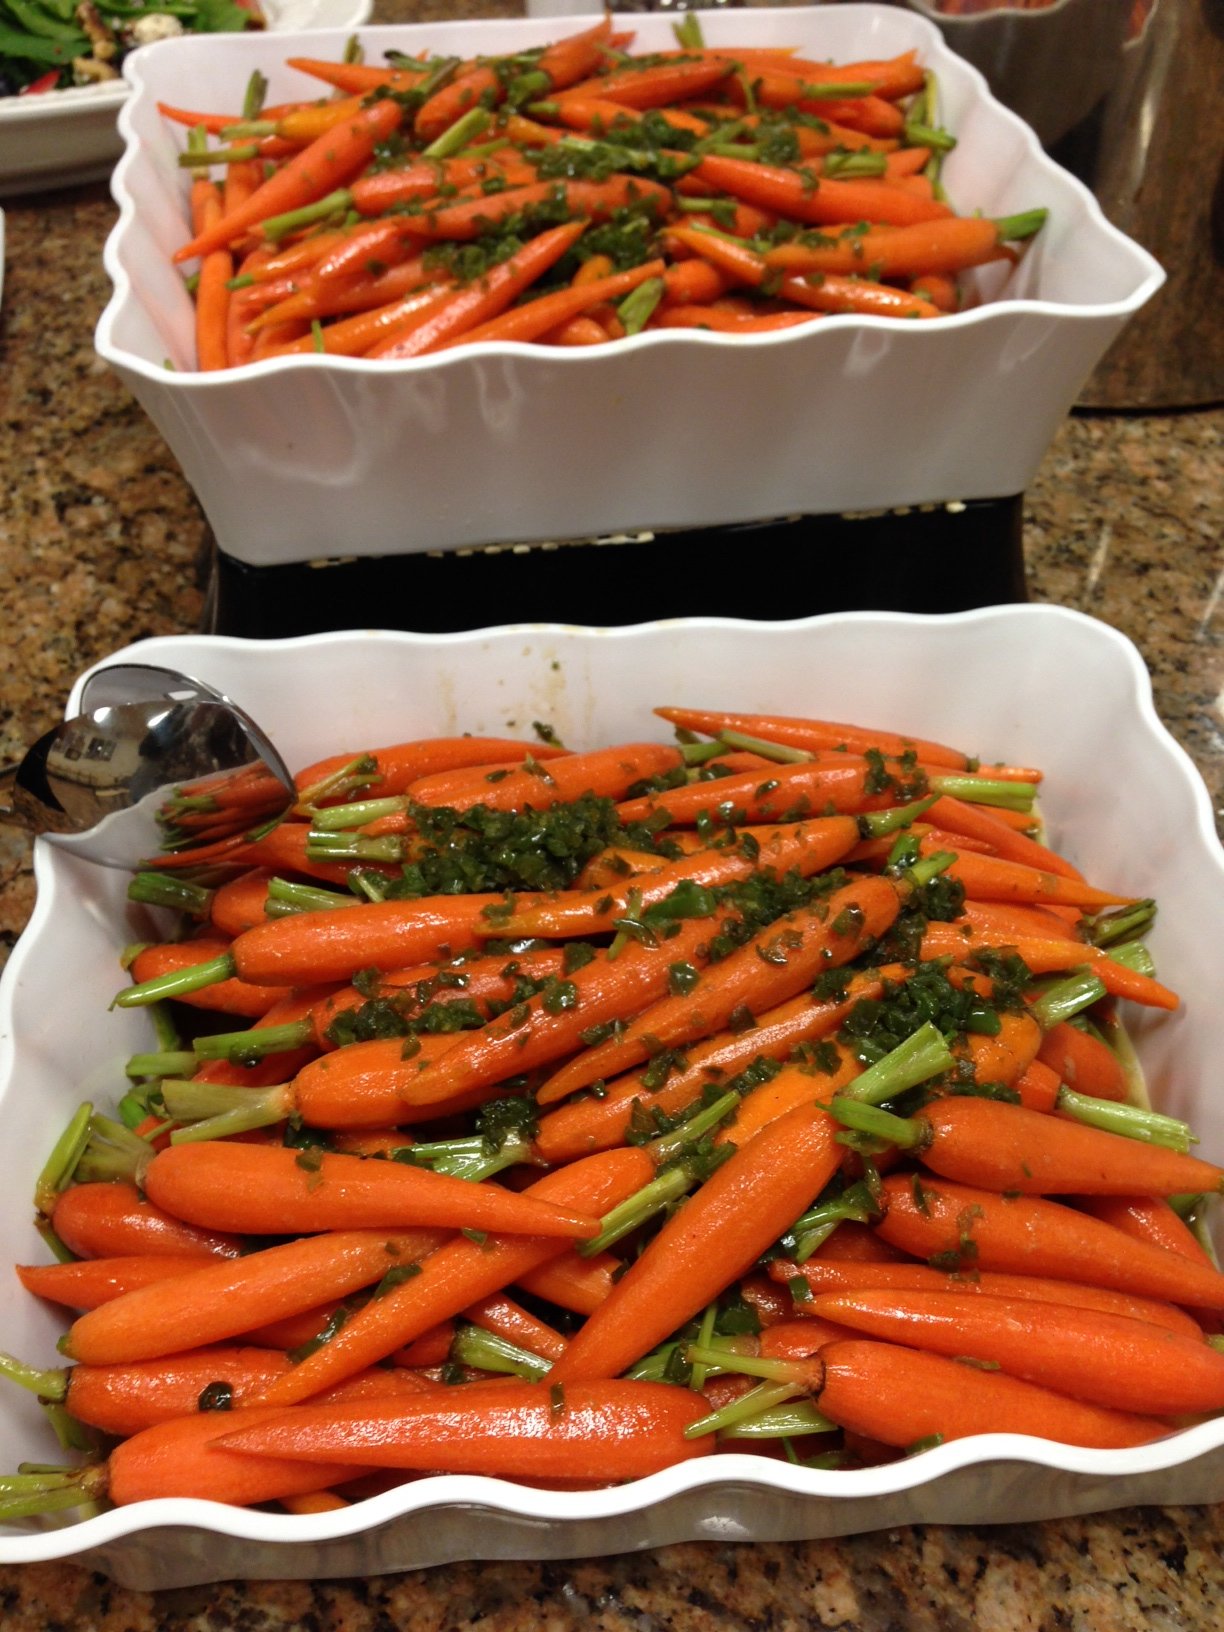
  Glazed Chile-Spiced Baby Carrots

melissas slaw

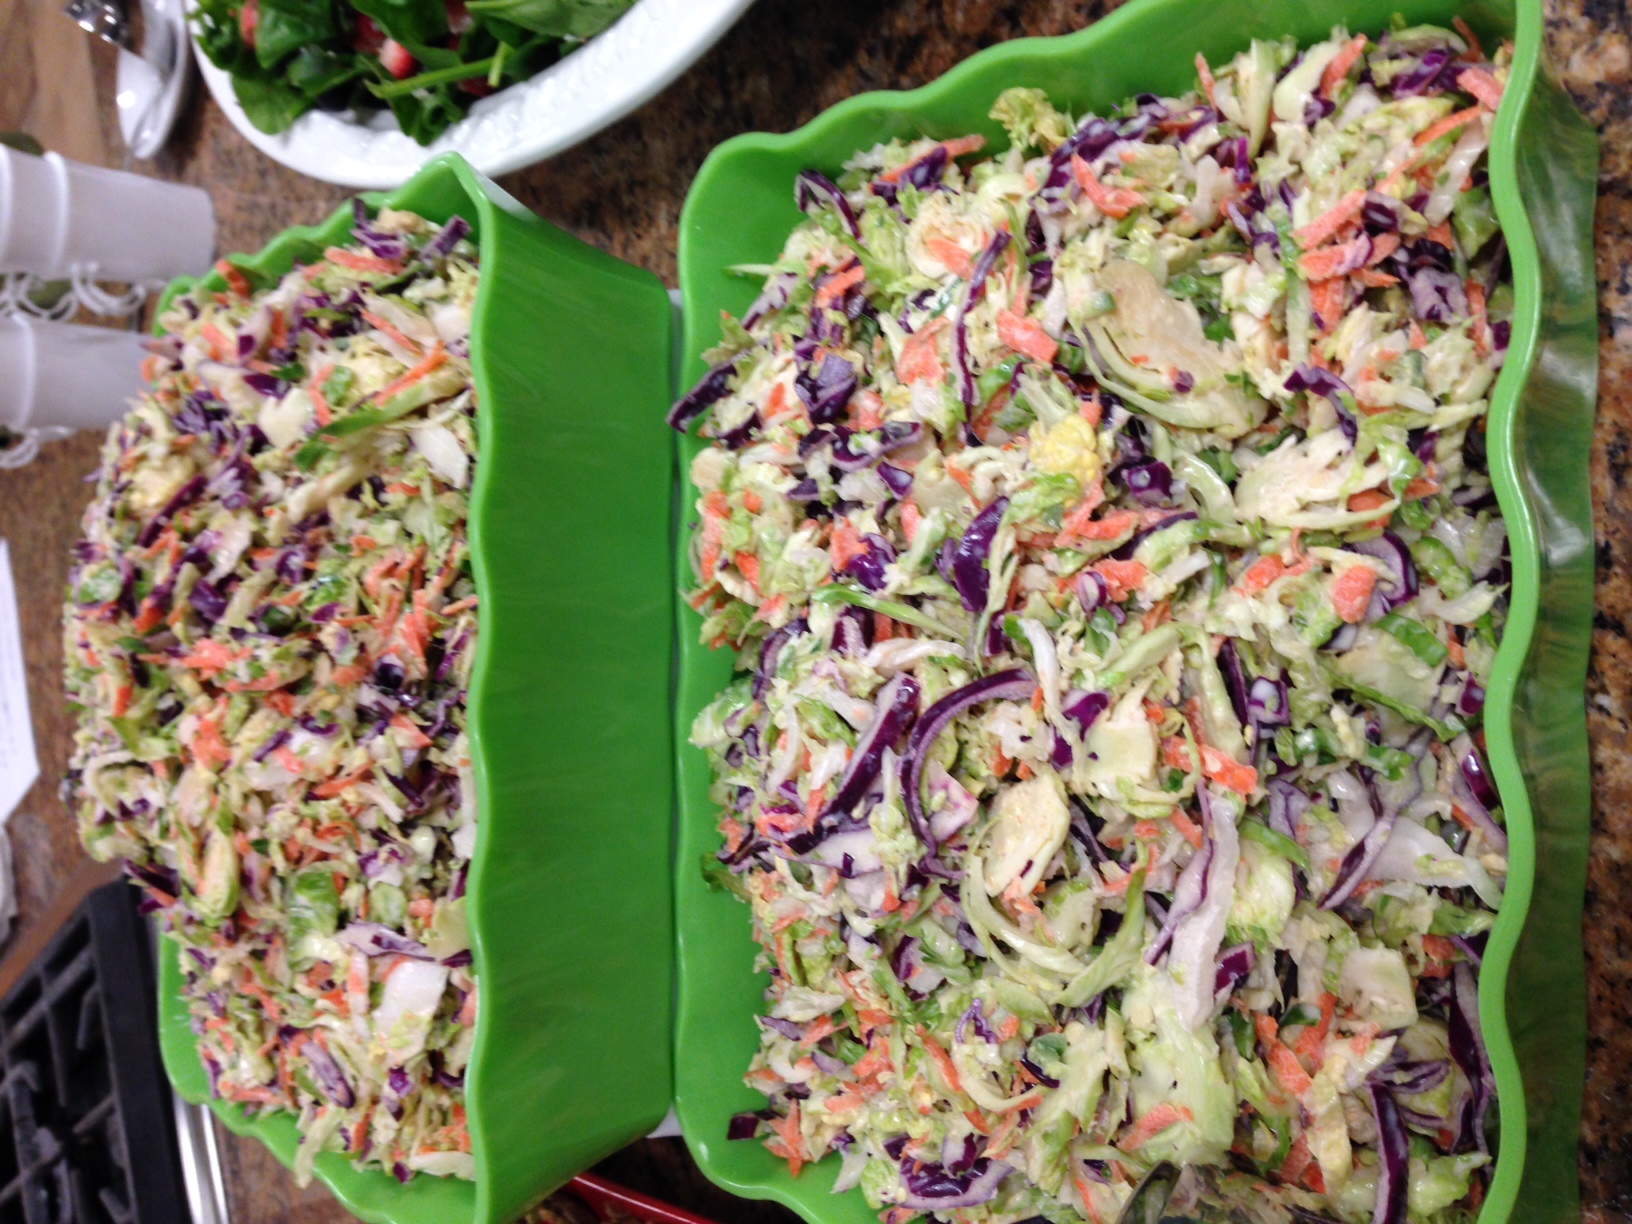
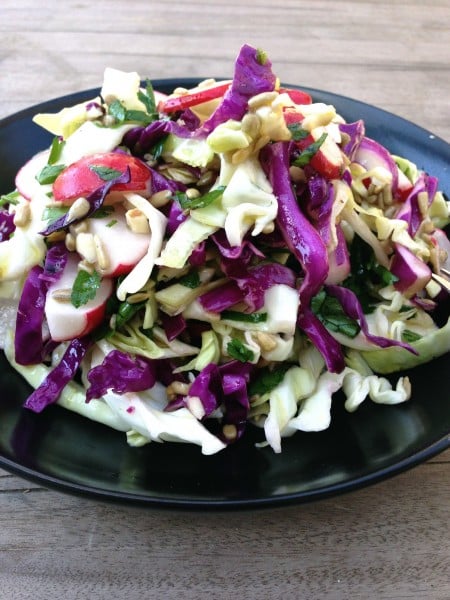
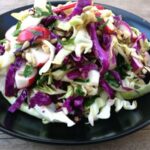
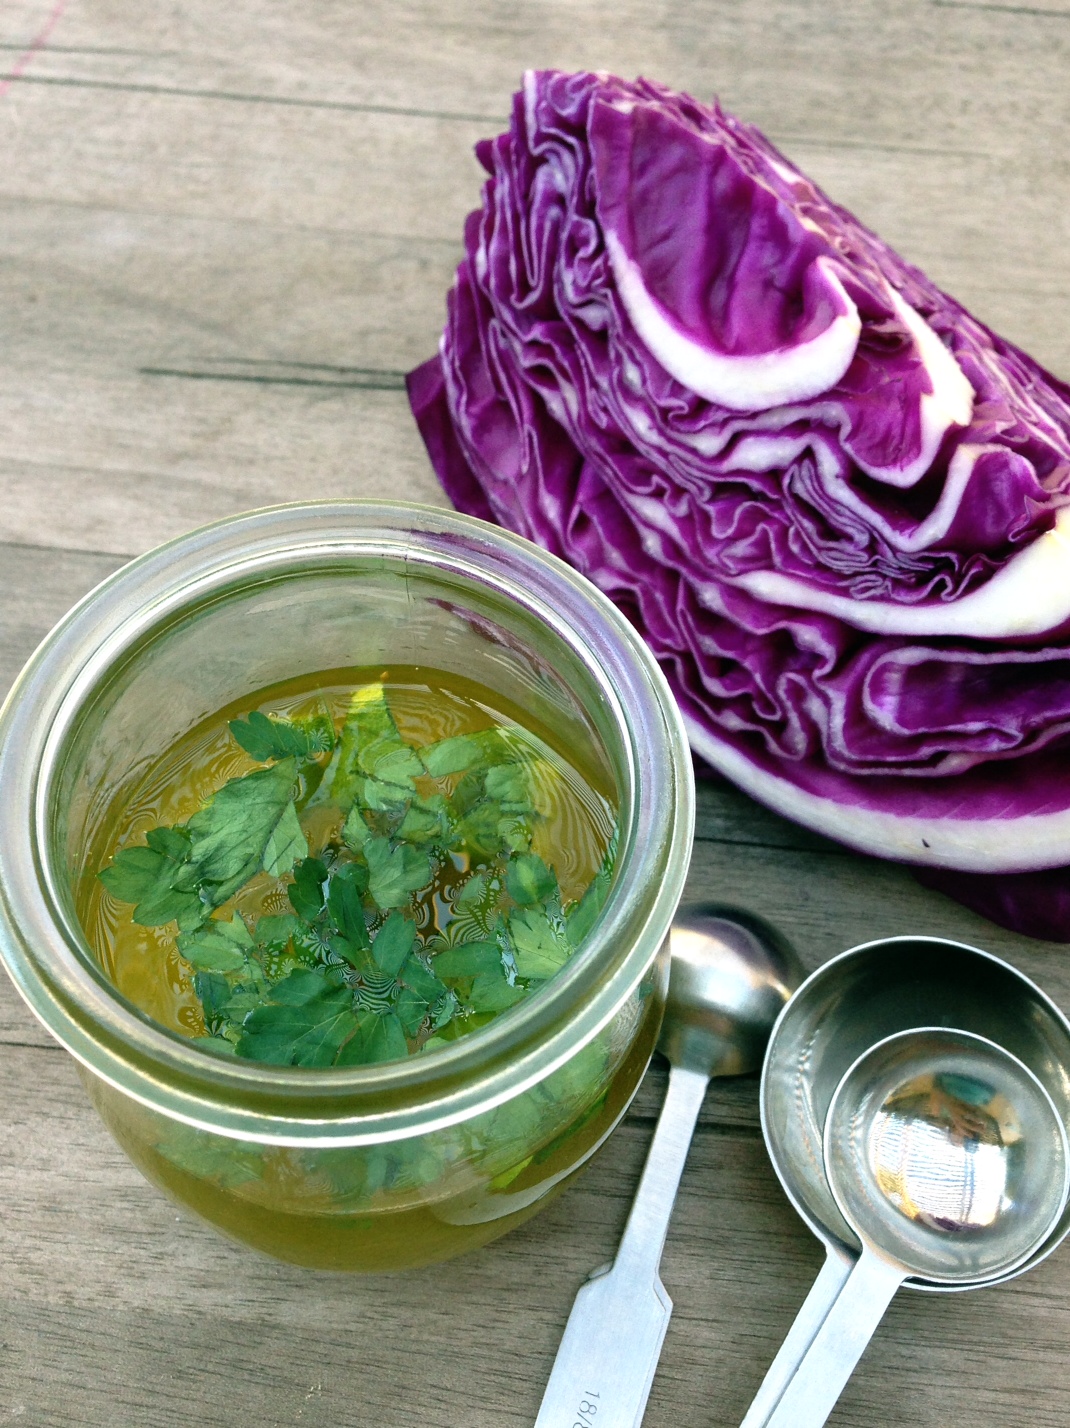
 Cole Slaw with Chile-Lime Dressing

melisasa spinach salad

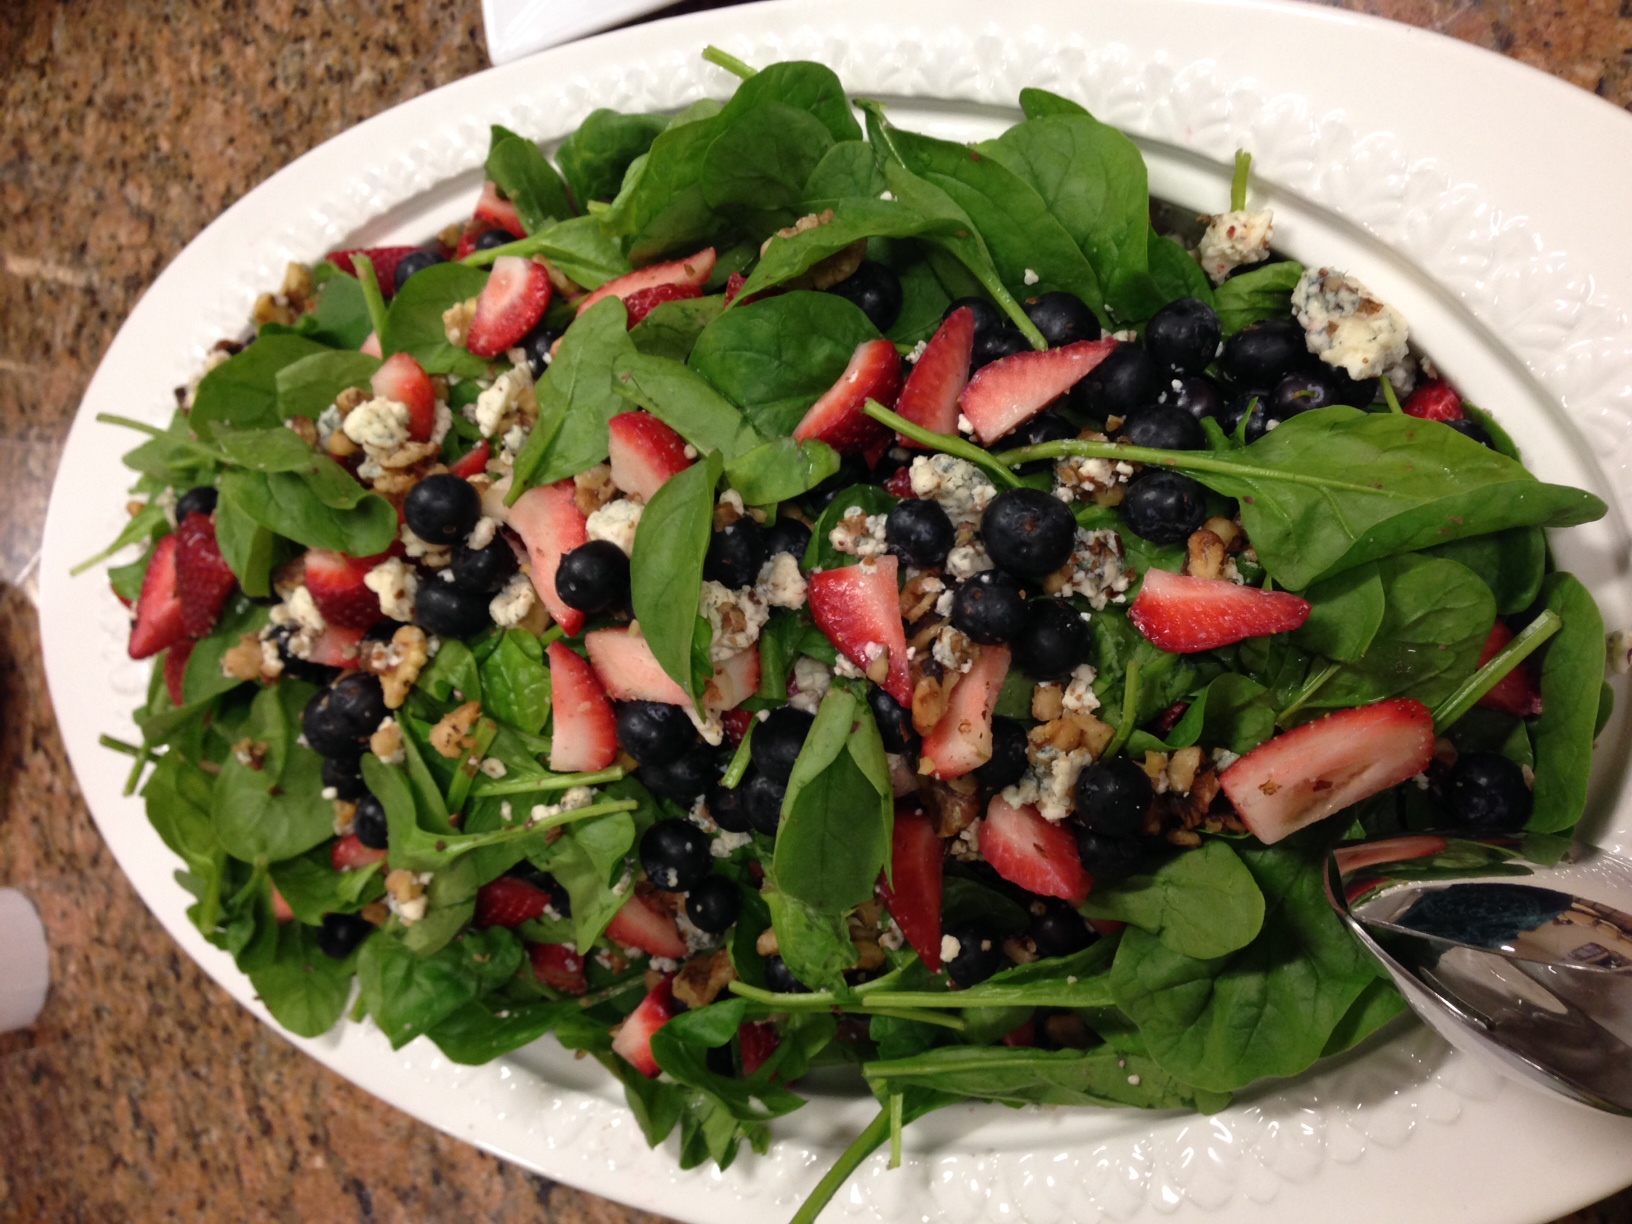
 Tropical Spinach Salad

melissa's mushrooms

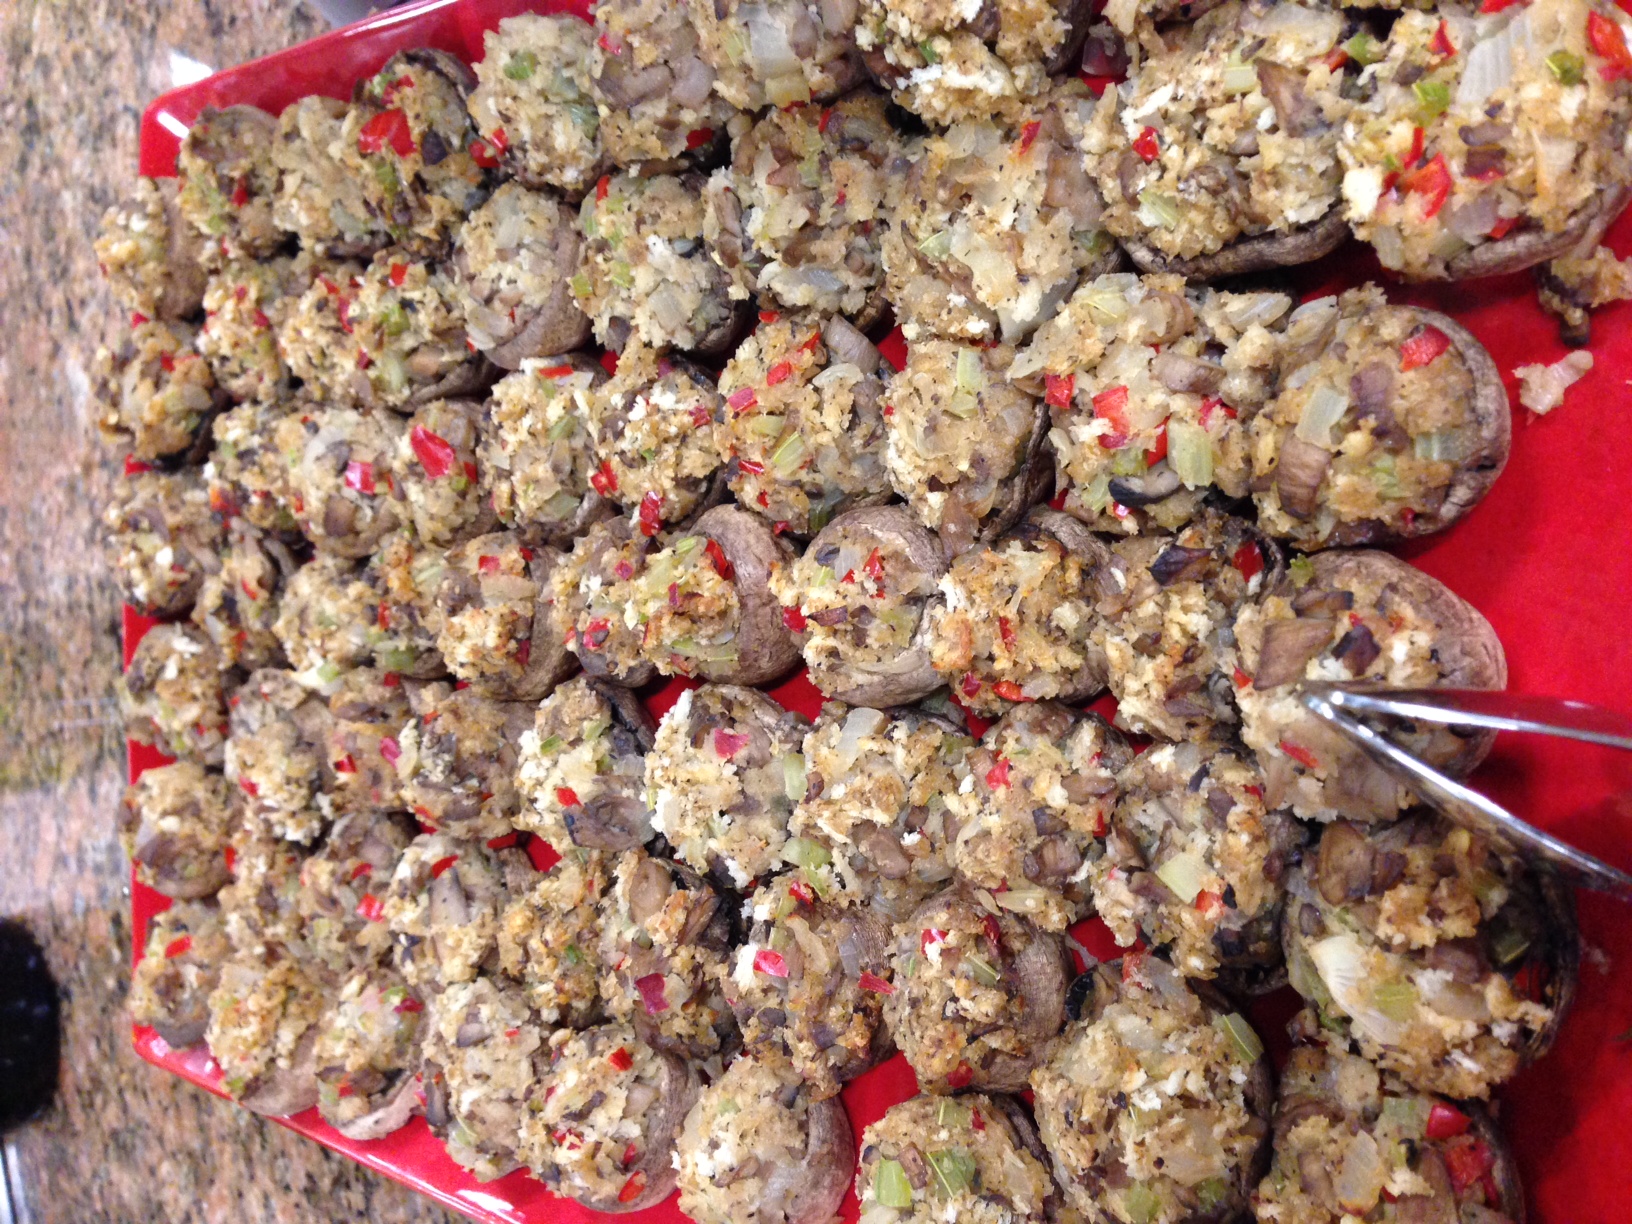
 Spicy Stuffed Mushrooms

melissa's potatoes


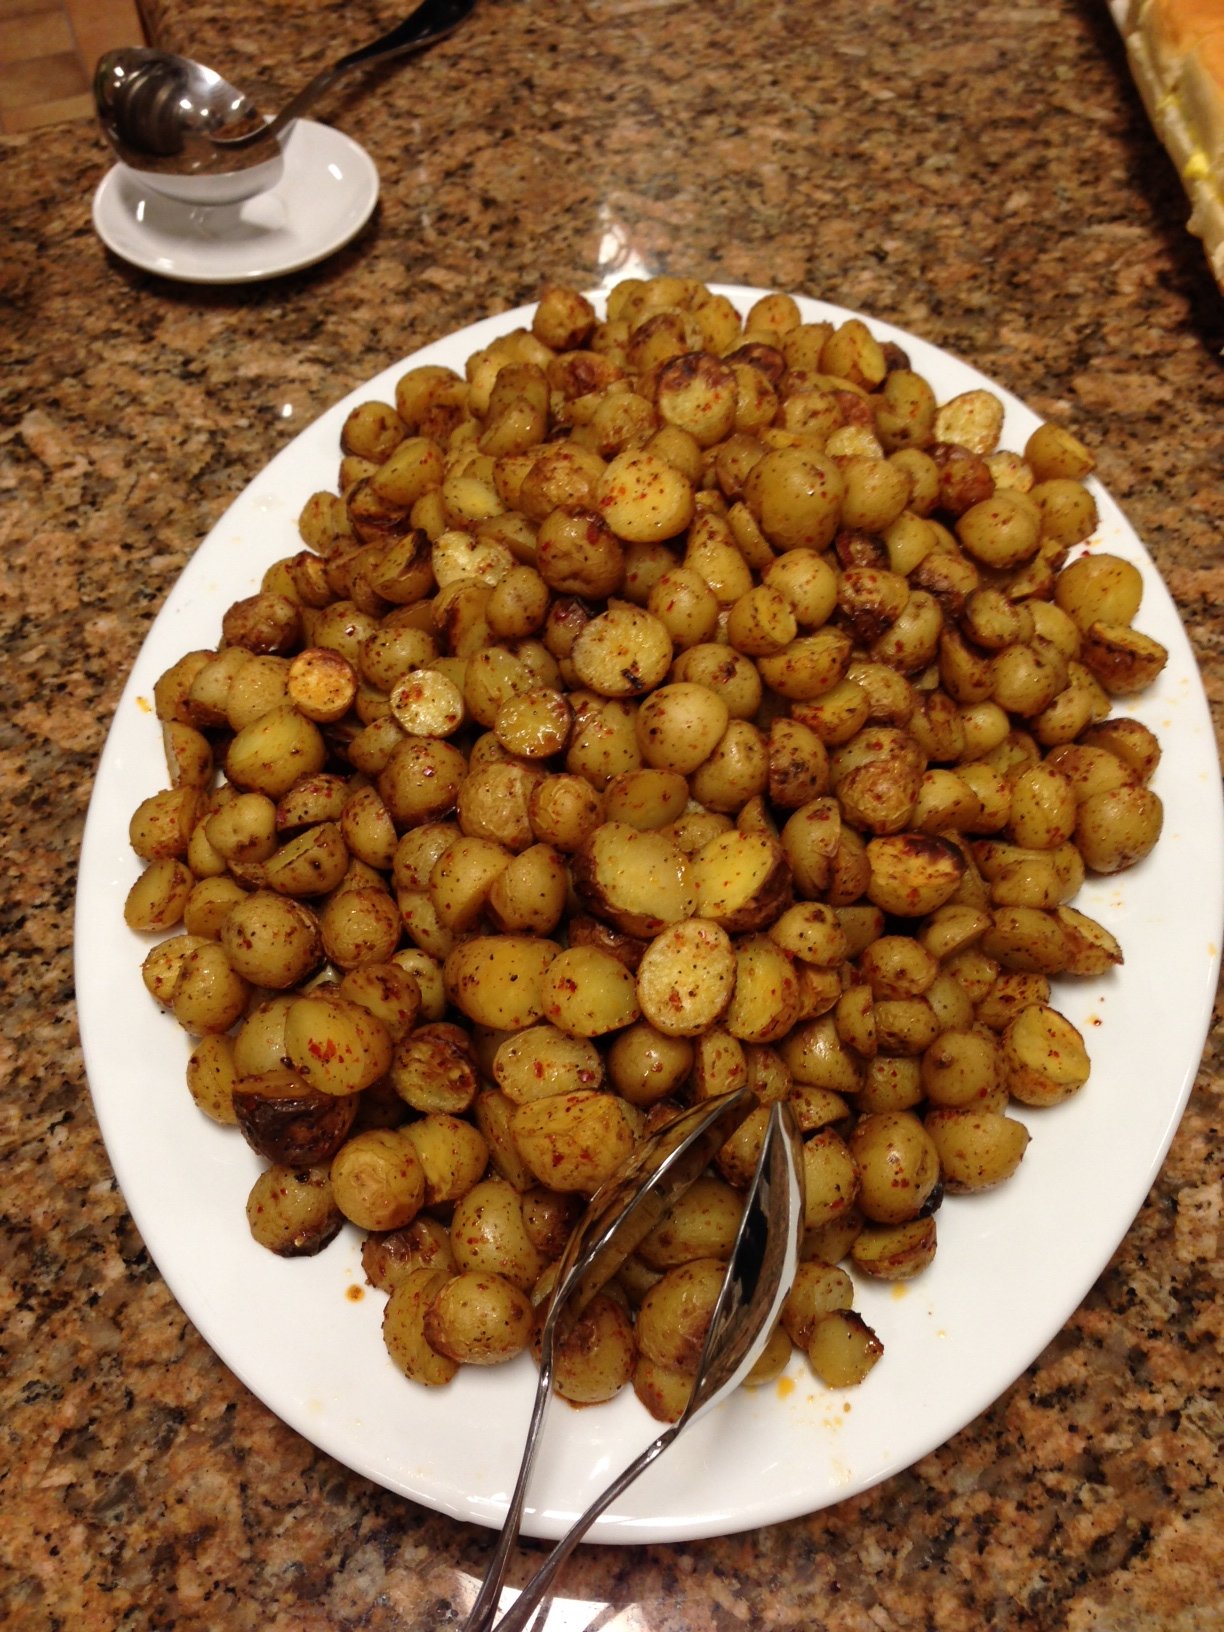
 Chile Roasted Dutch Yellow Potatoes

melissa's chocolate truffles


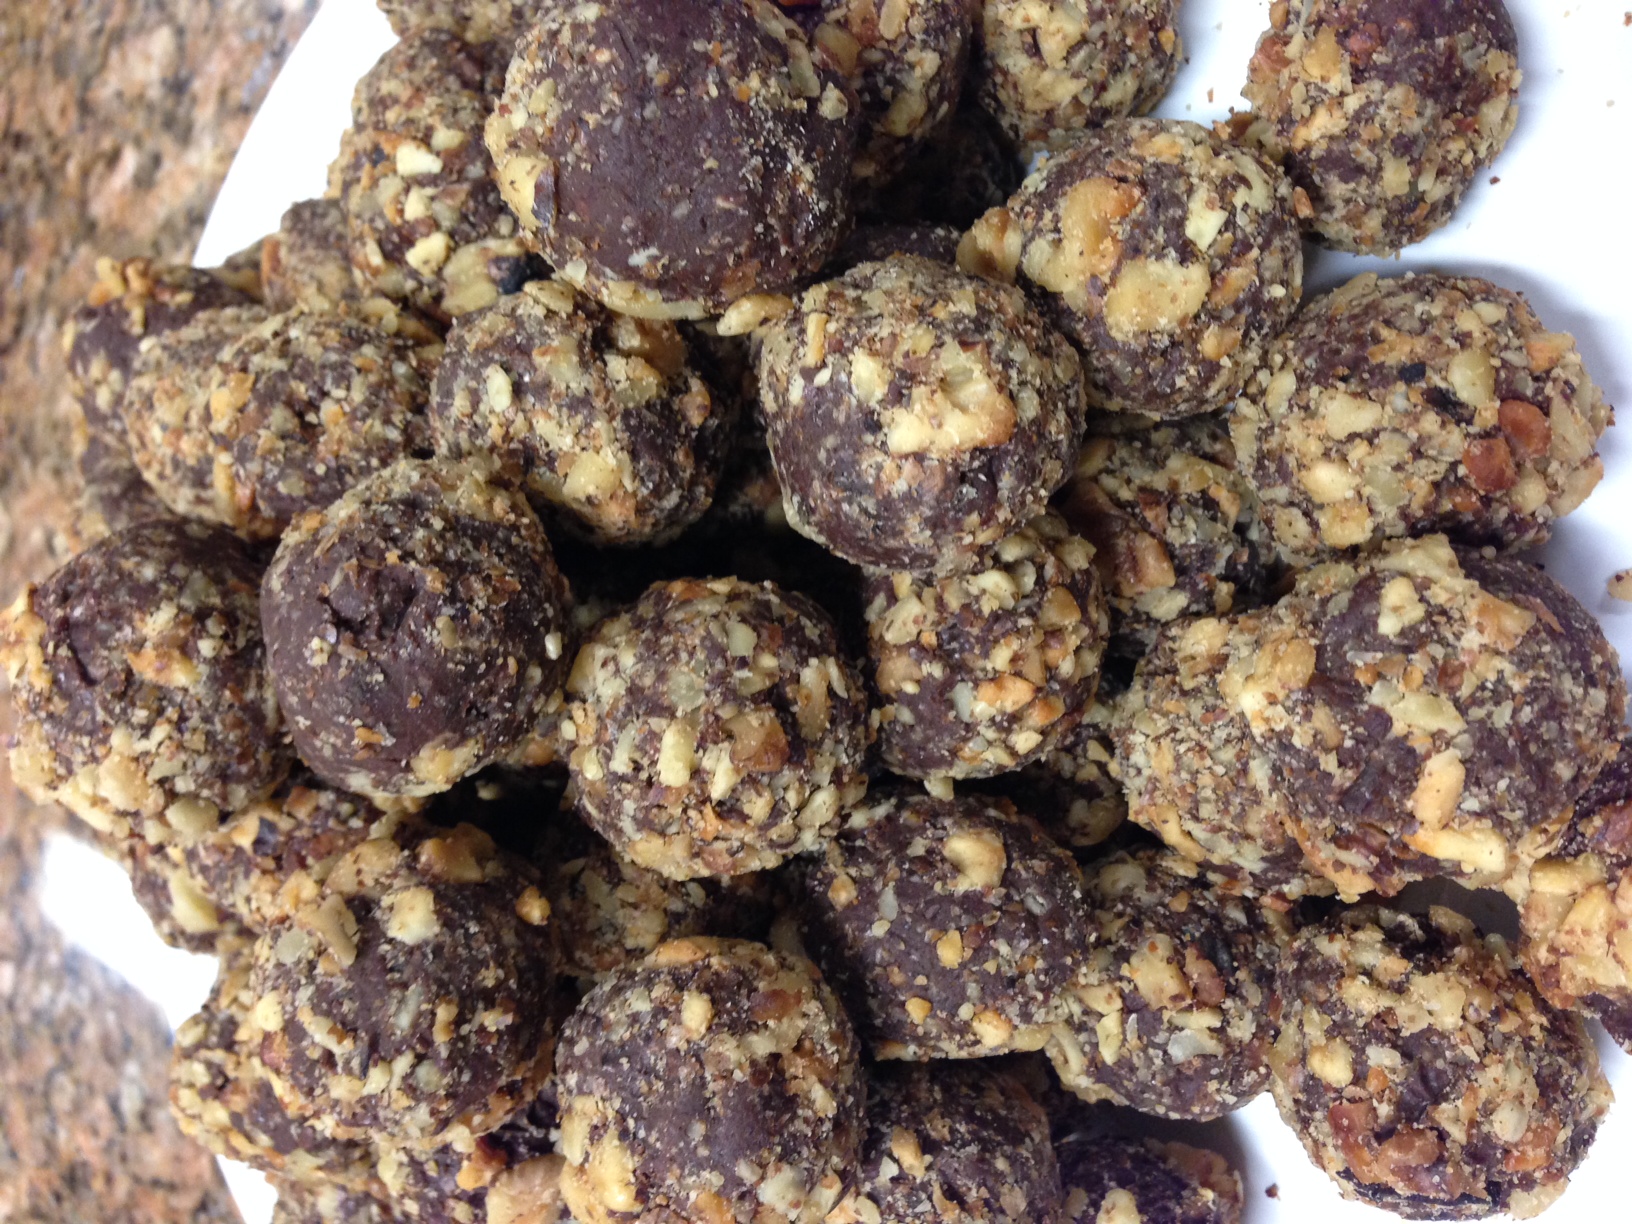
 Chili-Chocolate Truffles

Pollo en Crema Recipe

Serve over hot cooked rice or wide noodles; garnish with chopped cilantro.
Course Main Dishes and Sides
Cuisine Mexican
Keyword chicken, dinner, pollo
Servings 6
Author Melissa's Produce

Ingredients

  • 4 pounds bone-in chicken pieces, trimmed
  • 3 garlic cloves, thinly sliced
  • 3 dried chipolte chile peppers, stems and seeds removed
  • 1 cup sour cream
  • 1/8 teaspoons salt
  • 2 tablespoons extra virgin olive oil
  • 1 small sweet onion, thinly sliced
  • 2 large Roma tomatoes, finely chopped

Instructions

  1. In a large skillet, sear chicken skin side down in a single layer over medium high heat, about 3 minutes.
  2. Sprinkle evenly with garlic; add chiles and water to cover.
  3. Bring just to boiling. Reduce heat;simmer until chicken is completely cooked thorough and a meat thermometer inserted into thickest part of the chicken reads 165 degrees.
  4. Transfer chicken to a plate, reserving chiles and liquid.

  5. Place chiles and 2 cups liquid from the pan to a blender, add sour cream and salt. Process until smooth.

  6. Return pan to stovetop. Add oil, heat over medium-high. Add onion and tomato stirring occasionally, for 3 minutes.
  7. Add chile mixture, bring to just to boiling.

  8. Nestle chicken into chile mixture, simmer until chicken is heated through, about 5 minutes. Serve.

Recipe Notes

Be careful when blending hot foods, the contents expand rapidly, causing a risk for scalding. To be sage before blending remove center piece and place a towel over the opening.


melisssa pepper1

Bring in the Peppers!

Mary 


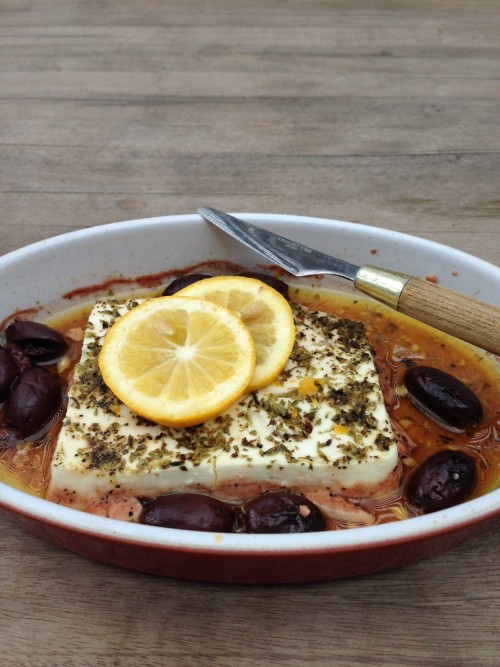
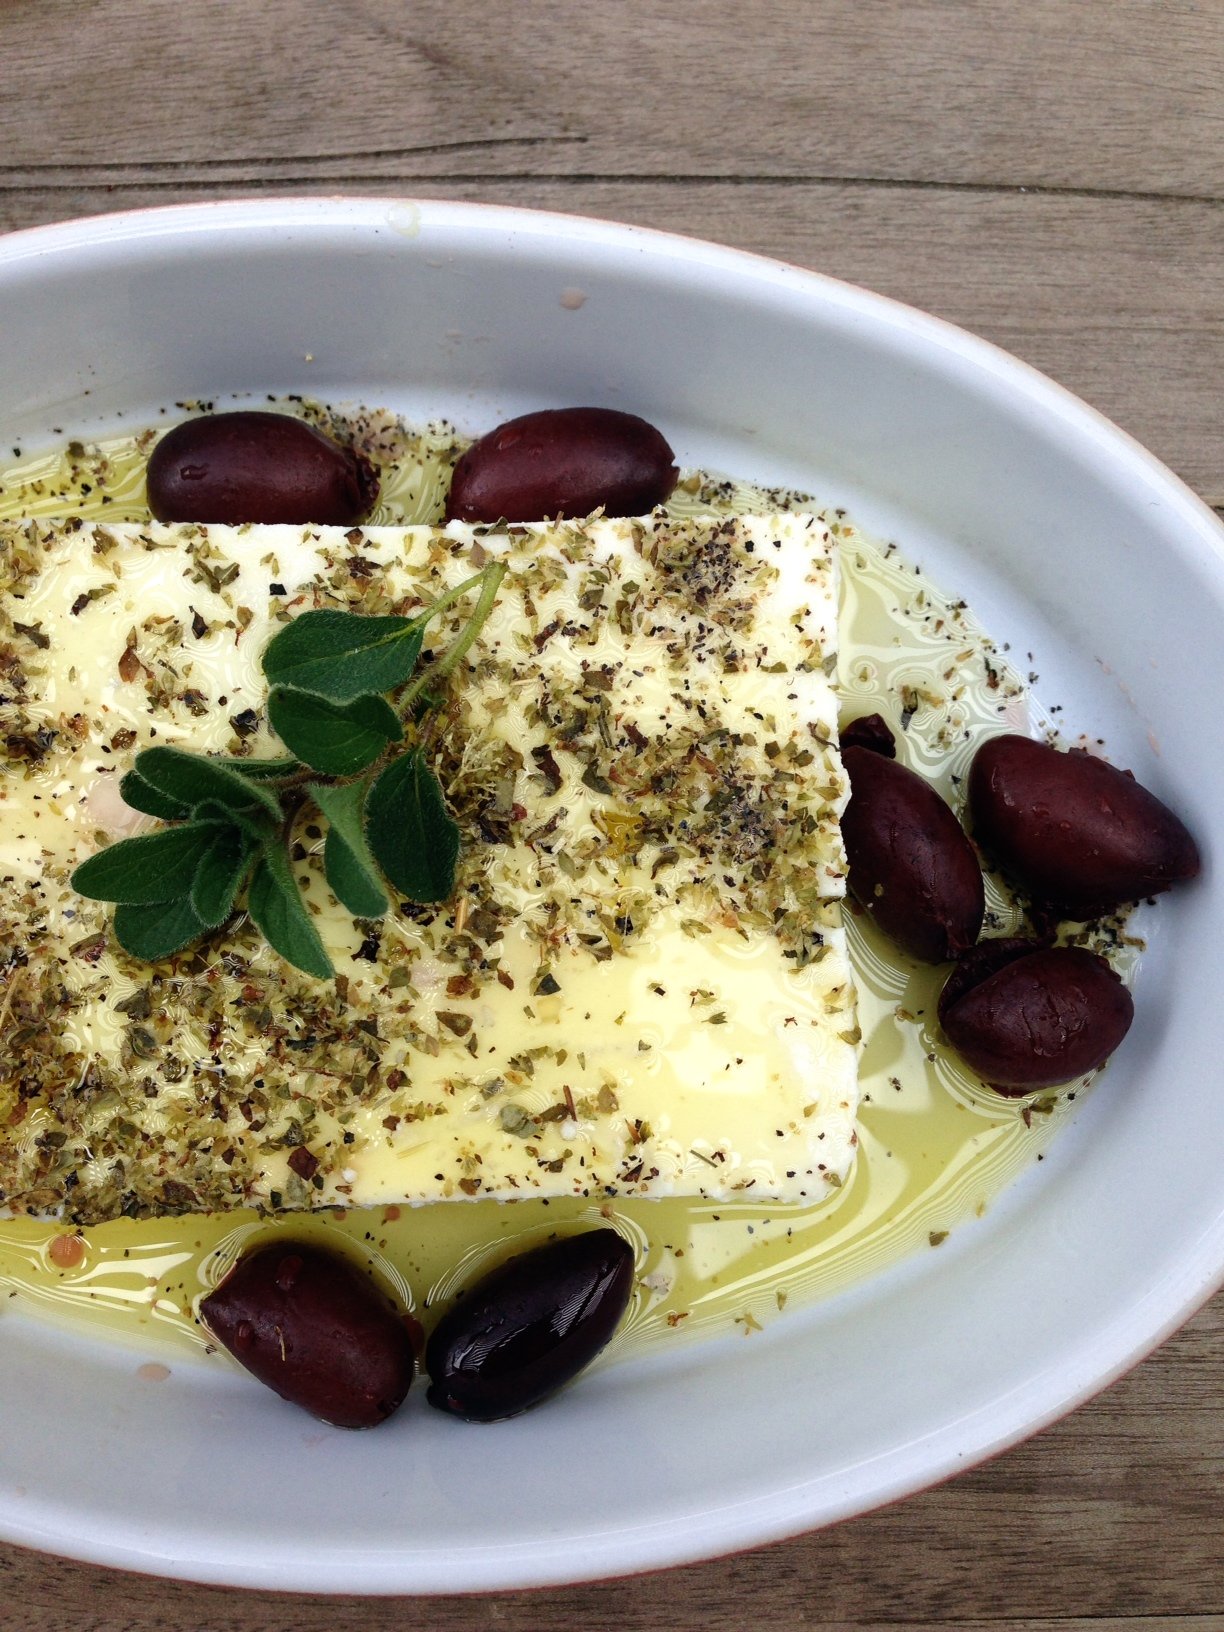
Other pepper recipes you may enjoy!

Kapia Peppers Stuffed with Feta!

Cinco de Mayo Vegetable Quinoa


{ 2 comments }

Post image for Greek Easter Week Traditions and Lenten Recipes

This last Sunday began the holy week for all Orthodox Christians, starting with Palm Sunday. Greek Easter week traditions are followed closely with many families around the world. Special recipes are shared among the communities to make fasting more accessible to all Greek homes. Every four years the Greek Easter is observed on the same day as the American Easter.  This year is that year. The Orthodox followers participate by going to church, involving their families in events at their local church while eating a restricted fasting diet. This is the most spiritual time for the Greek culture, and fasting is the preparation for the rebirth on Saturday night at midnight.

Easter Sunday is the most important day of the year and called “Pascha”. The festivities begin with a service called “The Great Vespers of Agape” (God’s Love) encouraging love, forgiveness, and reconciliation. Afterwards dancing, eating traditional foods, and visiting with friends and family at church picnics becomes an all-day event of celebration.

Lenten foods are eaten during this week, and a typical menu may include legumes, vegetables, fruit, and shellfish. Below, I have listed recipes for you and your family to make this busy week easier.

Fasoulada

Lenten Recipes can be found here.

Vegetable Dishes /Meatless – Spinach, potatoes, eggplant dishes…here.

Greek Soups – White Bean Soup, Lentil Soup and other soups here.

Salads and Fruit – Greek Salad, Fruit salads, bean salads…here.

Meatless Monday Recipes… Recipes here

Greek Easter Eggs

Red Easter Eggs are always dyed on Thursday, here.

Easter Bread is made with the dyed red eggs and served on Easter.

“Koulouria” are also traditional and made for Easter day, here.

Greek Kouloulakia

Holy Week Schedule

Sunday – Palm Sunday and The Matins of Christ the Bridegroom
Holy Monday – The Matins of Christ the Bridegroom
Holy Tuesday – The Matins of the Bridegroom
Holy Wednesday – The Liturgy of the Presanctified Gifts and The Sacrament of the Holy Unction
Holy Thursday – The Divine Liturgy of St. Basil the Great
Holy Friday – The Reading of the Royal Hours, The Decent from the Cross and The Martins of Lamentation (Epitaphios)
Holy Saturday – The Descent into Hades and the Anticipation of the Resurrection
Easter Sunday (Anastasi)

Christos Anesti!


{ 2 comments }

How-To Cook and Roast Fava Beans

by Mary Papoulias-Platis

Post image for How-To Cook and Roast Fava Beans

Fava beans may be new to you because they are derived from Europe and have a very short late winter season in the garden. Recently, I have seen them gain popularity here in the states and are now available in your markets. Below is a picture of my fava crop maturing in my garden box this month. They do need space to spread out which takes up half of my planter box. If you have a small area around your home they also do well in the ground. Every winter season I plant two varieties, a common local variety and one Italian version.  Do not miss the blossom period, they produce lovely white and black flowers that will delight you! Interesting to me is their strange growth pattern as they tend to grow upward on the stock and usually in groups of fours. Add this bean to your garden and try the easy cooking method of roasting for a rustic but fresh taste.

garden favas2

They are commonly used in soups, stews, and salads. But you need to prepare them depending on their freshness and time picked.

Their nutritional value of Fava Beans 
  • Great source of nutritional benefits such as fiber,  low-fat protein, and no cholesterol.
  • Included in these beans is 44 percent of your daily value in folate. (2,ooo calorie diet).
  • Also nutrient based in potassium, calcium, manganese and phosphorus.


fava flower

Fava blooms pop out early Spring and are so strikingly beautiful with their black and white blossoms. But, as they mature and grown up to 4 feet tall plus, once they have four or five blossoms on the stalk you must pinch off the top of the stalk and blossom, to promote the bean growth.

Preparing fava beans:

Step One: Picking  young favas will be easier to prepare. Selecting older beans will be a  few more steps.

Step Two: Young  favas can be left in their pod and roasted in the oven and eaten as is. Or they can be shelled and added to soups and stews as is.

Step Three: You can shell the beans (younger or older) and blanch them in boiling water for 4 minutes and remove the outer skin and add them to any dish.

blanched favas


Place the fava beans in boiling water for 1 minutes and rinse with cold water. As this point you can peel away the skins.

peeled favas

As you can see, the larger beans do need to be peeled. They have a much tougher skin. But young beans can be eaten as is, or peeled for that clear green color.

Roasted Fava Beans

Preheat your oven to 400 degrees.

Wash whole young pods and pat dry. Pace on a lined sheet pan in a single layer.

Drizzle extra virgin olive oil on top, and sprinkle with salt and pepper.

Roast for 15-20 minutes until browned.

Serve warm on a platter.

Can be used as an appetizer with bread, cheese, and cold cuts.

How-To Cook Fava Beans


{ 0 comments }

Greek Roasted Feta with Kalamata Olives

by Mary Papoulias-Platis

Post image for Greek Roasted Feta with Kalamata Olives

Have you ever roasted Greek Feta and Olives?  This is the perfect go-to appetizer for any given night. Simple and easy to assemble using the typical Greek pantry ingredients, extra virgin olive oil, oregano, olives and lemon. Don’t skip the olives because they bring out the earthiness –  an additional taste to this dish. This must be served warm, so to save you time, this can be assembled early in the day and refrigerated.  As your guests arrive, place it in the oven and serve immediately with crackers, pita bread, or vegetables of your choice.

Try and select a shallow baking dish you can also use to serve in.

Roasted Feta

Serve warm with your choice of bread or vegetables!

Roasted Feta with Kalamata Olives

Roasted Feta


If you would like to learn more about olive oil, you may want to buy my cookbook, Cooking Techniques with Olive Oil!

BUY COOKBOOK HERE

 Get your Greek on and serve this at your next dinner party~ OPA!

{ 1 comment }

Avocado Risotto with Lime and Olive Oil

by Mary Papoulias-Platis

Post image for Avocado Risotto with Lime and Olive Oil

Not so long ago, blogger Mimi Avocado invited our blogging group to her home and avocado farm for a tour and delicious luncheon. We spent most of the day together walking the orchard and picking avocados, while Mimi brought us up to date on the latest harvest and avocado news. It was a beautiful clear day and we enjoyed the brisk walk around her colorful property of blooming avocados and citrus trees.  Mimi defined all the varieties of avocados she grows on her farm by the shape and leaf design. The Fuerte variety is the earliest and we happily packed our bags full of the first crop of the season. This was my inspiration for this recipe, Avocado Risotto with Lime and Olive Oil. Risotto, is one of my favorite dinners  for my family. Avocados are so healthy, so try adding them to your diet. Find them at your local farmer’s market, or health food store.


AvocadoGroveBloggers

Bloggers Kim from Rustic Garden Bistro, Lisa  from Whisk and Cleaver, Liz from Liz the Chef and myself.

Her Fuerte Varieties!

mimi4

Here are the budding blossoms from one  avocado branch on Mimi’s farm.

The grove is very large with 100’s of  trees.

Avocados ready for the market!


Avocado Risotto with Lime and Olive Oil

This lovely risotto will warm your belly up with the touch of fresh citrus zest and juice. You can change up the citrus if you would like and add lemon or orange.
Course Main Dish or Side
Cuisine California Greek
Keyword avocado, lime, risotto
Servings 6
Author Mary Papoulias-Platis

Ingredients

  • 1/2 stick butter
  • 1 1/2 cups leeks, chopped
  • 1 3/4 cup arborio rice
  • 2 cups chicken or vegetable stock
  • 2 1/2 cups white wine
  • 1 teaspoon salt
  • 1/2 teaspoon pepper
  • 3/4 cup Greek Myzithra cheese or Parmesan
  • 2 avocados, peeled and diced into 1-inch pieces
  • Juice and grated rind of one lime
  • Drizzle of lime or regular extra virgin olive oil

Instructions

  1. Heat the butter in a heavy soup pot.
  2. Add the leeks and rice and saute on low heat for 10 minutes. Stirring constantly.
  3. Add the stock, wine, salt and pepper. Bring to a boil, reduce to a simmer.
  4. Cover and cook for 20 minutes. Stirring often to prevent sticking.
  5. Add the cheese of your choice, and stir well to mix.
  6. Remove from the heat and gently stir in the avocado, zest, and juice.
  7. Drizzle with lime olive oil or plain extra-virgin olive oil. Serve warm!


Try this risotto recipe and be happy!

Mary 

 
Other avocado recipes you may like:
 
Greek Avocado Ceviche
 
 
California Omelet with Avocado,Tangerines, and Cheese
 
 
Grapefruit and Avocado Cabbage Slaw
 
 
Enjoy!


{ 1 comment }

Roasted Beet Tart with Phyllo

by Mary Papoulias-Platis

Post image for Roasted Beet Tart with Phyllo

I often substitute phyllo in place of a typical crust, as I did here for this roasted beet tart. You would be surprised how much lighter phylolothis makes your dish.  Tarts are easy to assemble for a busy weeknight dinner, and it can be ready within an hour. Make sure you keep defrosted phyllo in your refrigerator for last minute meals such as this one. If you would like you may substitute your greens with blanched vegetables of your choice-for example broccoli, asparagus, or carrots.

melissasa beets

If you don’t have the time to roast your beets, you can purchase Melissa’s organic steamed baby beets in these packets cooked and ready to go. Just slice and add to your tart. You will possibly need to double the amount of beets, if you use the baby beets for this recipe.


IMG_1074

I do like to use fresh beets, so I may save the greens. Adding the greens enhances the flavor of the beets with a bitter taste. Beet greens are often thrown out, and overlooked but they are packed with nutritional benefits. They are a good source of protein, folate, and fiber.  Along with an added source of vitamin A,C,E and K. So, tell your grocer to keep them attached for you so you can enjoy their sweet flavor for your meals.

IMG_1091 (1)


Roasted Beet Tart with Phyllo

This is my version of a beet tart. Keep defrosted phyllo dough in the refrigerator so you can quickly cook this up for a quick lunch or for dinner. Purchased pre-cooked beets can be substituted. Serve alongside a soup or salad.
Course Main or Side Dish
Cuisine California Greek
Keyword beets, phyllo, tart
Servings 8
Author Mary Papoulias-Platis

Ingredients

  • 1/2 lb. phyllo dough, defrosted
  • 1/4 cup melted butter
  • 2-3 beets, roasted
  • 3-4 cups of beet greens, washed and roughly chopped
  • 1 bunch of green onions, chopped
  • 2 tablespoons olive oil
  • 1/2 teaspoon salt
  • 1/4 teaspoon pepper

Filing

  • 1/2 cup whole fat ricotta
  • 1/4 pound Greek feta cheese, crumbled
  • 1/2 teaspoon dried dill
  • 1/2 teaspoon salt
  • 1/4 teaspoon pepper
  • 2-3 teaspoons extra virgin olive oil

Instructions

  1. Pre-heat oven to 375 degrees.
  2. Wash and wrap each beet in foil. Place on a sheet tray and roast for 45 minutes.
  3. When beets are done and slightly cool unwrap and peel.
  4. Cut into 1/2-inch thick slices. Reduce the oven to 350 degrees.
  5. Butter the bottom of a 9x12 pan and layer the phyllo one sheet at a time, buttering after each later. Set aside. You may need to cut the phyllo sheet dough to fit your pan.
  6. In a deep pan saute beet greens and onions in 2 tablespoons of olive oil. Add salt and pepper.

  7. Cook until the greens and onions are softened about 8 minutes. (if needed add a little water to the pan to cook greens) While greens cool, make the filling.

  8. In a small bowl combine the cheeses. Spread the cheese on the top of the phyllo dough.

  9. Add the greens and onions to the top of the cheese layer.
  10. Add the sliced beets and sprinkle with dill, salt, pepper, and olive oil.
  11. Place in the oven and bake for 45 minutes.
  12. Cool for 10 minutes. Carefully remove from a pan and cut into serving pieces.

 
Try a few of my other beet recipes:
Roasted Beet Hummus
 
Roasted Beet Relish with Feta on Crostini


Lamb Ribs Poached in Olive Oil with Blood Oranges and Beets


{ 4 comments }

Spinach Pesto with Feta Puffs

by Mary Papoulias-Platis

Post image for Spinach Pesto with Feta Puffs

Fridays have come and gone, and I’m finally back, to give you a refreshing new recipe for Feta Friday, Spinach Pesto with Feta Puffs. I know everyone loves pesto, especially if it’s warm and garlicky. Spinach Feta Puffs are a match made in heaven and is a very common staple in my kitchen and why not! I have made these puffed balls (called profiteroles) before many times as a dessert. But, having so many herbs in my garden, I decided to try them as an appetizer. Instead of stuffing the inside which is traditional, I just cut them in half and sandwich them with pesto. The puff can be made ahead, and reheated in the oven. If you can serve these warm, they begin to ooze out with feta and spinach with each and every bite. Many greens can be used for pesto, just make sure to remove any tough stems before processing. You can also change the nut from walnuts to pine nuts, almonds or pecans.

Spinach Pesto Feta Puffs

For those of you who don’t eat spinach, try substituting greens such as kale, basil, arugula or cilantro. If these greens are not commonly found, try Melissa’s produce.


Spinach Pesto with Feta Puffs

For a warm appetizer that will make your guests and family happy you can quickly whip these up for all to enjoy.
Course Appetizer
Cuisine California Greek
Keyword pesto, Sauce, spinach
Servings 8
Author Mary Papoulias-Platis

Ingredients

  • 1 cup whole milk
  • 1/2 cup butter
  • 1/4 teaspoon salt
  • 1 cup flour
  • 4 large eggs
  • 1/2 cup crumbled feta
  • 1 egg for egg wash

Pesto

  • 1/2 bunch spinach
  • 1/2 cup Greek basil
  • 3 cloves garlic, chopped
  • 1/4 cup chopped walnuts
  • 1/4 cup grated Parmesan cheese
  • 1/3 cup extra virgin olive oil
  • pinch of pepper

Instructions

Feta Puffs

  1. In a 2 quart saucepan heat the milk, butter, and salt, until it comes to a boil.
  2. Remove from the heat and with a wooden spoon vigorously stir in the flour all at once until mixture forms a ball, and leaves the side of the pan.
  3. Add the eggs, one at a time.
  4. Beat after each addition until smooth. Stir in crumbled feta and cool slightly.
  5. Preheat oven to 350 degrees.
  6. Lightly grease a sheet pan or line with parchment paper.
  7. Drop batter in small 11/2 inch balls.
  8. Make the egg wash by beating the 1 egg with 1 tablespoon water or milk. Brush on balls with wash.
  9. Bake for 15-20 minutes until golden brown. Transfer to a wire rack to cool.

Pesto Filling

  1. Place the spinach, basil, garlic in a food processor and process.
  2. Add the cheese and walnuts and process until finely chopped.
  3. With the motor running add the olive oil and pepper.
  4. Slice each ball in half and spoon in pesto, cover with top.
  5. Serve warm.


Take a look at my many pesto recipes!

Pecan Pesto

Pecan Pesto Butter Sauce

Fresh Pesto three ways.

Fresh Pesto Three Ways


If you garden don’t forget to plant herbs and greens to make your own pestos!

Mary


{ 7 comments }

How to Make Breakfast Bulgur

by Mary Papoulias-Platis

Post image for How to Make Breakfast Bulgur

How to Make Breakfast Bulgur is one of many requested recipes when I teach cooking classes. Bulgur has so many uses in recipes as well as a great breakfast alternative to oatmeal. I use it as a thickener for soups, casseroles and quiches. We often go back to our family traditional use of bulgur in our turkey stuffing on Thanksgiving Day. Growing up with Tabbouleh at the table we try to keep bulgur on hand in our pantry for our Greek dishes. This grain is a wheat that has a high nutritional value with a soft chewy texture. It often comes in coarse, medium, and fine varieties. Look for it the grain section, near the rice of your store or in large bins in your natural food stores.

Bulgur contains the following benefits

  • High in fiber
  • Potassium
  • Iron
  • Protein

Substitutions/Additions 

  • Add bulgur to your cold salads salads.
  • In place of white rice in your pilafs.
  • Add to breads and baked goods for a crunch.
  • Mix bulgur into meatballs and meat loaf.


 Let’s get started!
(If you’re making plain bulgur just follow the first recipe.)
But, take a look at the how the bulgur looks in the steps below as it cooks.

bulgur1


Set out all the ingredients on a sheet tray.

bulgur2


Add the water to the saucepan and bring to a boil. Add the bulgur, stir and cover and set aside.

bulgur3


 Let it sit for 15 minutes. In a small saucepan (or the same one-washed out) add the orange juice and zest.

In a small saucepan (or the same one-washed out) add the orange juice and zest. Bring to a boil. Remove from the heat, steep for 10 minutes. Fluff the bulgur with a fork and mix in the fruit and juices. Serve warm!


How to Make Breakfast Bulgur

An easy grain to cook and add to several of your dishes. Add bulgur for extra nutritional benefits to your soups, meatballs, and salads.

Course How To Make Bulgur
Cuisine California Greek
Keyword bulgur, grain, side dish
Servings 3 cups
Author Mary Papoulias-Platis

Ingredients

  • 1 cup fine or medium bulgur
  • 1/2 teaspoon kosher salt
  • 1 cup water

Instructions

  1. Rinse and drain the bulgur.
  2. Bring 1 cup of water and salt to a boil in a heavy saucepan.
  3. Stir in the bulgur, cover, and remove from the heat.
  4. Leave the bulgur to steep, covered for 15 minutes.
  5. Drain off excess water, and fluff with a fork.


Orange-Infused Hot Bulgur with Fruit

Adding fruit to your hot bulgur cereal gives breakfast a nutritional boost for your morning.
Course Breakfast
Cuisine California Greek
Keyword breakfast, bulgur, grain, oranges
Servings 4
Author Mary Papoulias-Platis

Ingredients

  • One bulgur recipe from above
  • 1 tablespoon brown sugar
  • 2 tablespoons butter
  • 1 orange zest and juiced
  • 1/4 cup dried prunes, sliced
  • 1/4 cup dried apricots, sliced

Instructions

  1. Make the bulgur recipe and add the brown sugar and butter to the water before adding the bulgur.
  2. While the bulgur rests make the fruit mixture.
  3. In a saucepan, bring the orange zest and juice of the orange to a boil.
  4. Stir in the prunes and apricots and remove from the heat to steep for 10 minutes.
  5. Stir the warm fruit and juice into the warm bulgur.

Bring on the Bulgur! 
Mary 


You may also enjoy the following bulgur recipes on my blog. 

Artichokes Stuffed with Bulgur and Mushrooms

How To Make Garden Tabbouleh without a Recipe


{ 2 comments }

Post image for Greek Slaw with Olive Oil “Lachanosalata”

Late winter is perfect for cabbage and winter slaws.  I planned ahead and planted both and used most of my cabbage heads for fresh salad and for topping fish tacos. This version of my Greek Slaw with Olive Oil is what I grew up with in my household. Mayo dressing was not an option. I can never remember having it in our refrigerator. This is the beginning of Great Lent in the Orthodox religion and a simple meal such as this is prepared for a light lunch or as a side. What makes Greek slaw salad so different than the American version is the dressing. We use a simple olive oil dressing with fresh lemon.  What makes this salad pop with flavor is using a premium extra-virgin olive oil and fresh lemon juice. (not that bottled stuff). An apple-cider or red wine vinegar can be substituted from your pantry in place of the fresh lemon.

And that’s one thing I love about the Greek Diet, recipes are easy and fast, using whatever ingredients you have on hand!


Pictured above is my red cabbage I grew and just picked for this recipe.
Not only is this cabbage so fresh and flavorful, but the leaves are large and majestic in your garden!

Greek Slaw with Olive Oil "Lachanosalata"

This refreshing slaw can be made year-around with the simple traditional oil-lemon dressing. Dress it up with your choice of nuts, dried fruit and additional vegetables. And don't forget to add red and green cabbage to your garden list next year.

Course Salad or Side Dish
Cuisine California Greek
Keyword cabbage, olive oil, salad, slaw
30 minutes
30 minutes
Servings 6
Author Mary Papoulias-Platis

Ingredients

  • 1/2 head red cabbage, shredded
  • 1/2 head green cabbage, shredded
  • 1 bunch radishes ,trimmed and sliced
  • 1/2 cup sesame or sunflower seeds
  • 1/2 cup fresh parsley, finely chopped

Dressing

  • 1/2 cup extra-virgin olive oil
  • 1/4 cup fresh lemon juice
  • 2-3 garlic cloves, chopped chopped
  • 1/2 teaspoon salt
  • 1/4 teaspoon pepper

Instructions

  1. Place the shredded cabbage in a large bowl.
  2. Add the radishes, nuts and parsley.

  3. It can be covered and refrigerated at this point.
  4. Combine the olive oil, lemon juice, garlic, salt and pepper. Shake to mix.

  5. Before serving add the dressing and mix thoroughly..

Recipe Notes

Additional options: Add shredded carrots, celery, apples, dried fruit, and nuts.


This slaw is a wonderful salad for a BBQ or a large gathering, because it can be left out without refrigeration. This can be assembled the day before without the dressing. And don’t forget to add this to your Meatless Monday list of quick family recipes.


IMG_1537


Making your own dressing is so rewarding. Start out with a bottle of fresh extra-virgin olive oil and add your favorite spices. This gives you, your very own signature salad!

Enjoy cabbage for all it’s health benefits,

Mary 

Other Cabbage Recipes for you to try:

Grapefruit and Avocado Cabbage Slaw

Greek Stuffed Cabbage Rolls with Meat and Quinoa

Cabbage Soup with Fresh Vegetable Stock


{ 2 comments }