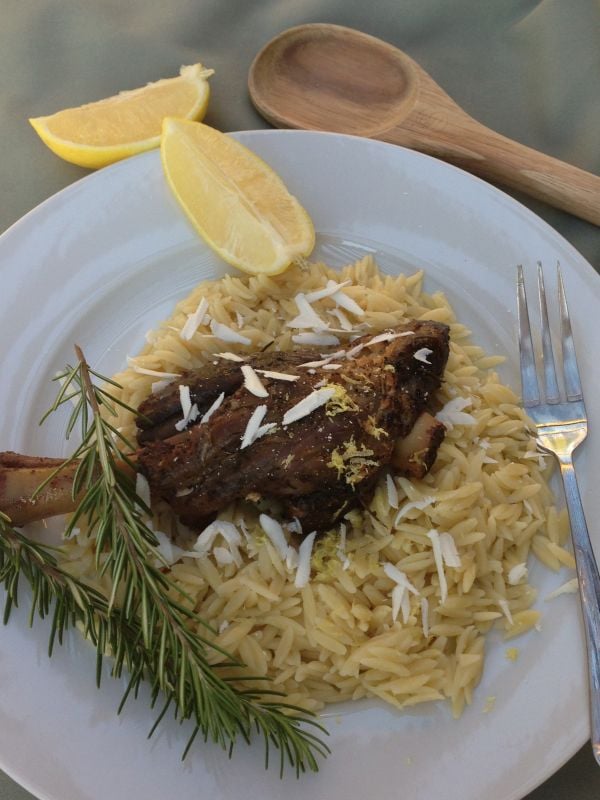
These Greek Lamb Shanks with Orzo, is one of our “best-sellers” from our catering company and the county fairs for years. We don’t make this dish very often, but when we do it’s for a holiday or for a special occasion. A simply made marinade whisked and poured over the shanks for tenderness is made to enhance their rich deep lamb flavor, then later used to add to the orzo which we serve alongside the shanks. Serve these Greek lamb shanks the day they’re made or they can be made the day before and re-heated for a larger crowd. The recipe can be cut in half, if needed. One shank per person is ample. If these Greek lamb shanks are hard to fine try a nearby restaurant food supplier or wholesaler. You can also purchase these lamb shanks at Restaurant Depo, or a natural food outlet.
This traditional lamb dish is marinated with garlic and rosemary for a very earthy and warm dish served usually during the holidays or for a special occasion. We serve orzo alongside made from the deep browning juices of the lamb. This dish is best when made the night before.
Course
Main Dish
Cuisine
California Greek
Keyword
Greek, lamb shanks, orzo
4hours
4hours
Servings12
AuthorMary Papoulias-Platis
Ingredients
12lamb shanks
2teaspoonsalt
1teaspoonpepper
4cupscooked orzo
1/4cuptomato sauce
3-4tablespoonsolive oil
Mizithra or Parmesan cheese for topping
Marinade
4cupsred wine
2cupsolive oil
1cupfresh lemon juice
4large sprigs of fresh rosemary
1/2cupwhole fresh garlic, chopped
salt and pepper
Instructions
Preparation
Preheat oven to 400 degrees.
Salt and pepper both sides of each shank.
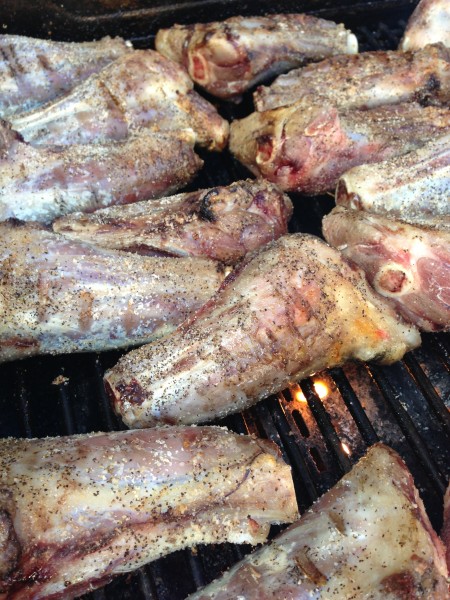
Place on a hot grill and brown on all sides, about 15 minutes.
(This can also be done in a hot skillet with a little olive oil.)
Place in a deep casserole or baker and pour marinade over the shanks.
Make sure there's enough liquid to cover the shanks. Place the sprigs around the shanks.
Cover the pan tightly with foil and place in the oven.
Bake for 4 hours. Remove and let cool for 10 minutes. Serve with orzo on the side.
Orzo
Bring salted water to a boil in a large pot.
Add orzo and cook until al-dente.(almost done)
Drain and place back in the pot.
Add 3-4 tablespoons of olive oil to pasta and stir gently to cover. Set aside.
While the shanks are resting, add about 1 cup of strained lamb juice to the pre-cooked orzo and stir. (You can add 1/4 cup tomato sauce if desired)
Place over low-heat and re-heat until warm and add more juices if needed.
Serve with lamb.
Sprinkle the dish with Mizithra or Parmesan cheese.
Placing the shanks on the BBQ gives them a glazed browned crust which is important for keeping the shanks juicy.
This also can be done inside in a very hot skillet with a splash of extra virgin olive oil.
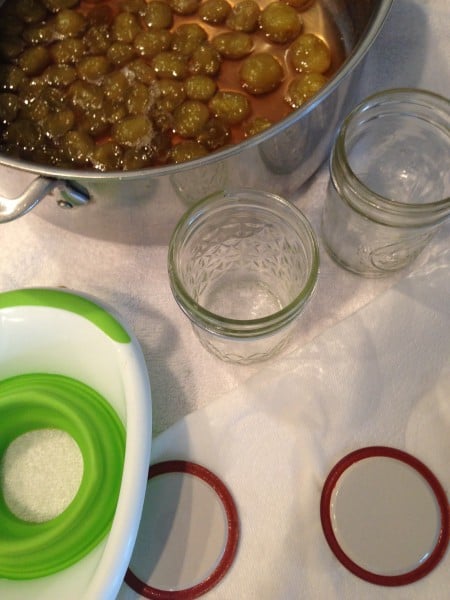
My mother-in-law Helen taught me everything I know about canning with fruit. When I was younger and watching her preserve various seasonal fruits throughout the months, it inspired me to continue with my own family’s traditions in the kitchen. Green grapes are now in season, especially the large seedless ones you’ll find this month at your farmer’s market. This recipe can be made without canning just simply place the preserves in a covered container, and refrigerate. If you choose to go the canning route, and need more information on canning , please visit the Ball Canning site for the list of canning equipment and methods you might need for this recipe. This recipe will yield around five or six (8 oz.) jars, depending on the size of your grapes. You can halve this recipe for a smaller batch.
Delicious over vanilla ice cream this caramel colored marmalade is worth making for the long winter days. You 'll need a candy thermometer for this recipe, to ensure the cooking time. The gel-point for this recipe is 220 degrees.
Course
Dessert
Cuisine
California Greek
Keyword
canning, jams, marmalade
AuthorMary Papoulias-Platis
Ingredients
8cupsgreen grapes
4cupssugar
1cupwater
1lemon, squeezed
Instructions
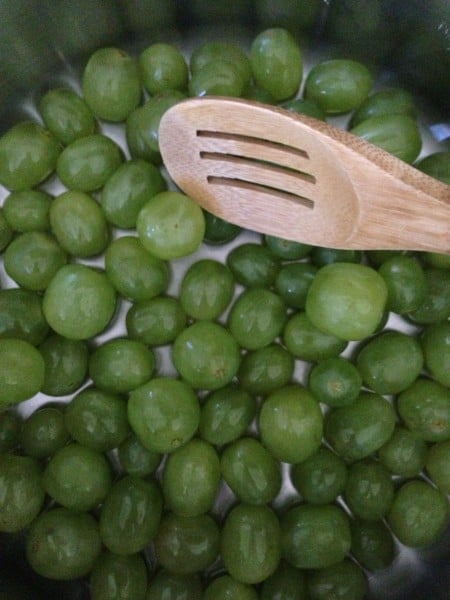
Wash, stem, and measure your grapes.
In a heavy large pot add the grapes, water and cook for 5-10 minutes.
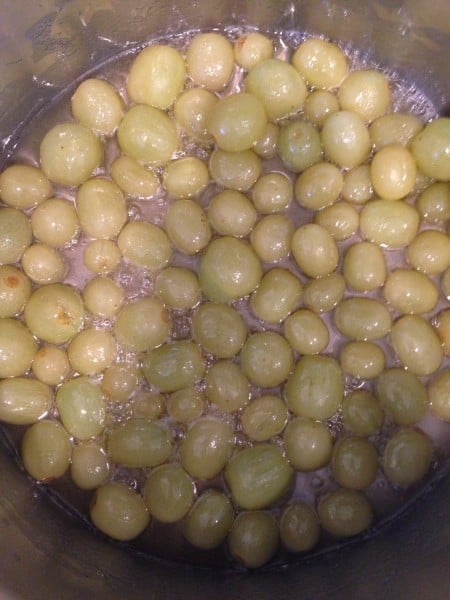
Add sugar and stir until all sugar is dissolved.
Continue cooking and stir occasionally until almost jellying point - 220 degrees.
This could take well over an hour depending on how many grapes you're cooking.
About 10 minutes before it's done add at least 1-2 tablespoons of lemon juice for above amount.
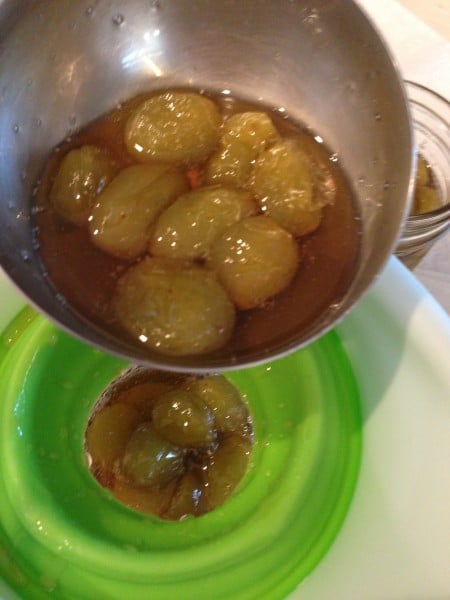
Pour, boiling hot, into hot canning jars and seal.
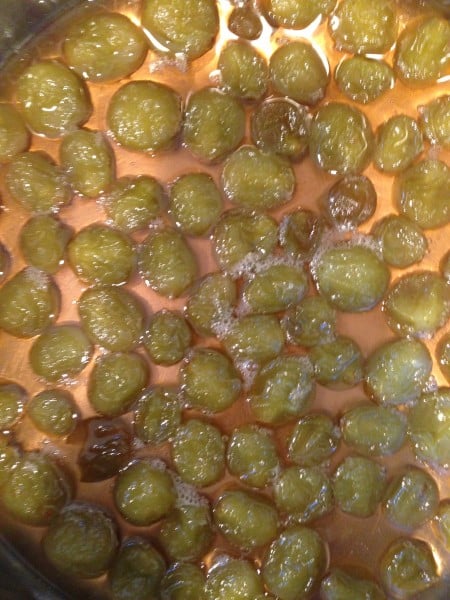
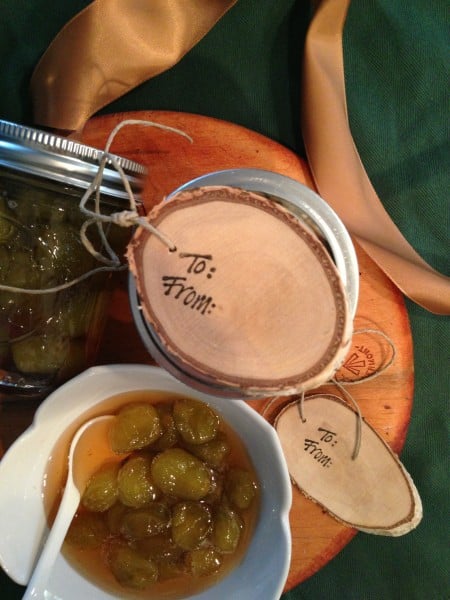
It will be a reddish caramel color when done.
Add the grapes to your deep pot and cook with the water until they soften .
Add the sugar and continue cooking until gel- point which is 220 degrees on a candy thermometer. This can take up to an hour.
Don’t forget to add the lemon juice 10 minutes before removing the pot from heat.
As you can see the grapes have taken on a reddish- color and are just about ready to be removed from the heat.
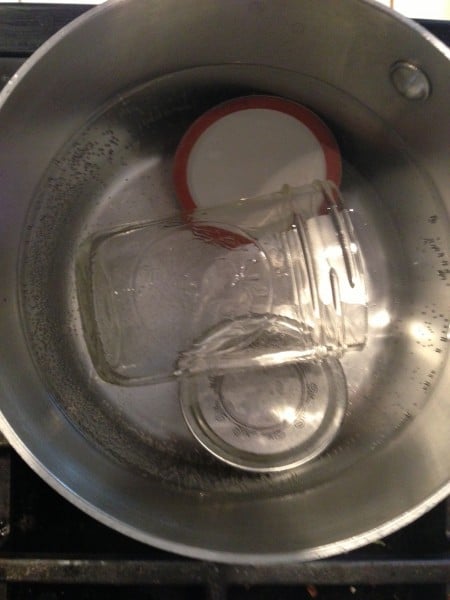
In the meantime, if you plan on putting the preserves in jars place them along with the lids in a hot water bath to sterilize.
Prepare all your equipment and pour hot preserves into hot bottles. Clean around the lids with a clean cloth and add lids.
Using the proper tools will keep you safe from the hot jars and food.
I encourage you to go online to learn about canning before you attempt it. Or simply, place the cooled jam in your refrigerator and use up within 2 weeks.
These preserves are wonderful on pound cake, over Greek yogurt, and served with vanilla ice cream.
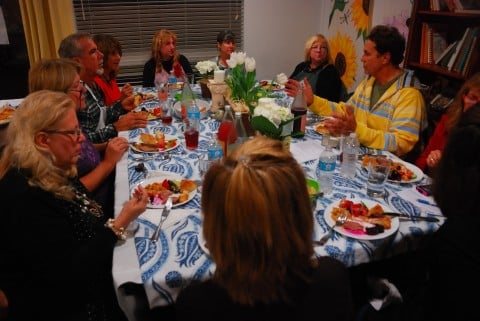
It couldn’t have been a more perfect ending to my holiday season, teaching and visiting with my students and friends during my Christmas cooking class this past week at the Center for Healthy Living in Solana Beach. We watched as my husband stuffed garlic cloves into the lamb, while I assisted with peeling beets, slicing tomatoes for our salad, and working with phyllo as we wrapped spinach – filled spanakopites. A special thanks to Diane Barnard for assisting me in the class. Thank-you to everyone who participated in this festive occasion.
Afterwards, we all sat down to enjoy each other’s company and shared stories told by everyone.
Introducing the class to everyone – I had friends from all parts of my life attending; Teachers, Greek girlfriends, Neighbors, Blog Followers, as well as many guests!
Peeling the cooked beets for a lovely salad with garlic sauce!
The baking station concentrating on their recipe.
Hands-on with the spinach and cheese pies- a group effort!
Setting the table table buffet style as we dig in to a healthful meal!
My favorite part of the evening is gathering around the table and sharing our thoughts of the day!
After attending TEDxSanDiego last year and having a remarkable experience, this year I was looking forward to spending the day with a special friend or family member . The date was approaching and no one could attend this year’s event. It was hard convincing everyone that until you spend the day at this event will you not understand the benefits you receive by the end of the day. It encourages you to open your mind to new innovative ideas, along with close-up dialog with the speakers throughout the day. I wouldn’t miss this event for anything.
I had just one ticket for me, but the night before the event I won a ticket on Twitter, so I asked my husband Mike to come along with me. This was gong to be his first-time attending. I told him I can literally spend hours telling him about the event, but I truly believe you need to be there, be present to hear the beat of the music, hear the tone of the speaker’s voice, and just purely feel the resounding energy that comes from the audience . This year’s theme was Cause/Affect and it was held at the Irwin M. Jacobs Qualcomm Hall. He agreed to come with me, even though it wasn’t his type of event.
And this is the funny thing that happened at TEDxSanDiego!
Upon arrival to the event the first glimpse of anything was this incredible display of sitting clay figures at the entrance. Hundreds of them, 800 exact , were positioned like these pictured all over the campus. This installation was designed by Miya Hannan and Jenny Yoshida Park, called “Critical Mass”. They each had a message in a the red center of each character.
We were all given one to take home and here is my gem!
The figures represented each person’s role as an agent of change. Questions were inside for the attendees to go out into the world and ask themselves and others to begin to create change in the world.
Quotes from Anne Frank, Leonardo da Vinci , Mother Teresa, and Gandhi were inside my figure.
He rests with my collection of children’s books.
We entered a large auditorium with three of my fellow bloggers, and we happen to sit in the second row up front.
A pictured captured before our lunch-break.
After a brief presentation by Jack Abbott, the founder of TedXSanDiego, he introduced the first speaker, Matt Emerzian. Matt’s presentation was called You Matter. His story was surrounded by the various effects his body had on the super busy work schedule he had for many years and how he managed to slow down and take charge of his life to make it “matter more”.
Half -way through his presentation, he looked over at our row and invited us up to the front to stand with him on stage! Us! (and remember Mike was sitting with us )
So, we’re up on stage and he continues with his talk, (by now I can’t remember a thing he was talking about or the answer I gave later on to his question as I gazed out into the audience of 800 people),
The question finally was spoken, “Why do you matter?” He handed the first guest a microphone as we listened on.
Mike was next. He took the microphone and then it all went silent. SILENT!
I glanced over and he was all choked up! All that could go through my mind at this point was “Don’t look over there or else”, so I did! Well, guess what? – I choked up-ugh!
It took a few moments for him to compose himself and he went on to talk about his work with homeless children at Casa De Amparo. It was perfect!
But by now I couldn’t remember a thing I was suppose to say! He handed over the microphone, and I got through it and so did the rest of the group.
Now you have to remember this is streamed live around the world! All I could think about is my kids and their reaction to dad choking up on stage.
Matt obviously made an impact on Mike and the entire room with his incredible life experience. As we listened to several more speakers it was time for a short break. As we approached the center of the hall, Mike instantly became the star of the first half of the show! We were told the entire back room where the speakers sat didn’t have one dry eye in the group. Several people approached him, and I was approached in the bathroom by many women as well. Who would have thought my husband was so touched! Afterwards, Mathew visited with Mike and signed his book over to us- such a treat!
Matt talking to me about Mike and how many women come up to him and often comment on how their husbands react to his talks.
The first half of the program was called Cause/Belief. These presenters spoke about how belief in oneself, an organization, and humanity changed their lives. In these session everyone had a purpose for their new step in life and all the changes they had to overcome to become the person they are today. Some had experienced health issues, others had uncontrolled circumstances. Overall, Dr. Edith Eger’s remark hit me the hardest; ” “Nobody Can Take Your Spirit”.
The food was delicious this year, and their were many choices to make: from paella to sliders.
Mike enjoying the sliders…boy did that make him happy!
Here, my fellow food blogger, Mimi Avocado, enjoying her spicy but delicious taco.
I saved the best for last, meeting Ken Blanchard and having the chance to chat with him for a few seconds!
His talk-away message for me was when on a project and you’re collaborating with another partner you must have essence first ( your relationship) and form later ( how your writing or developing it,details,$) .
TEDxSanDiego is coming again next year, and I highly recommend you attend it! Spend the day in your city relaxing and meeting some of the most creative and motivated speakers from around the world.
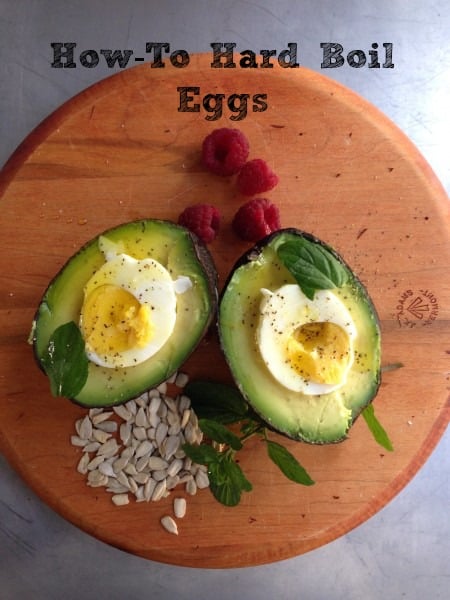
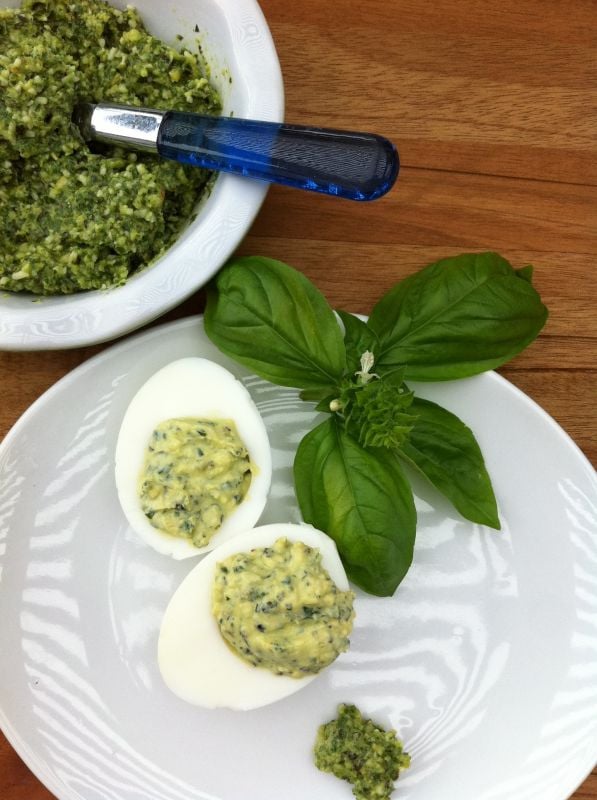
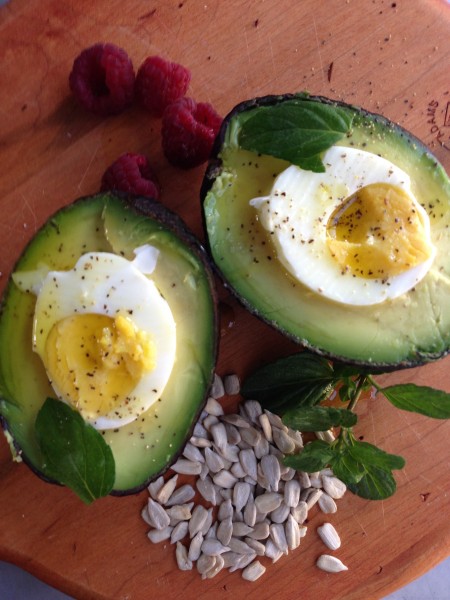
Let’s just face it, it’s hard to boil an egg without the ugly gray line around the yolk. I love my eggs, any way I can eat them. When I’m asked to bring a dish to a party, deviled eggs is always my first choice. I have made hundreds of boiled eggs in my lifetime and this method works! Trust me. Only a crazy avocado fan like me can dream up this edible creation to eat. But, I do crave eggs, morning noon and night. And one day in the summer, when basil was abundant in my garden, I decided to make pesto and make spicy basil deviled eggs. The recipe can be found here, Pesto Deviled Eggs. You’ll be loved for bringing them to your next get-together. But, let’s talk about how to boil the perfect hard boiled egg!
And I must have avocados on hand in my kitchen at all times. Besides, isn’t that the reason I stay in California? So, one day I had an avocado on hand too to eat – so I married the two and they fit together perfectly. A pinch of salt and pepper, a dash of olive oil or lemon and you’re on your way to a creative duo for breakfast, lunch or brunch. If you want to get rid of the ugly green lines around your cooked eggs, please read -on.
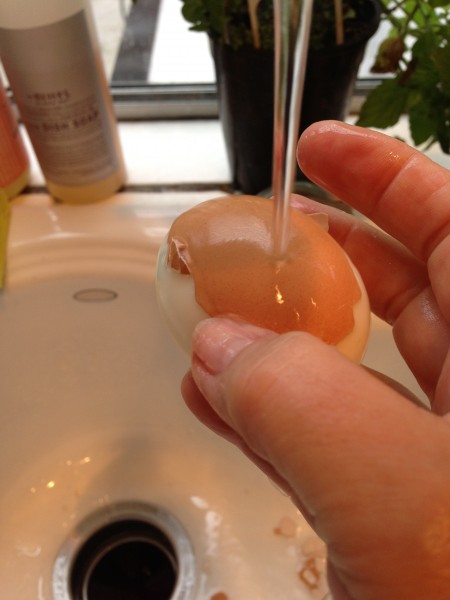
Let’s get started!
Peeling under water creates a non-blemished peeled egg. Or crack the egg slightly, add to a bowl of cool water. Peel in a few minutes.
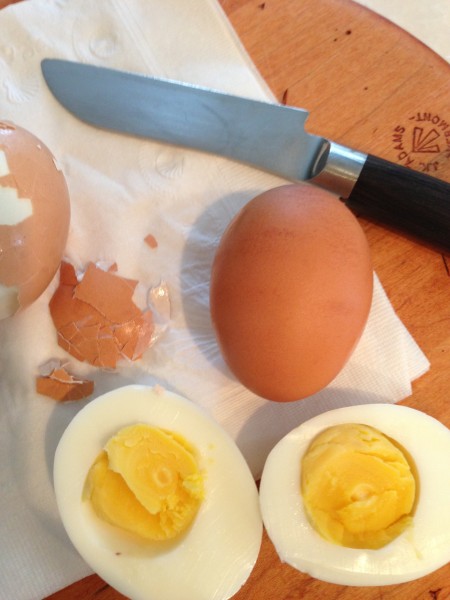
The secret to getting a beautiful egg without the green around the yolk is to not overcook the egg.
If you love eggs as much as I do try these recipes on my blog:
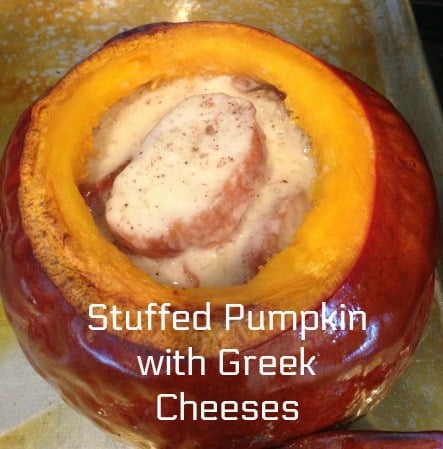
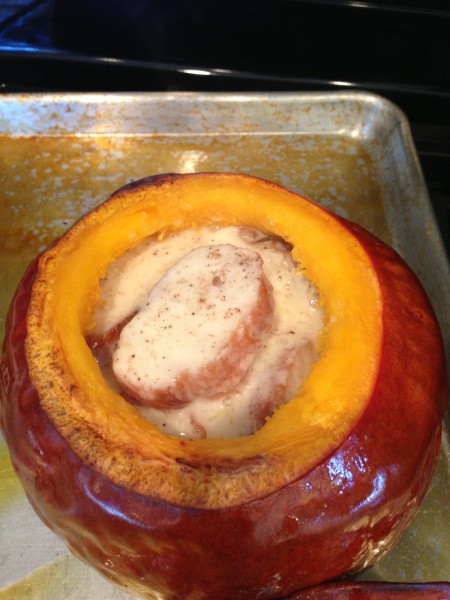
I love fondue, anyway I can get it. I work with sugar pumpkins all the time, and I was wondering if you can stuffed an entire pumpkin. So, I began looking at recipes and I was inspired when I read an issue of the Gourmet Holiday Magazine, and they stuffed a pumpkin with cheese for a fondue. I found this so intriguing I thought I would try it and use Greek cheeses instead. It took me awhile to decide what cheeses to use but I chose one hard and one soft cheese for the filling. It was such a beautiful presentation, I will make this again for Christmas but possibly change it up for the seasons. Try finding sugar pumpkins in your supermarket or visit a nearby farmer’s market and ask if they have any left at their farm.
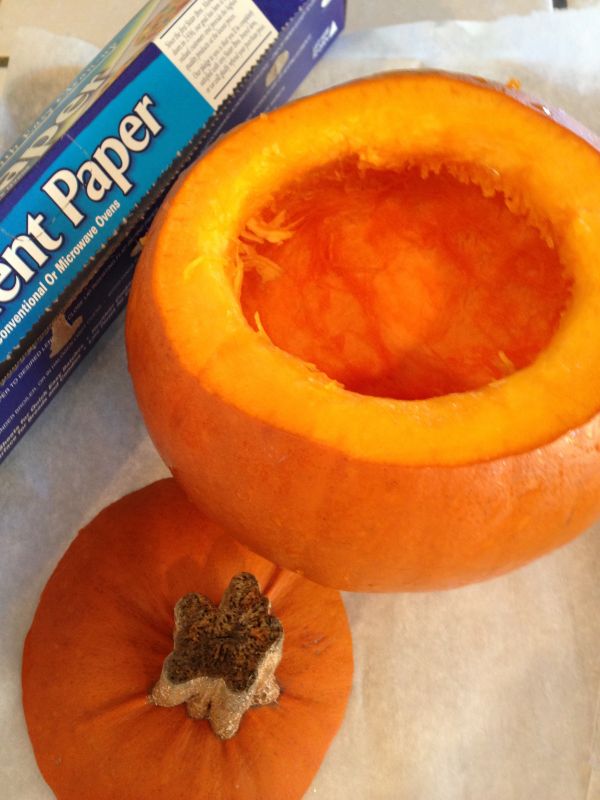
A fresh pumpkins should have bright orange flesh like this one. The stem should also be attached and hard. Clean out your pumpkin and make sure all the seeds and strings are removed before stuffing.
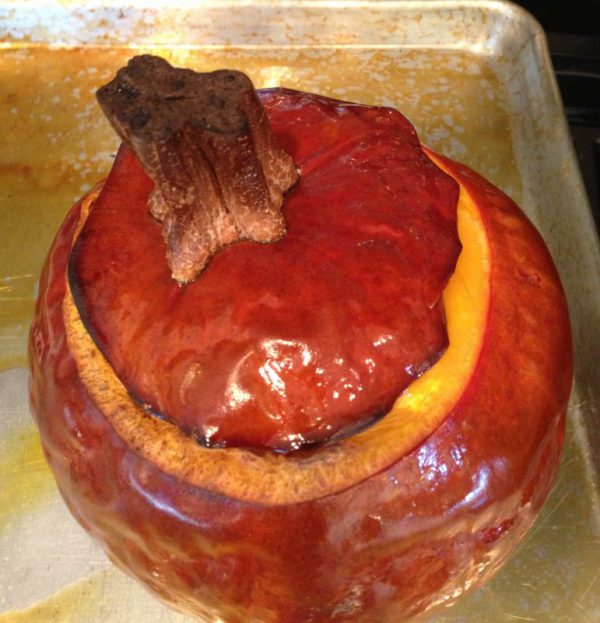
This is how it looks when it comes out of the oven warm and gooey with a beautiful scent of pumpkin. Do not cook it ahead of time. (the cheese hardens). Plan ahead and place it in the oven so it’s ready when your guests arrive. Serve it up with freshly sliced baguettes or a strong cracker. I had a pretty appetizer knife alongside to scoop up the goodness.
Inspired by Gourmet Magazine this stuffed pumpkin appetizer is a sure hit for your holiday table. It makes a knock-out presentation for your guests. I used Greek cheeses that are available at all cheese shops, or use cheeses of your choice.
Course
Appetizer
Cuisine
California Greek
Keyword
baked, greek cheeses, sugar pumpkin
30minutes
1hour30minutes
2hours
Servings6
AuthorMary Papoulias-Platis
Ingredients
1 - 4lb.sugar pumpkin
1/2baguette, cut into 1/2 inch slices, toasted
3/4cupheavy cream
1/2cupchicken or vegetable broth
1/4teaspoongrated nutmeg
3/4cupgrated Kasseri cheese
3/4cupgrated Vlahotiri cheese
1tablespoonolive oil
salt and pepper
Instructions
Preheat oven to 450 degrees.
Toast the baguette slices on a cookie sheet in the oven until tops are crisp. Cool.
Remove the top of the pumpkin using a sharp knife, cutting around the stem 3 inches in diameter. Set aside.
Scrape out the seeds and pulp with a spoon from the inside of the pumpkin.
Season the inside of the pumpkin with 1/4 teaspoon salt.
Whisk together cream, broth,nutmeg,1/2 tsp. salt, and 1/4 teaspoon pepper in a bowl.
Mix together cheeses in another bowl.
Place a layer of bread in the bottom of the pumpkin. (Do not overlap)
Cover with 1/2 cup of the cheese mixture.
Add 1/4 cup of the cream mixture.
Repeat one more time with bread, cheeses, and cream until 1 -inch from the top.(You may have bread and cheese left over)
Cover the pumpkin with the top, and place on a parchment covered sheet pan.
Brush the outside with olive oil.
Bake until the pumpkin sides are tender and filling is puffed, 1-1 1/2 hours.
Remove from pan and place on serving platter with remainder baguette or crackers.
Recipe Notes
The pumpkin can be stuffed 2 ours before baking and chilled. Bring to room temperature before baking. If the pumpkin gets cold, you can place it in the microwave or reheat it in the oven to reheat the pumpkin. Best when served warm!
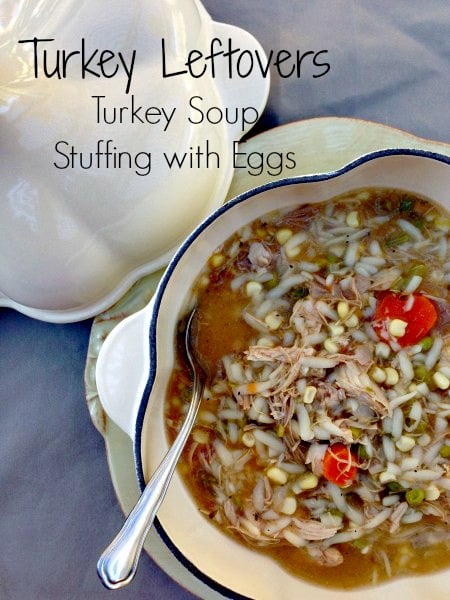
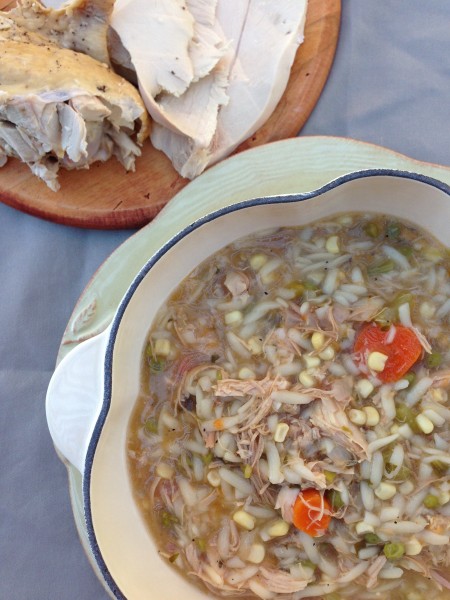
Whether you hosted Thanksgiving and cooked the turkey or you brought home a plate of leftovers, you have to decide to eat it as is, or turn it into a new meal for a quick dinner. Every year I make homemade turkey vegetable soup from the carcass and enjoy a richly flavored broth for a soothing bowl of soup- a nice way to stretch the turkey. If you don’t have the carcass you can substitute chicken broth to make this soup with the extra turkey you may have. This soup has all the nutrients you need for several days. It an be reheated for tomorrow’s lunch. Use what you have in your refrigerator, and pantry. After making this a couple of times, you will be able to substitute your favorite foods.
And what to do with the stuffing? Have it for breakfast with your eggs and get a quick boost for the day. The recipe is below with just one example – have your eggs scrambled or sunny-side up, your choice.
Any leftovers can be made into a terrific soup for your next day meal. Add what you have on hand, vegetables, rice or pasta and enjoy a warm and healthful dish.
Course
Soup
Cuisine
American-Greek
Keyword
homemade, soup, turkey
AuthorMary Papoulias-Platis
Ingredients
Broth
1leftover turkey carcass, cleaned of most of the meat. Cut into pieces.
1bay leaf
1/2onion
3-4peppercorns
2celery
3carrots
1teaspoonsalt
1/4teaspoonpepper
Soup
6-8cupsturkey broth, chicken broth or vegetable
3-4carrots, peeled and chopped into 1/2 inch pieces.
2stalks celery, chopped
1onion chopped
1/2cupfresh or frozen corn
1/2cupfresh or frozen peas
1or more of the turkey meat torn into small pieces
1/4cuptomato sauce
2teaspoonssalt
1/2teaspoonpepper
1/2cuporzo, rice or noodles
Instructions
For Broth
In a large dutch oven place the carcass in the pot with water to cover one inch above the bones.
Add the remainder ingredients and bring to a boil, reduce heat and simmer for a couple of hours.
Remove from the oven and cool. Pour and strain the broth through a sieve into a big bowl.
Discard the bones and cooked pieces. Cool broth.
Soup
In a large soup pot saute onions, carrots, and celery with olive oil until onions are soft.
Add the broth and all the remaining ingredients except the turkey and orzo.
Bring to a boil and reduce the heat to a simmer and cook until carrots are tender around 10-15 minutes. Add the turkey, orzo, frozen corn, and frozen peas and simmer for 20 minutes. Test to see if orzo is done.
You may need to add more broth or water if the soup is too thick.
Taste for salt and pepper.
Have leftover stuffing? Why not make it a meal for breakfast or a quick lunch. Here, I decided to add an egg to the pan and make a delicious and savory meal to carry me into the day! I make my stuffing with bulgar which adds a hearty element to this dish. But any stuffing will do.
Here’s how:
Place a frying pan on a medium heat and add a little olive oil or butter.
Add stuffing to the pan and flatten with the spatula so the egg stays in place.
Crack one or two eggs on top of the stuffing and add salt and pepper to taste.
Add any fresh herb; parsley, thyme, oregano
Cover and cook on low until egg is ready.
Carefully slide the stuffing and egg onto the plate.
Enjoy this homemade soup and egg breakfast using leftovers,
I have posted all my Thanksgiving traditional dishes in my past posts and thought you may enjoy a few simple ideas for a beautiful table. Over the years, I have collected many dishes and accessories but they come in handy for quick ideas for any occasion. If just starting out I suggest white dinner plates. Add colorful or themed salad plates and you have an instant display. Also, add one or two tall glass cylinders for your center table and look what you can do. I have designed three simple ideas for your fall table and all it took me was a trip to Michael’s or to my junk closet . Since I had all my decorative items out already I decided to add a white plate option to go with all the arrangements. I’m a firm believer in re-using what you have and making it work with a bit of creativity! Here’s a bonus: a Michael’s coupon page just for you from Michael’s.
My County Inspiration
I bought the corn at the grocery store, the feathers, sticks and shells at Michael’s.
I had the brown plate from my collection, made the stamped napkins year’s ago (my Martha days), and placed a wooden honey spoon for warmth.
My Elegant Touch
This is a copper spool for around $2.50 that was wrapped in circles inside the vase and then wrapped around the top. The orchids were pulled off from one stem and carefully placed in the vase. The vase can be filled with water for a beautiful effect, make sure to secure orchids with hot glue. The bird can be an accent piece ~ all from Michael’s.
This yellow depression plate has been a favorite of mine for years. I love old things so bring out Grandma’s china or hunt some down at your local resale shop!
My inspiration from these plates created the look above.
My Garden Path
Succulents are the new rage today! I couldn’t resist them, and I added green pomegranates and artichokes.
This can also be filled with water with a mini light for the base to light the vase. ( found at Michael’s- the light can be purchased there too.).
This again is a green plate from my collection – as you can see just adding a fresh fall leaf or fake one to any plate can be festive.
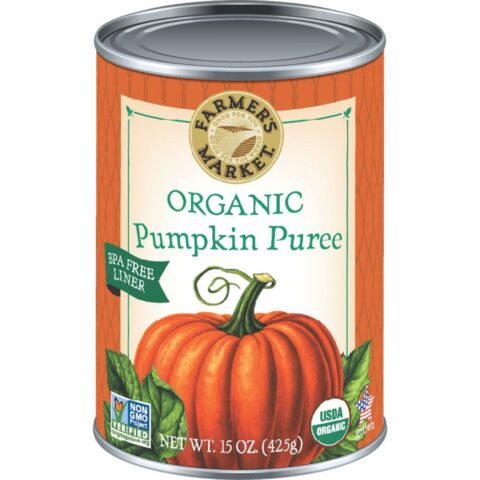
Before every Thanksgiving Day I visit the local ice cream shop to pick up their seasonal special ice cream, especially anything pumpkin. But lately, when visiting the shop I have enjoyed the frozen yogurt varieties they have offered more than the ice cream. And while planning my Holiday menu these last few days, I have decided to come up with my own version of Pumpkin Frozen Yogurt and serve it with a pumpkin seed brittle. In late October, I try and pick up the small sugar pumpkins for baking pies and breads, because I prefer fresh pumpkin puree. My goal is to get up early morning to roast two pumpkins a day. It’s not that difficult at all. Just remember not to skip the brittle, it adds a nice crunch. If in a crunch, you can use organic canned pumpkin. This is the canned variety I like to use. Find it here from Farmer’s Market.
Pumpkin is also a high nutrient food. To find more information visit: Web MD.
Pumpkin is recommended as part of a heart healthy diet that may help lower your risk of heart disease. It offers a long list of nutrients that protect and support the heart, such as vitamins A, B1, B6, and C, copper, fiber, folate, and manganese.
Pumpkin provides calcium, potassium, and magnesium, which can help keep your heartbeat regular and your blood pressure low.
The fiber in pumpkin can also play a part in lowering blood pressure as well as cholesterol. In addition, the fiber in pumpkin makes you feel full promoting weight loss.
A nice ending to any meal this frozen Greek yogurt has a bit of a pumpkin pie taste, with it's autumn spices. Switch this out for pie and enjoy it's Fall warm flavors.
Course
Dessert
Cuisine
California Greek
Keyword
brittle, icecream, pumpkin, seeds
Servings6
AuthorMary Papoulias-Platis
Ingredients
Yogurt Filling
1cupheavy whipping cream
1cupwhole milk
3large egg yolks
3/4cupsugar divided, 1/2 cup and 1/4 cup
1cupwhole-milk Greek yogurt, I used Fage
1 1/2cupfresh pumpkin puree or organic canned pumpkin
1/2teaspoonvanilla
1/2teaspoonnutmeg
1/2cupcinnamon
Pinchof salt
Pumpkin Seed Brittle
1cupsugar
1 1/2cupswater
1/8teaspoonsea salt
3/4cupraw green pumpkin seeds
Instructions
Pumpkin Yogurt
Combine 1 cup heavy cream, 1 cup whole milk, and 1/2 cup sugar in a heavy saucepan. Bring mixture to a simmer, stirring until sugar dissolves.
Whisk 3 large egg yolks and remaining 1/4 sugar in a large bowl until blended.
Gradually add hot cream to the egg mixture and whisk to blend.
Return mixture to the saucepan and stir over medium heat until custard thickens slightly and coats the back of the spoon, or instant thermometer reads 170 degrees.
Pour custard through a strainer and let cool slightly.
Whisk in yogurt, salt, vanilla, nutmeg and cinnamon. Refrigerate until custard is well chilled.
Transfer to an ice cream maker and process until thickened .
Place in a freezer container. Cover and freeze until ice cream is firm.
Pumpkin Seed Brittle
Place a large 24x12 inch sheet of parchment paper on a work surface or a sheet pan.
Bring sugar, water and salt to a boil in a 2-quart heavy saucepan. Refrigerate until custard is well chilled. Stir until sugar is dissolved.
Cook mixture without stirring, washing down any crystals from side of the pan with a pastry brush dipped in cold water.
Cook until mixture reaches soft ball stage of 238 degrees. Remove from heat.
Stir in seeds with a wooden spoon and continue stirring until syrup crystallizes.
Remove pan from heat and cook, stirring until sugar melts and turns a deep caramel color.
Carefully pour caramel onto parchment paper and carefully cover with another sheet. Roll out candy as thin as possible.
Remove paper and cool. Break into pieces.
Recipe Notes
Greek yogurt can be found at most your local food stores. If unavailable, place regular yogurt in a cheesecloth lined strainer, place in a large bowl, cover and chill overnight to drain.
3.1.09
The trick is to make sure it coats the back of your spoon when you run your finger across the spoon. Then it’s ready to pull off the heat.
I pulled the yogurt out of the ice cream maker when I sampled it and it was thick and creamy.
Stir the seeds until the sugar crystallizes.
Return to the heat until a deep caramel color. This is just beginning to turn- watch it carefully and pull it off the minute it changes or you’ll burn it.
Let it rest and cool. Then break into pieces and store in an airtight container up to a week.
Ice Cream Happiness!
Mary
Many more pumpkin recipes can be found on my blog under the category “pumpkin”.
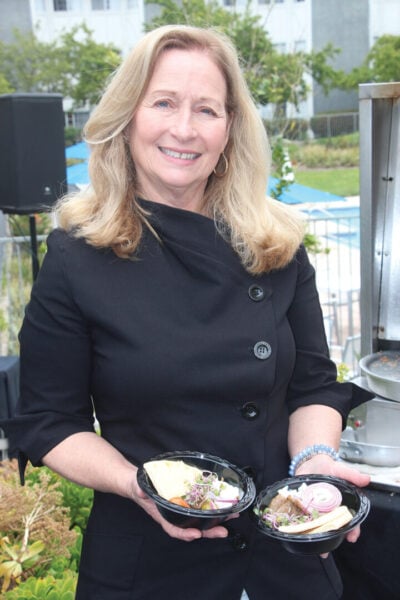
Hello from California Greek Girl. I’m the owner of Ethos Culinary located in the beautiful city of Carlsbad. Join me as we explore California’s bounty of foods, farmlands, and culinary experts. I’m looking forward to bringing you Greek, Mediterranean and Plant-Forward Cuisines. OPA!


 Hello from California Greek Girl. I’m the owner of Ethos Culinary located in the beautiful city of Carlsbad. Join me as we explore California’s bounty of foods, farmlands, and culinary experts. I’m looking forward to bringing you Greek, Mediterranean and Plant-Forward Cuisines. OPA!