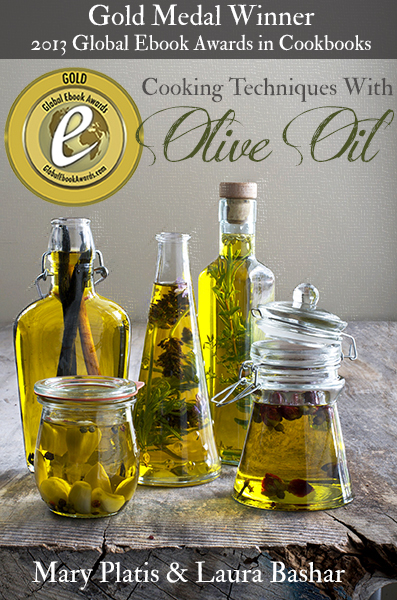
We have great news! This week we have been awarded the Dan Poynter Global E-Book Gold Award for our new book, “Cooking Techniques with Olive Oil”. For the past several months we have been waiting to hear whether we placed or not. This award was the biggest surprise to both of us! Now, we have this handsome sticker we can be proud to place on our eBook cover. We want to thank Dan Poynter and his staff for this great honor.
So, here’s a toast to you for being such loyal fans!
A Cucumber-Anaheim Chile Olive Oil Shot!
2 cups coarsely chopped cucumber
1 large Anahiem chile, finely chopped
2/3 cup water
1/2 teaspoon dill
1/4 teaspoon salt
1- 1 1/2 teaspoon sherry wine vinegar
Process in a blender and strain.
Place in shot glasses and add a layer of extra-virgin olive oil on top.
Makes 1 cup – good for 6 shots
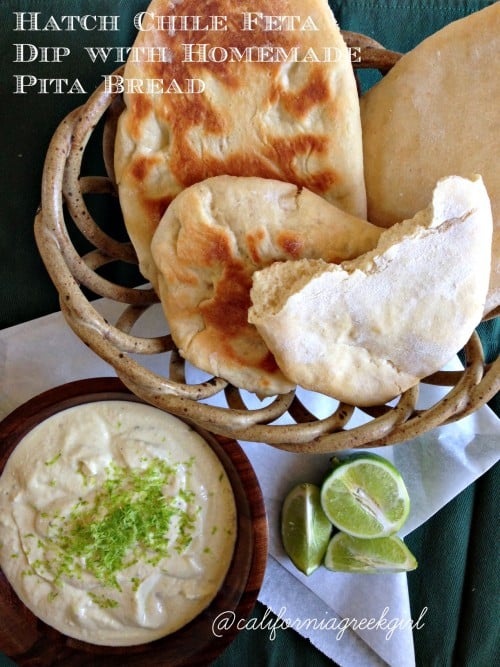
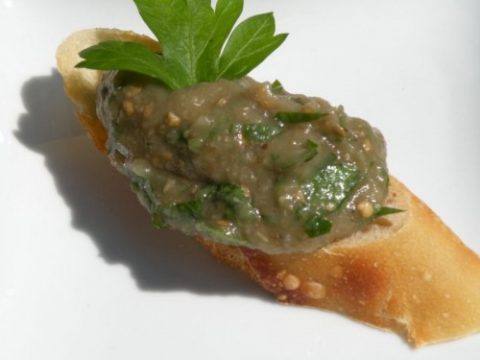
Let me introduce my first Greek Mexican twist during Hatch Chile Month! What does a Greek Girl do but add feta to everything she makes! Adding chiles to a feta dip gives it a new dimension and such a spicy kick. I won’t make a feta dip again and not use some kind of green chili. But first, you must prepare the chiles by rotating them to remove the flesh.
Take a look at Cooking Techniques on “How to Roast a Hatch Chile” to learn how. Along with giving this dish a wow-factor, it encouraged me to try and make something to go along with it from the Greek cuisine. Making your own pita allows you to add any spices or herbs you would like to the dough before baking it off. Because of the spiciness of the feta, I chose to go plain this time.
For Hatch chiles in your area go to Melissa’s Produce and check out where you might find these delicious chiles. I used the mild chiles for this recipe, but they do come in hotter varieties. As I pulled out the bread from the oven, not only did it take over my house with that fresh bread smell, to my surprise I loved the soft billowy texture of the bread. Perfect for the spicy feta dip, that yin-yang thing! Make sure you prepare the feta dip first, so that you can serve the pita hot, straight out of the oven!
It's Hatch Chili month, so I'm double-twisting my recipe with two of my favorite cuisines. With my new hatch chile feta dip and freshly baked pita bread. I can now scream out Olay and Opa!
Course
Appetizer
Cuisine
California Greek
Keyword
dip, hatch chile, pita bread
Servings12
AuthorMary Papoulias-Platis
Ingredients
Pita Bread
7cupsflour bread flour
1envelope active dry yeast, 1 tablespoon
2teaspoonssalt
2tablespoonsextra virgin olive oil
1/4-1/3cupwater
Hatch Chile Feta Dip
1cupcrumbled feta
1/2cupGreek plain yogurt
1/8cupextra-virgin olive oil
3-4mild hatch chiles, roasted peeled and seeded
Zest of 1 fresh lime
Juice of 1 fresh lime
Pinchof salt and pepper
Instructions
Pita Instructions
In a large bowl, add sifted flour. Stir in the yeast and salt.
Add the olive oil and mix in enough water to make a soft dough.
Turn dough onto a floured surface and knead for 10 minutes, or until smooth.
Cut into 12 equal pieces. Roll each piece into a ball, then roll into a 6-inch oval shape.
Place on a floured tray, cover with a towel and place in a warm place for 1 hour to rise.
Preheat oven to 475 degrees. Oil the baking tray and place in the oven to heat.
Place three pitas on the tray and sprinkle with water.
Bake 5 minutes or until puffed and lightly brown. Remove pita and wrap in a cloth.
Continue baking the remaining pitas.
Dip
Place everything in the blender or food processor, except the lime zest.
Place the feta mixture in a bowl and place the lime zest on top.
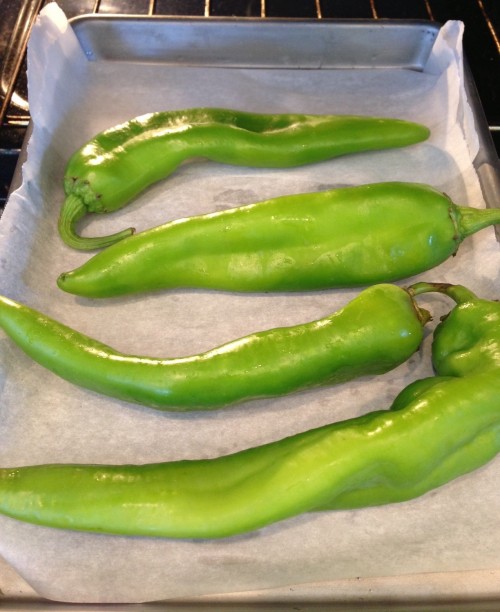
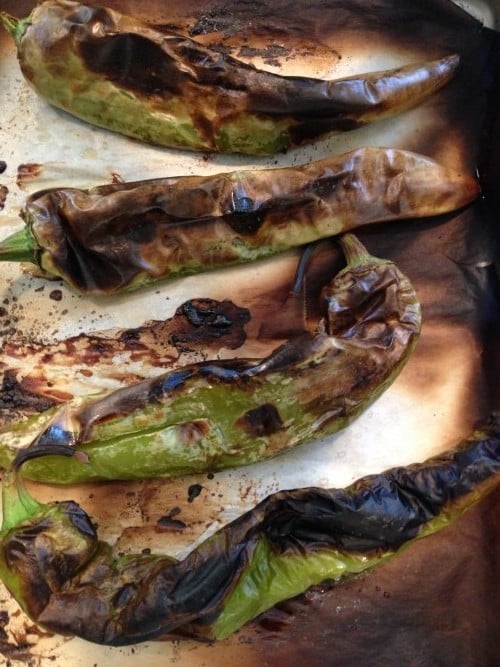
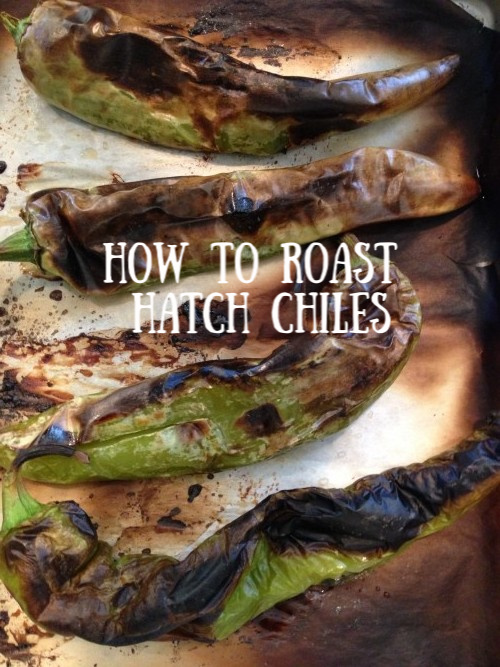
Hatch Chiles can be roasted in many different ways. Often during the season you may witness someone at the Farmer’s Market, roasting them with a large rotating drum method, the traditional method often used outdoors.
At home here are a few tips on how to roast chiles:
In a very hot 400 degree oven, roast them on a lined sheet tray.
As is, with tongs on the gas burners of your oven.
On your outdoor BBQ.
All you’ll need for this method is:
a sheet tray
liner for the tray (optional)
tongs for turning or a big fork
a brown sack or bowl
Place the chiles on your lined sheet tray and place under the broiler in the oven on the high setting.
WATCH CAREFULLY! Do not leave the kitchen. Turning often to brown all sides until blackened.
Remove from the oven and place in a brown bag and seal or a bowl, covered with plastic allowing the chiles time to steam. For about for 10 minutes.
Let them steam…
Sorry about the bad picture…but you get the point.
To clean the chilies carefully remove the skin and seeds. If still warm use a paper towel to rub off the outer skin.
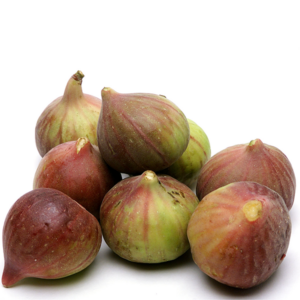
Every summer I remember hopping into the car with my parents and driving to North Park from La Mesa to visit several of my relatives and cousins. Once there I would make a run for the tree and help myself to handfuls of fresh figs. I eagerly awaited for dessert that evening for my aunt’s special Greek Fig Jam. Everyone had a big fat fig tree to pick fresh figs from during my summer visits there. I couldn’t wait to take my first bit of these juicy, soft -filled goodies. Figs are a Greek staple in the household, and I remember watching my Greek aunts make jelly and jam from their summer crops.
My favorite of all were my mom’s almond stuffed figs in a light syrup. Can’t find her recipe, but my memories are still very clear in my mind, how sweet and delicious they were. For those of you who are not so familiar with figs here are a few facts about the fruit.
Fig Facts
In ancient times they were an early symbol of peace and prosperity.
Figs were brought to America through the Spanish missionaries who came to set up Catholic missions in
Southern California. (Hence, the popular Mission fig)
They are among the richest plant sources of calcium and fiber.
Dried figs are richest in fiber, copper, manganese, magnesium, potassium, calcium, and vitamin K.
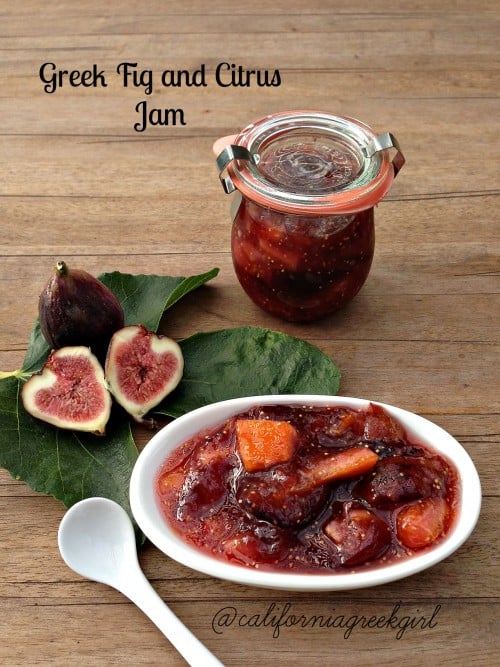
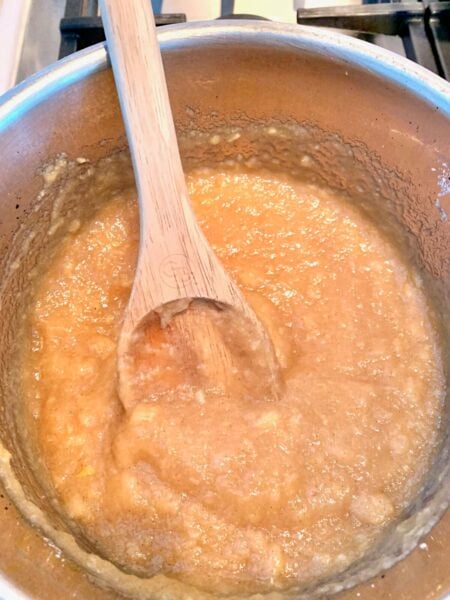
Once I began an interest in canning, my mother-in-law taught me how to process jams and jellies in her home one summer. Since then, I have taught many students and neighbors how to can their backyard fruits. Enjoy this recipe from my mother-in-law Helen. She loves citrus in everything, and this adds a lemony California kick to fig jam. Look for my mom’s recipe in the future as I try to nail it down, in the meantime enjoy this one fantastic recipe.
By the way, I made this jam from “Brown Turkey” figs.
Morning fig jam with toast is a great way to start your morning. Or slather it on your chicken breast, pork chop, or over ice cream.
Course
Condiment, Jam
Cuisine
California Greek
Keyword
fig, jam, preserves
AuthorMary Papoulias-Platis
Ingredients
12cupsfigs - diced into 1/2 inch pieces
10cupssugar
2oranges, chopped
1lemon, lemon
Instructions
Prepare your fruit and place in large heavy dutch oven.
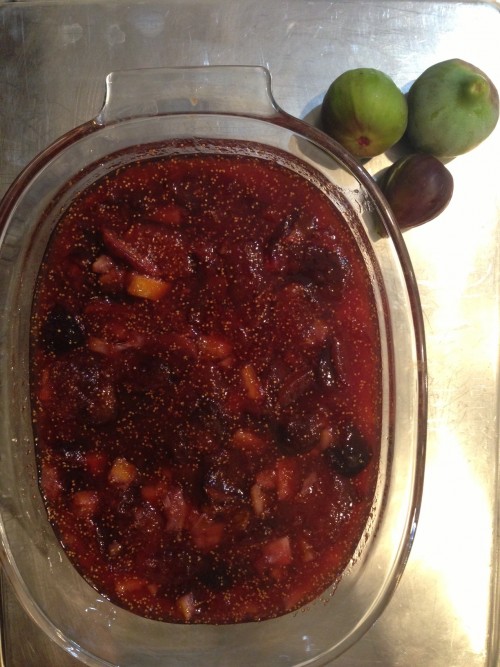
Place pot on medium heat (slight boil) and simmer for 40-45 minutes until thick. (Reduce to 1/3 of the original volume.)
Refrigerate jam or can in jars.
Recipe Notes
This jam is very chunky. It's great over fish, chicken and pork. For a smoother jam finely chop all the fruit. Wonderful as a spread on sandwiches or as a topping for your desserts.
Thick and ready to refrigerate or can in jars.
Love this little tidbit: In Greek mythology, the god Apollo sends a crow to collect water from a stream for him. The crow sees a fig tree and waits for the figs to ripen, tempted by the fruit. He knows that he is late and that his tardiness will be punished, so he gets a snake from the stream and collects the water. He presents Apollo with the water and uses the snake as an excuse. Apollo sees through the crow’s lie and throws the crow, goblet, and snake into the sky where they form the constellations Hydra, Crater, and Corvus.
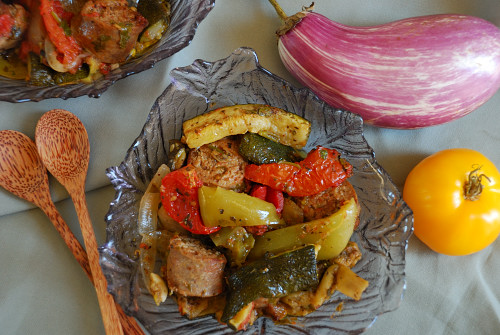
This recipe for Rataouille with Garden Vegetables has been sitting in my recipe box since I was in my twenties and newly married. I remember perfecting this Italian version of Ratatouille, so I would have something to serve my parents as they came up to visit us in college. It’s best made the day before and reheated and this is why I often used it. Served with a great loaf of bread and a green salad, it makes a perfect meal.
My mother-in-law’s gift to me as we left for college was a subscription to Bon Appetit. It saved my life. Not only did the magazine teach me to cook, but it gave me confidence to cook for others. The issue this came from is the Bon Appetit, from November 1977. I wish I could thank the author of this recipe and the many years of enjoyment it has brought me, definitely a keeper.
Ratatouille Tips:
Prep ahead and read the entire recipe for ingredients you may need.
Can be made ahead of time, and it fact it tastes better the next day.
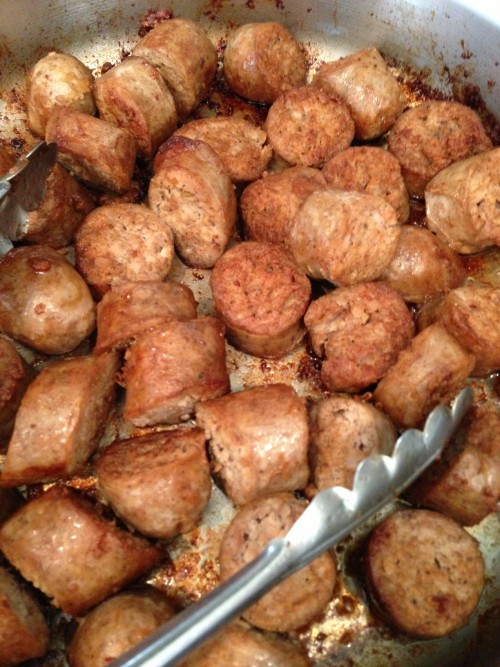
The sausage I used in the recipe is mild Italian. It can be cooked the night before and refrigerated to save time.
Serve with your choice of bread, rice, noodles or alone.
The perfect casserole for your garden vegetable abundance. Add the sausage or serve with the vegetables alone. Can be made ahead for a large crowd.
Course
Main Dish
Cuisine
Italian
Keyword
Ratatouille, sausage, vegetables
Servings12
AuthorBon-Appetit November 1977
Ingredients
2large eggplant, peeled and cut into strips
8medium zucchini, cut into 1/2 inch strips
Extra Virgin Olive Oil
5large sliced onion
6minced garlic cloves
2cupsmushrooms, sliced, ( in place of sausage)
6green peppers, seeded and sliced
8peeled tomatoes, cut into strips
1cupfinely chopped fresh parsley
2teaspoonsoregano
2teaspoonsthyme
2teaspoonsbasil
salt and pepper
1dozen sweet or mild Italian sausages (meat version)
Instructions
Preheat oven to 400 degrees.
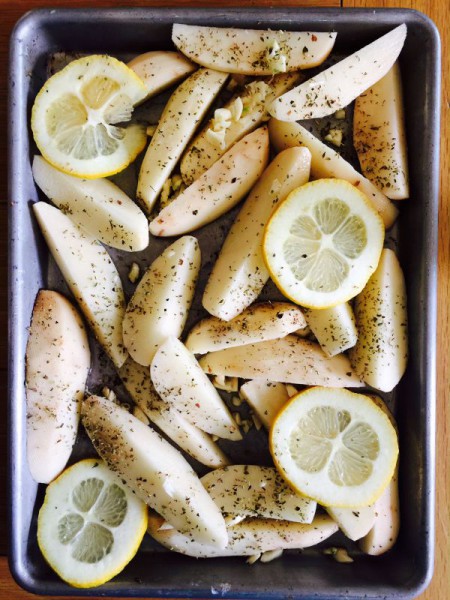
Place eggplant and zucchini on individual sheet pans and sprinkle with olive oil, salt and pepper.
Roast in the oven until soft around 20 minutes. Check eggplant half-way through the baking time and turn if needed. Place aside to cool.
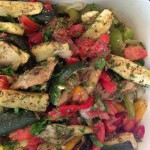
In a large skillet saute onion, garlic and mushrooms (for vegetarian version) with 2 tablespoons of olive oil.
Add green peppers, and continue cooking and add more oil if needed.
In the meantime, saute sausages (meat version) in a new skillet until browned. Or saute mushrooms in the first pan after vegetable mixture has been cooked.
Cut sausages in 1/2 inch round slices and place back in pan to further brown, 2-3 minutes. Remove and cool.
Preheat oven to 350 degrees.
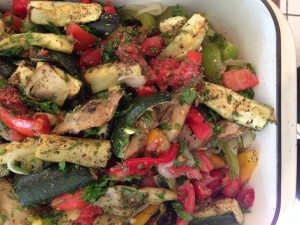
Layer sauteed vegetables, tomatoes, herbs, salt and pepper in a large casserole dish or two small ovenproof dishes. Stir gently to mix.
Sprinkle with olive oil and bake covered for 35 minutes for meat version, or continue baking for 10 more minutes for the vegetarian version.
After vegetables have baked add sausage, pushing down to distribute evenly.
Return to oven and bake uncovered for 20 minutes.
Remove from the oven and let sit for 10 minutes before serving.
Recipe Notes
Flavor improves by making the casserole 24 hours ahead and refrigerating. Bring to room temperature before reheating.
Sauteed vegetables.
Browning the sausages for the meat version~
Try my Greek Version of Ratatouille and Roasted Vegetables
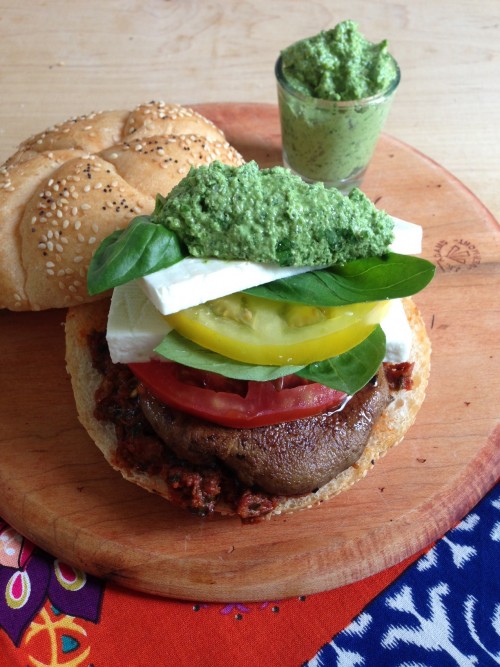
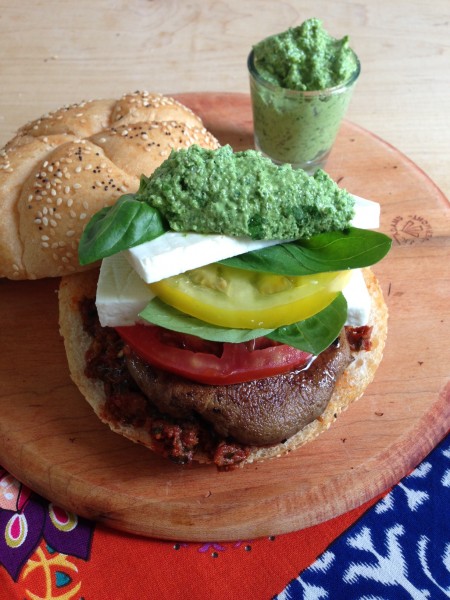
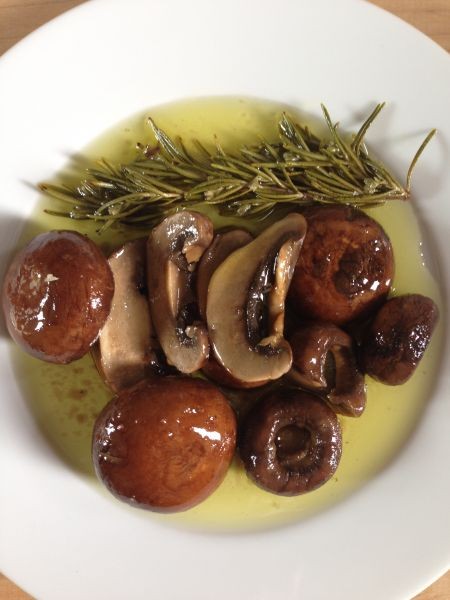
It’s tomato season and what better way to start the week than with a Portobello Tomato-Feta Caprese Burger, to serve on a hot summer day. This time I’ve chosen to go with all vegetables and a garden arugula pesto sauce to accompany my Greek Portobello burger. I just stacked everything up, splashed a little pesto on the top and I’m ready for a terrific lunch, or dinner served alongside slices of fresh melon. The mushrooms can be placed on the BBQ, or cooked in a hot skillet or grill . Use my Fresh Pesto Three Ways recipe and simply substitute the arugula for the basil.
The Portobello is such a unique mushroom, you can use as a substitute for a steak or burger.
Mushroom Health: Just a few reasons to continue eating mushrooms!
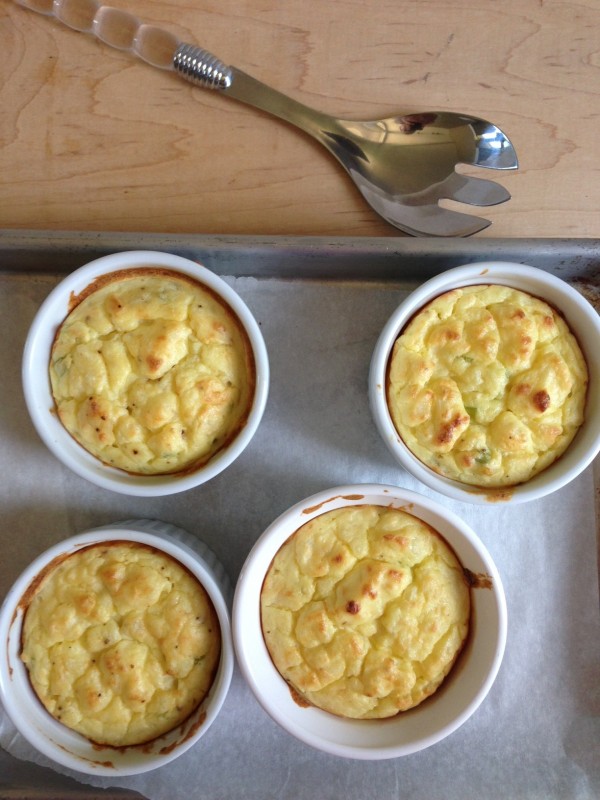
When was the last time you ate a Potato and Feta Cheese Souffle or any souffle at that! Potatoes and Feta are a often a perfect match in heaven. If you’re true to the Greek traditions, Greek Lemon Potatoes with lots of fresh lemon juice are the best, ask anyone. My version of this souffle takes on a traditional feta cheese, onion and celery combo. I just love changing up a recipe, which I do quite often on this blog.
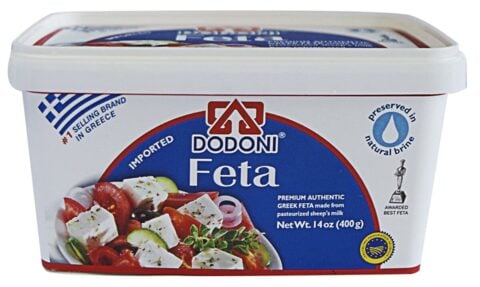
The type of Greek Feta cheese matters!
Buy your Greek Feta in a block with brine. Crumble the cheese by hand. Do not buy pre-crumbled.
Store the Feta in the container it came in. Do not drain the brine, it keeps the Feta fresh.
Buy Greek Feta only for my recipes, it’s salty which many recipes require. Use more salt in the recipe if it’s not Greek Feta.
Yes, I know souffles are mostly French in origin, this is my Greek twist, that I love adding to my recipes. Simple pantry ingredients makes this souffle easy to prepare, and a challenge to most of us to make. This can also be made in a large souffle dish. This makes 6-8 individual servings.
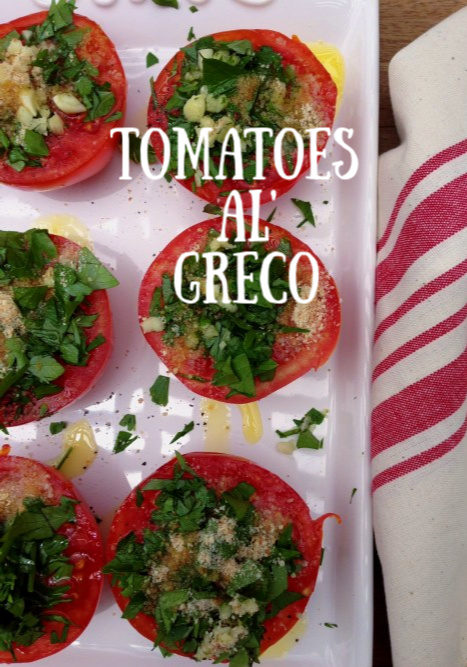
Summer has arrived and I have rediscovered an old recipe ~ Tomatoes Al’ Greco, from my old shoe box of family recipes. So easy and such a great reward at the end! Use this as a side for any main meal, and it’s truly a winner. As a long-time gardener, I have learned to always plant herbs alongside as companions to the vegetables in my boxes. Herbs for the summer garden might include parsley, basil, and cilantro.
Summer is prime for this recipe with garden tomatoes in season. Use it as a side to any meal, or serve it up at BBQ's and outdoor gatherings.
Course
Side Dish
Cuisine
California Greek
Keyword
evoo, garlic, salad, tomatoes
Servings8
AuthorMary Papoulias-Platis
Ingredients
10medium tomatoes, halved
salt and pepper
2 -3clovesgarlic, crushed
1cupfinely chopped parsley
1/2cupfine dry bread crumbs
1/2cupextra virgin olive oil
Instructions
Preheat oven to 375 degrees.
Cut tomatoes in half and place in a shallow baking dish, cut side up.
Sprinkle with salt and pepper.
Mix parsley with garlic and spoon on top of tomatoes.
Sprinkle with bread crumbs.
Pour olive oil over tomatoes.
Bake for 20-30 minutes. Serve warm.
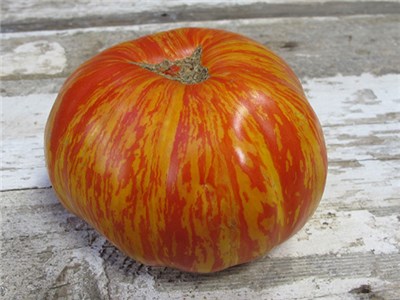
Tomatoes from the garden are ideal if you have gardening space. Tomatoes can be placed in the ground, garden boxes and in pots. If you have a porch or front yard area, why not add a few to your garden beds or porch. I often visit local gardening events, walking tours and new nurseries to find the variety of tomatoes such as the one below, Tomatomania.
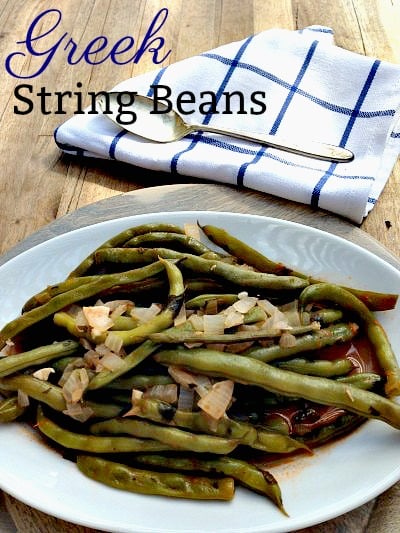
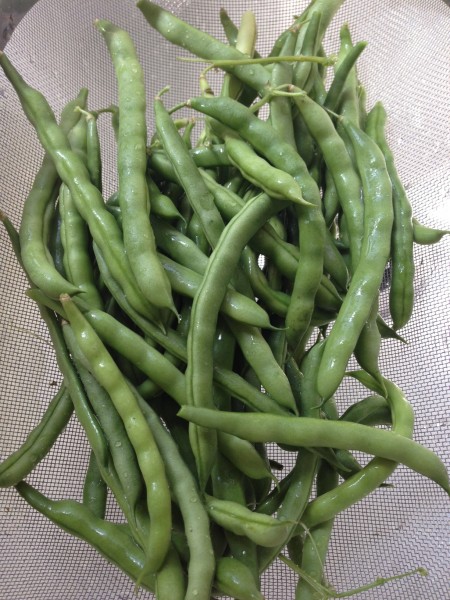
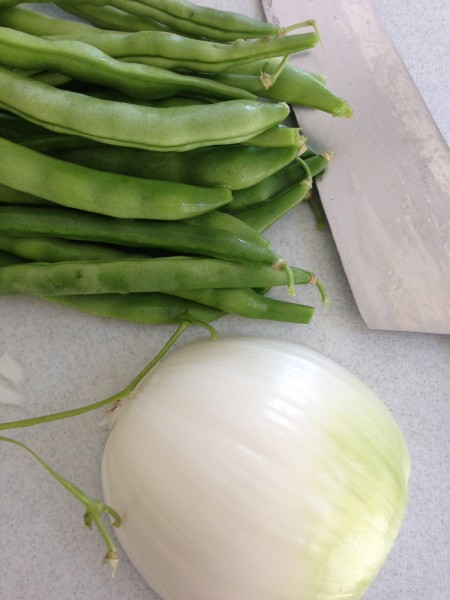
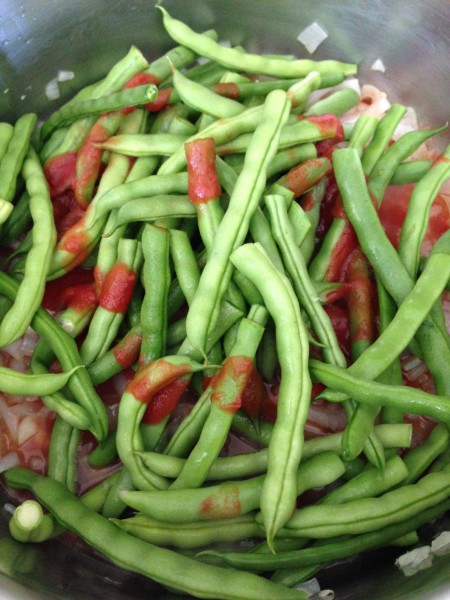
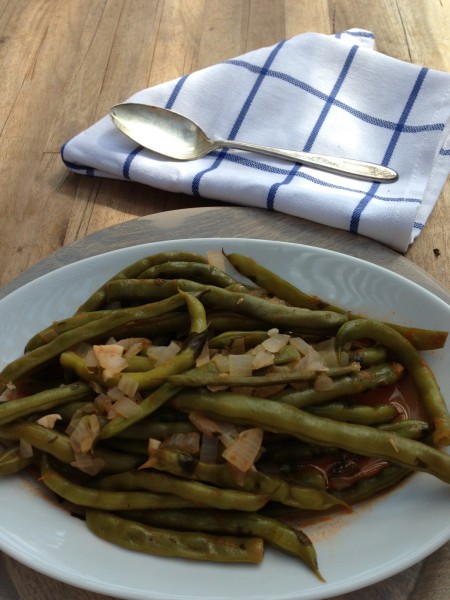
My garden is runneth over…with fresh green string beans. And what comes to mind – is this Greek string bean dish. With the traditional slow braising cooking method, this has become a favorite of ours at the dinner table. Made with simple pantry ingredients, it’s quick and ready to serve in minutes. You may also consider it as a side with fresh BBQ fish, chicken or lamb. Or just serve it alone, with a hunk of artisan bread- and a sprinkle of fresh Greek Feta, that’s how I love it! This Greek bean dish is meant to be a simple summer meal from your garden’s summer bounty!
Green Beans are nutritional alone or with the addition of evoo, garlic and onions.
Help you maintain a healthy weight.
So, heart healthy!
Green beans are a low FODMAP food and can be enjoyed by many people who have chronic digestive issues.
They provide protein for healthy muscles, organs, bones and hair.
Provide vitamins and minerals to your diet. For more information go online to: Healthline.
Just picked from my garden!
Line up the green beans with the top ends together and snip off the ends. Leave the cute curly-end, they are edible and sweet-looking.
Once you have the onions and garlic cooked, add the rest of the ingredients and fill the pot with water just to cover and cook.
This is a braising technique slow and long, so the flavors have a chance to meld together. The beans are even better the next day!
Hello from California Greek Girl. I’m the owner of Ethos Culinary located in the beautiful city of Carlsbad. Join me as we explore California’s bounty of foods, farmlands, and culinary experts. I’m looking forward to bringing you Greek, Mediterranean and Plant-Forward Cuisines. OPA!


 Hello from California Greek Girl. I’m the owner of Ethos Culinary located in the beautiful city of Carlsbad. Join me as we explore California’s bounty of foods, farmlands, and culinary experts. I’m looking forward to bringing you Greek, Mediterranean and Plant-Forward Cuisines. OPA!