This is my Top 10 Greek Pantry Items that will help you create dishes for your friends and family. With these staples you can make just about anything ”Greek” and with a few recipes on hand you are ready to go. Of course you’ll need to add your protein, fresh vegetables, and staples like bread, milk, flour, and herbs.
To help you, I’ve included recipe posts for you to choose from in which I used these staples, so you can begin your journey in cooking. Just keep in mind a recipe is there to guide you so you may add your unique touch. Use your fresh herbs such as oregano, parsley, and dill. They add a great addition to any Greek recipe. And I try and find orange orange for my pastries, since citrus is so important in the Greek Diet. If you can’t find it, any honey will do.
Top 10 Greek Pantry Items
Greek Extra Virgin Olive Oil
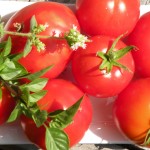
Canned tomatoes, sauce, whole tomatoes, paste
Lentils, bulgur, rice
Gigantes beans,white beans, garbanzo
Red Wine Vinegar
Potatoes
Onions
Honey
Walnuts, almonds
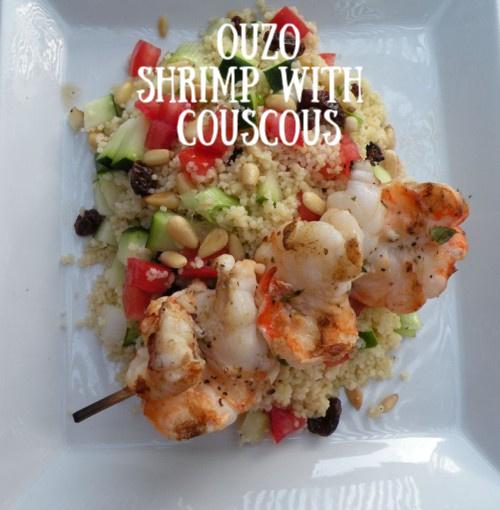
Wine: Red, White, Ouzo, Brandy
And to help you out here are a few of my favorite recipes from my blog.
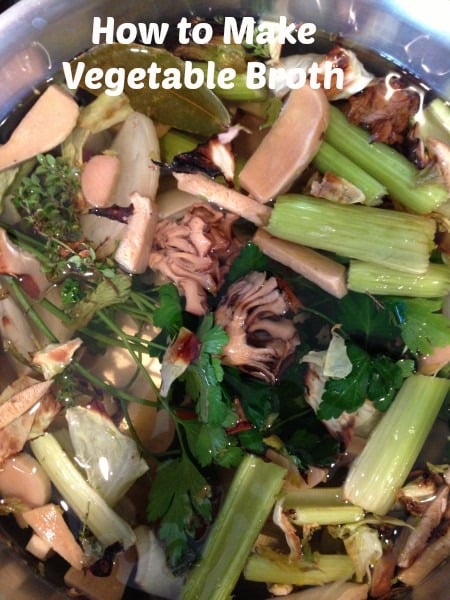
How many times have you been in a bind and needed vegetable broth for a soup or sauce?
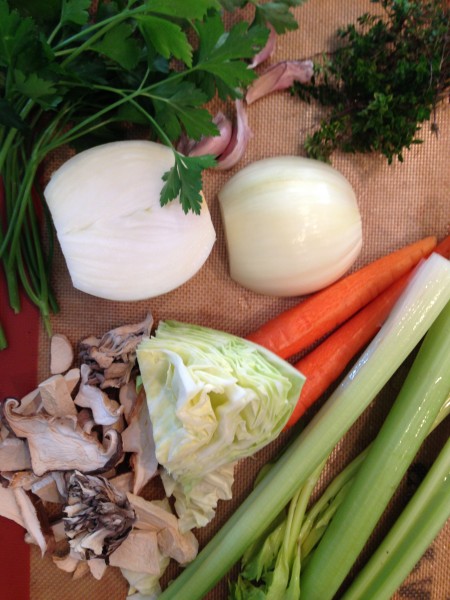
Here’s a simple recipe for a making a richly seasoned vegetable broth for any recipe. I used the basic vegetables in your refrigerator, carrots, celery, and an onion. Add your aromatics – a bay leaf, peppercorns, and parsley. And not necessary but a wonderful addition are dried mushrooms for that deep burst of flavor often needed in a vegetable broth. Simple and easy, done in the morning and soup in the evening! You can prepare this ahead of time and in the freezer for later in the week.
I often get the question; why would you take the time to do this ?
The nutrient level of a fresh broth is much higher than that of a processed purchased product.
You can control the flavor profile of the broth.
The salt content is also controlled by you. I prefer not to salt my broths.
Make as much as you need, no waste.
Prep all your ingredients and decide what flavors you would like in your soup. Choose spices and herbs to compliment your cuisine.
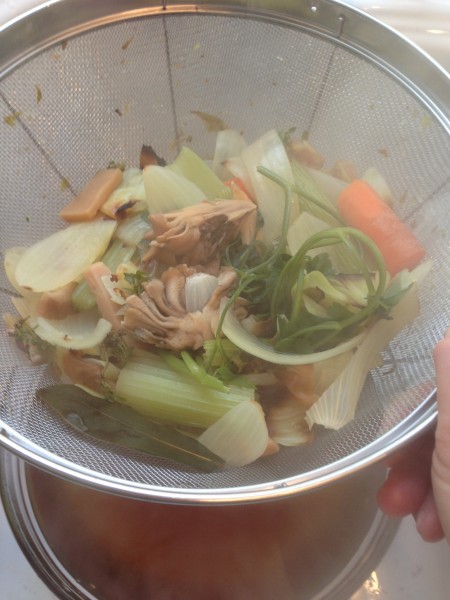
Strain your broth and let it cool. From here you can freeze it or refrigerate it up to 3 days.
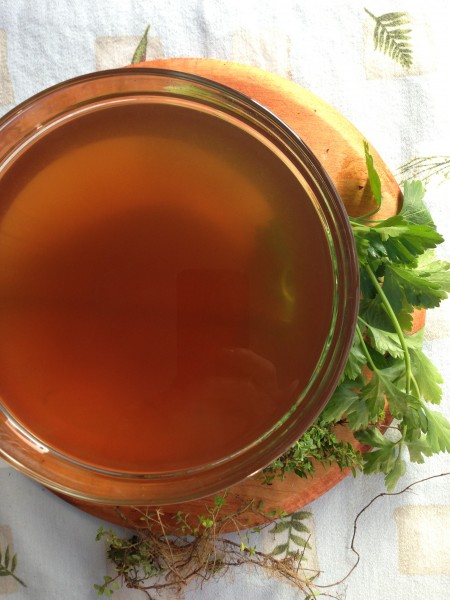
Here’s the finished product. Clear and ready to use. The mushrooms give it this earthy – brown color. So, don’t leave them out!
Quick and easy vegetable broth from your basic vegetables - add it to your soups, sauces, and dishes.
Course
Soup and Broths
Cuisine
California Greek
Keyword
broth, fresh, homemade, vegetable
AuthorMary Papoulias-Platis
Ingredients
8cupsof cold water
2carrots, cut in half
3celery stalks, coarsely chopped
1onion, cut in half
1/4of a green cabbage head, coarsely chopped
1cupfresh mushrooms or 1 cup dried mushrooms
6peppercorns
2bay leaves
2sprigs thyme, washed
1/4bunch parsley, washed
Instructions
Add all the ingredients and cold water in a large pot.
Bring to a boil over high heat.
Lower the heat to medium and simmer for 1 hour, skimming often.
Strain through a fine-mesh sieve or several layers of cheesecloth.
Let cool and store in a container.
Can be stored up to 5 days in the refrigerator, or freeze up to 3 months.
Recipe Notes
For a deeper flavor roast the vegetables in a 350 degree oven. Spread in a single layer and roast until the vegetables are wilted and browned, 10-15 minutes. Then transfer to the pot. Another method would be to saute the vegetables in the pot until they have browned, continue with the recipe. Note: Vegetables only should be browned, not the spices or herbs.
Make this broth with many of the soups on my blog.
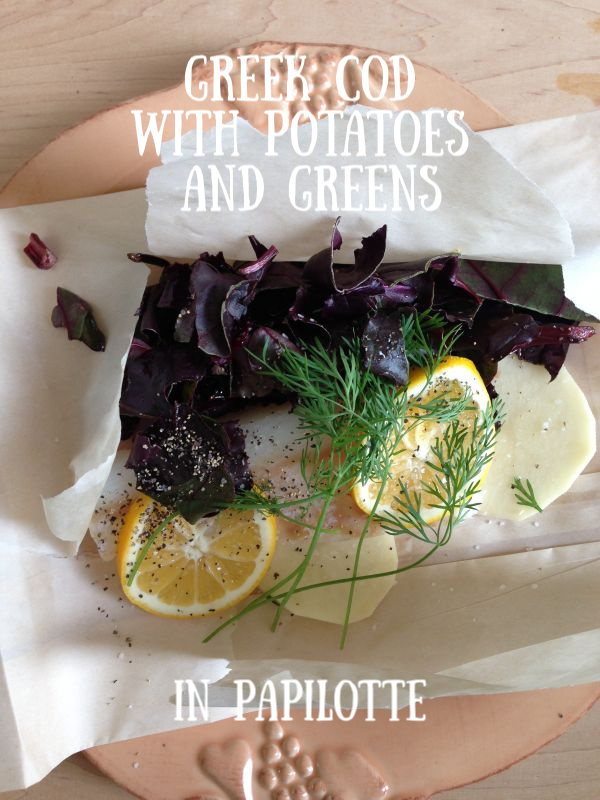
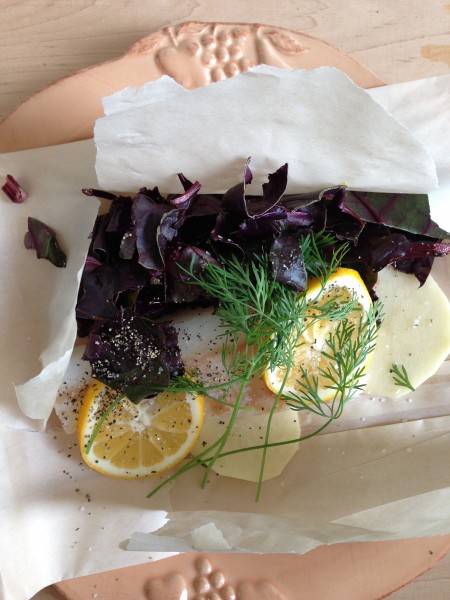
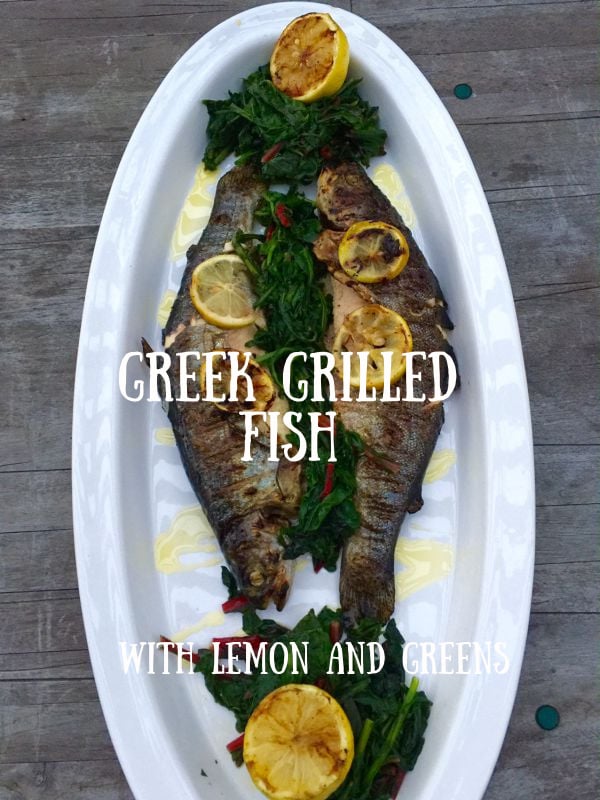
Greek Cod is used in may dishes throughout Greece. I recently came across this method while writing my olive oil cookbook. This cooking method is so easy and can be preapread ahead of time, and baked as guests arrive. I used cod fillets, which are very common in the Greek diet with rustic potatoes, beet green tops, and fresh lemon and dill. Any substitution of a white fish will do; halibut, tilapia, grouper and haddock. Adding fresh ingredients makes this dish delicious and healthful. You can also use brocolli, green beans, or asparagus. I used beet greens because they are a high nutrient dense food, including vitamins A,C and K, fiber, Iron, and Potassium a Greek powerfood for sure!
What is Papilotte?
When you see this term used on the menu in a restaurant you can safely assume your meal will be wrapped in paper. The dish is wrapped normally in parchment with a piece of fish, or a thin fillet of veal. This fish dish is fast and easy and can be prepared in minutes. The paper encloses all the ingredients and keeps the steam and aroma enclosed, and the ingredients are baked in it’s own juices. The papilotte is served directly on the serving plate as guests have their own serving.
Bring in any flavors you wish, but try this method with other fish, such as shrimp, scallops, a whole fish, or any other filet.
A quick and easy preparation with a fantastic presentation, this Greek inspired dish has common ingredients and delightful taste of the Greek sea!
Course
Main Dish
Cuisine
California Greek
Keyword
beet greens, cod, fish, main dish, papilotte
Servings4
AuthorMary Papoulias-Platis
Ingredients
4sheets or bags of parchment paper
4fillets of Wild Caught Cod Fillets, fresh or defrosted - (12 ozs.)fresh or defrosted (approx. 12oz.)
2potatoes, peeled and thinly sliced, 1/8 inch thickpeeled and thinly sliced, 1/8 inch thick
4cupsfresh beet greens, choppedchopped
4tablespoonsextra-virgin olive oil
4tablespoonswhite wine
8slicesof lemons
4sprigs fresh dill
salt and pepper
Instructions
Preheat the oven to 400 degrees.
Season the cod fillets with salt and pepper. Season the beet greens with salt and pepper.
Place 1 tablespoon of olive oil on each parchment sheet or inside each bag.
Peel and thinly slice the potato and place 4 slices in a row on each sheet/bag on top of the olive oil.
Place the cod fillet on top of the potatoes. Add one cup of seasoned beet greens alongside the cod.
Add 2 lemon slices on each cod. Add the dill sprigs on top.
Add 1 tablespoon of white wine in pockets.
Seal the bag by crimping the edges three times. If using parchment paper, start on one side and roll the edges to opposite side. Crease down to keep juices in.
Bake at 400 degrees, for a 1" fillet, 11 minutes, 2 inch fillet, 15 minutes.
Place bags on a plate and serve, unopened.
Recipe Notes
Any thin fish filet can be substituted. Beet greens can be replaced with spinach, arugula, kale.
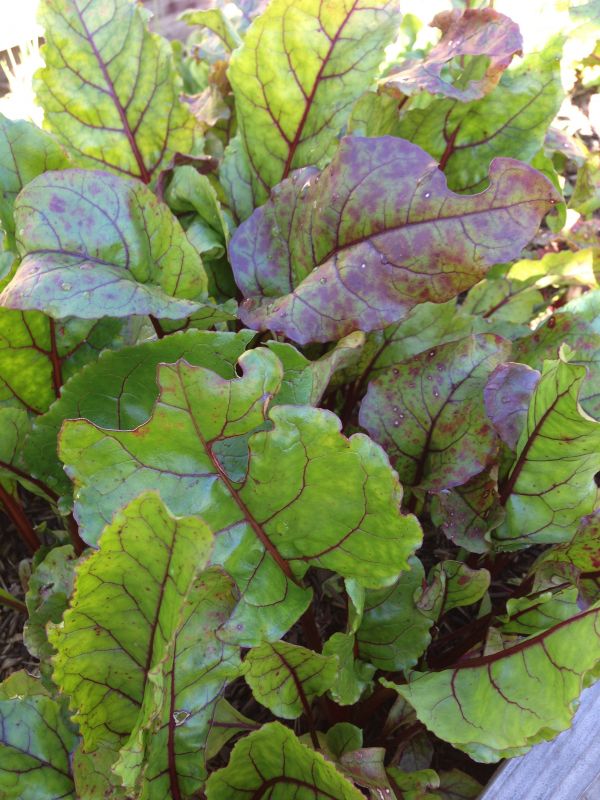
These are beet greens from my garden are sweet and picked when the leaves are small and tender. The cod will benefit from these greens in the dish, bringing the flavors together in the baking process.
COOKING TIPS:
Beet Greens are sweet when cooked in water, add a splash of olive oil, lemon, salt and pepper and they are done and ready to serve.
When buying beets, keep the greens and when you get them home, cut them off the root and store them in a bag to keep fresh.
For the parchment paper I used the paper on a roll, so you can fit any size fish. Just place everything in the bag and fold three times and place on the sheet tray and bake.
I try and use fresh fish whenever I can. But frozen fish can make a good substitute. If using frozen, defrost the fillets before using.
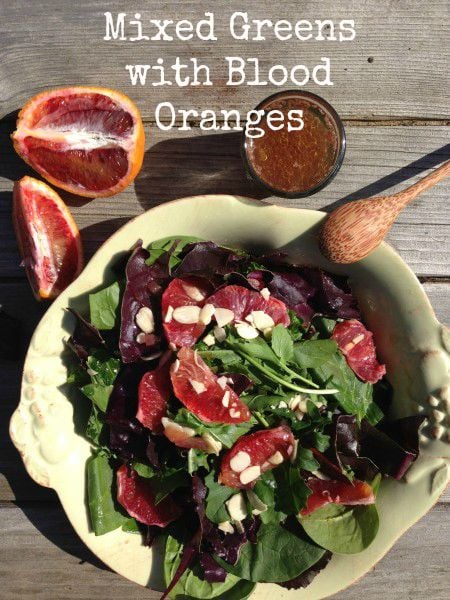
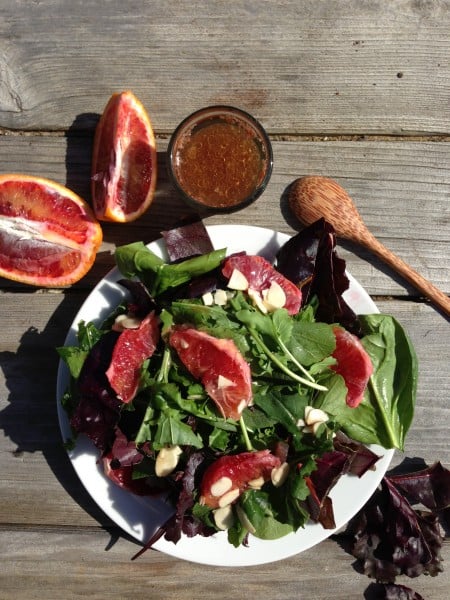
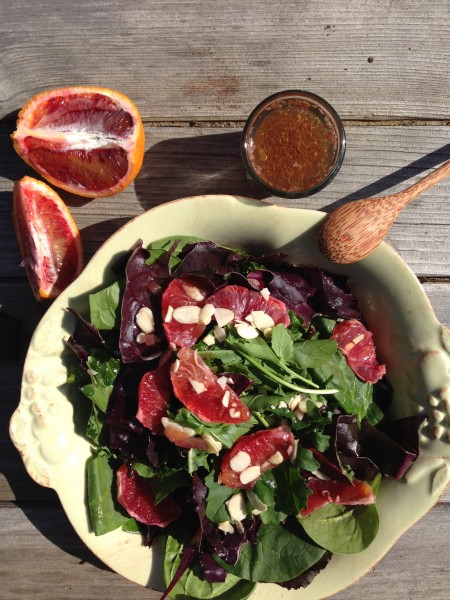
What do you do when you have eaten your way through the weekend mindlessly (which we all do once in a while) and now could use some serious nutrition? This salad is a combination of mixed greens, such as spinach, beet greens, and arugula; a true Popeye salad! The warm pomegranate vinaigrette lightly dresses the salad with the addition of blood oranges and almonds. These mixed greens have the highest nutrient-density which provides your body with phytochemicals, antioxidants, vitamins and minerals. Highest on the list of these dark leafy greens are; kale, mustard greens, beet greens, collard greens, Swiss chard, watercress, spinach and arugula. You can purchase these mixed greens at any supermarket with multiple choices and varieties. I like to use Organic Girl packages when in a rush. But as the Winter approaches I try and grow as many greens as I can.
Blood Oranges are unique:
Blood oranges are highly nutritious and contain several important vitamins and minerals including fiber, vitamin C, and antioxidants.
They may be a great addition to a healthy weight loss diet, due to the high fiber content.
With a hearty dose of vitamin C packed into each serving, blood oranges may help your immune function.
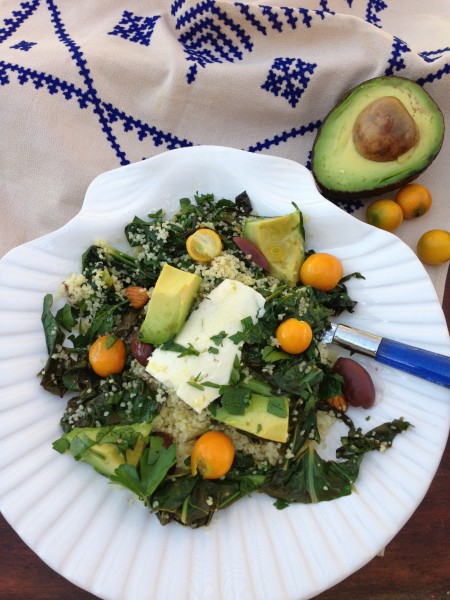
When I take a look through my pantry for a quick dish, I often gravitate to couscous or quinoa for a simple meal. Mustard greens are a staple in the Greek diet and make an easy addition to any meal. These dishes require an acid and something salty to perk it up. After searching in my refrigerator, I found the perfect ingredient, feta cheese. It’s salty and creamy and all you need is a small piece to make this dish complete. I grabbed a box of couscous, which can be prepared in 5 minutes, and mustard greens. In the Greek cuisine, a few more fresh ingredients and you have a complete meal; a fresh lemon, parsley, garlic, olives and an avocado. At the last minute, I looked out and saw my kumquat tree full of fruit, so I added in a couple for freshness. Here’s to a quick and easy simple salad for lunch or dinner, and don’t forget some local bread.
Finding CousCous might be a challenge, but you can order it online from Bob’s Red Meal.
Couscous with Fresh Mustard Greens, Avocado and Feta
Simple and quick to assemble couscous can be whipped up in 5 minutes with your choice of greens and cheese.
Course
Lunch or Dinner
Cuisine
California Greek
Keyword
avocado, couscous, feta, mustard greens
AuthorMary Papoulias-Platis
Ingredients
1 10oz.package of couscous
1 10 oz.bag of mustard greens, or 4 cups chopped
2teaspoonsolive oil for the saute pan
1fresh lemon, zest and juice
3-4clovesof garlic, finely chopped
1/2teaspoonsalt
1/4teaspoonpepper
1/4cupfeta cheese, crumbled or whole
1/4cupGreek Kalamata olives, chopped
1/4cupalmonds, chopped
1avocadochopped
1/4cupchopped fresh parsley
1-2teaspoonsof olive oil for topping
3-4kumquats or oranges
Instructions
Couscous
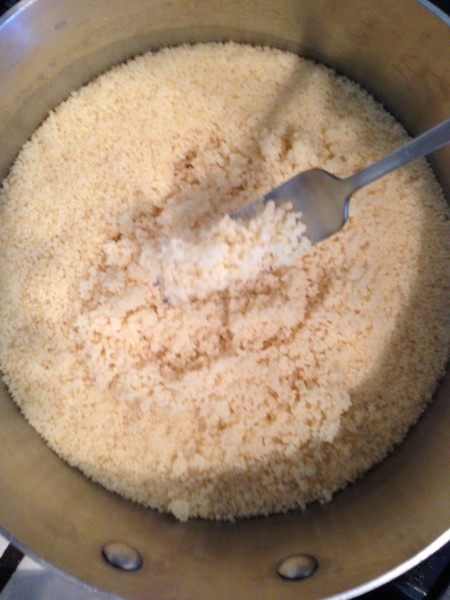
Prepare the the couscous according to package directions or follow the directions below.
In a medium saucepan bring 2 cups water to a boil. Stir in 1 cup of couscous and cover.
Remove from the heat and let stand for 5 minutes.
Fluff couscous with a fork and place in a large serving bowl.
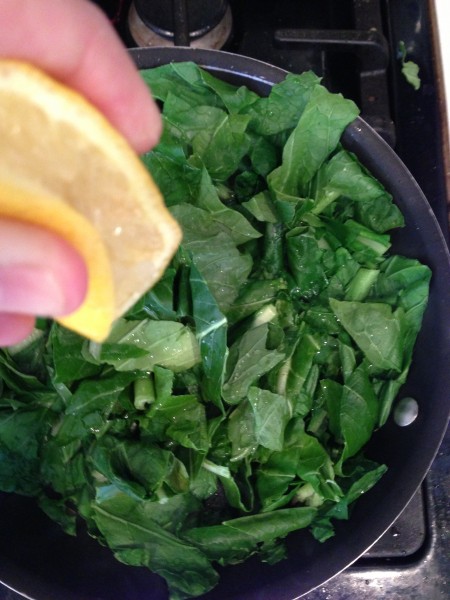
Greens
In a medium saute pan add 2 tablespoon olive oil and heat to medium.
Add greens, garlic, lemon zest, juice of one lemon, salt and pepper. Stir until almost wilted.
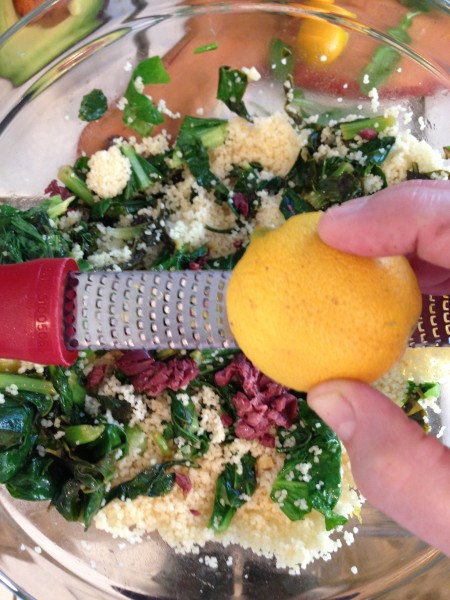
Add the warm greens to the couscous. Gently mix.
Add the feta, olives, almonds,avocado and parsley.
Add the additional olive oil and mix. Taste and adjust seasonings.
Serve warm.
Recipe Notes
Add more olive oil and lemon juice if the couscous is too dry. Substitutes for this dish might be: fresh tomatoes, cucumbers, green onions, green beans, corn, or mushrooms.
Tips:
I chose couscous for a quick meal. But you can substitute quinoa, bulgur, brown rice – your choice. Don’t forget to fluff it up!
Saute the mustard greens for a short time to preserve their nutrients and crunch. Adding lemon zest brings out all the flavors!
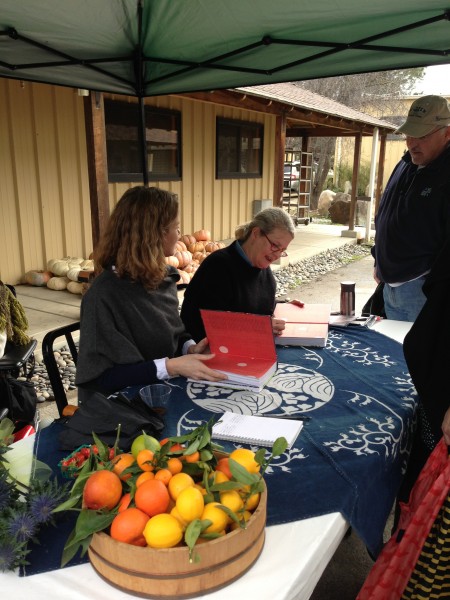
What a beautiful place for a cookbook signing on a working farm. And look who I ran into! Posing with Stephanie Weaver from Recipe Renovator, we’re enjoying a brisk morning at Chino Farms together, after having our cookbooks signed by author Nancy Singletom Hachisu. I cannot wait to dig into this book. Imagine me, a Greek girl in the kitchen surrounded with Japaneses ingredients- that’s another post! I’m bound and determined to learn and adapt this healthy and intriguing cuisine.
Chino Farm’ is located in Rancho Santa Fe, with sprawling acres of organic farm land.
The lovely Nancy Singleton Hachisu signing away hundreds of copies of her new cookbook.
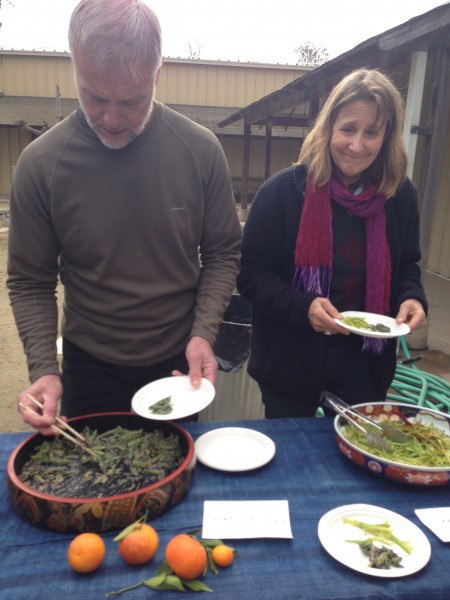
Mustard greens are served up for a quick bite from her cookbook.
Warm miso soup was also a big hit among the crowd , and convinced me ‘I can make this”!
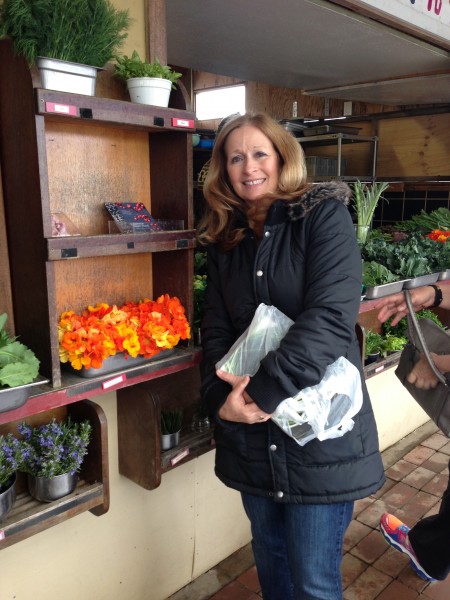
Take a look at the heirloom pumpkins on display. This is my dear friend Madeline joining me for the signing.
Who can resist taking a picture next to these beauties, nasturtiums!
January and February are cold and wet months in your garden and often a time for cleaning up, weeding, and pruning. But first to peek out in early Spring are the beautiful sunny faces of the trailing”Nasturtium” blossoms. A fast creeping herbal flower with petals 2-3 inches round, and multiple colors to choose from.
This flowering pear tree ” Chanticleer” is showcasing it’s beautiful white blossoms all over town.The dark rough trunk is a beautiful contrast from the lovely lacy flowers it produces.
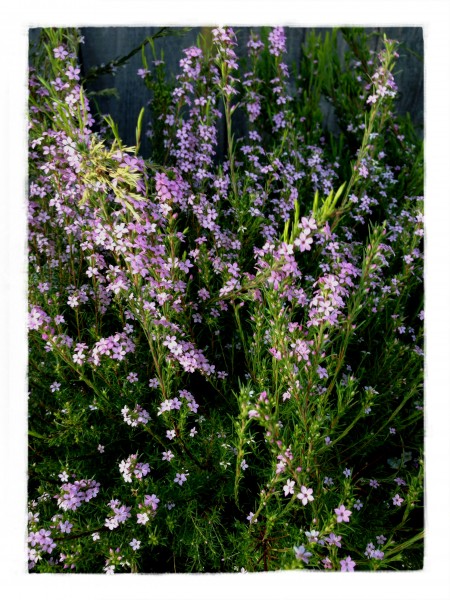
Small fragrant pink blossoms of this perennial “Breath of Heaven”, Coleonema pulchrumis, is just showing up as it produces a full bloom in early Spring. Brush alongside this bush and a wonderful fragrance soon surrounds you.
Fiery red blossoms flowing down the hard tough woody branches of the “Leptospermum, “Red Damask”, makes a grand entrance in your flower garden. A perfect cutting flower for your spring floral arrangements, it can also be purchased in white and pink.
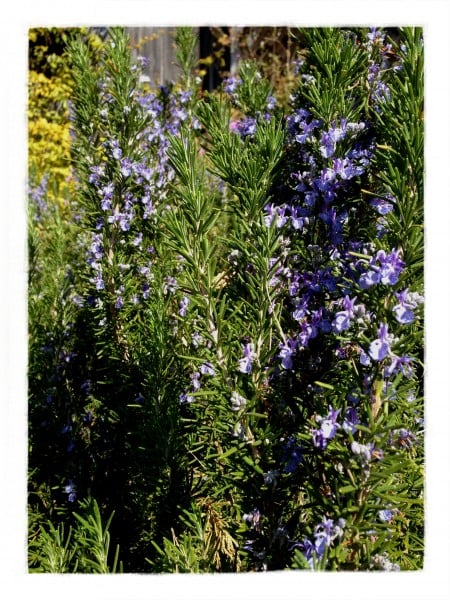
Rosemary ” Tuscan Blue” is one of my favorite landscape plants. With it’s strong herbal scent, perfect for cooking with, it’s a grand show during the cold winter months.
My “Anna” apple trees have the most beautiful pink blossoms during the early spring. Be ready for a large supply of large green-pink tart apples perfect for apple pies and desserts in the early summer months.
Blooming now, this “lilac vine” (Hardenbergia violacea), is a climbing perennial with light violet blossoms. It’s very delicate in nature and needs careful attention, but worth it’s beautiful floral show.
My climbing single petal rose is a knock-out as it over-performs every Winter in my garden. Even this monarch butterfly enjoys it’s three-colored blossoms.
You can never go wrong with this lovely “Sweet Pea” bush, blooming effortless for several months in and out during the seasons. I use mine in a fence-like border with the “Tuscan Blue” rosemary plant.
The “California Poppy” found on side streets and hillsides in California growing wild is one of the most popular flowers to place in garden pots or borders in the coastal communities. Select from many bright shades and plant in clusters to brighten any dull spot in your landscape.
Planting on a slope is difficult, but I chose the ground cover purple verbena. I just love the winter backdrop of solid purple blossoms it provides in the garden.
Camellias are in bloom and appear late winter in mild climates. Needing shade and moist conditions they can be found in a multitude of colors and shapes. From double blossoms to single petals, the choice is yours.
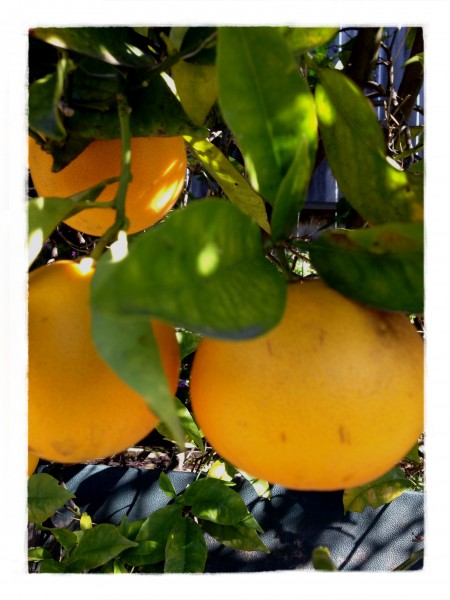
I couldn’t resist to throw my “Valencia” orange tree in this grouping, because of it’s magnificent color it provides in the garden.
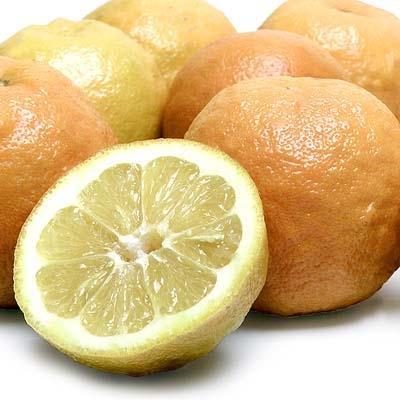
Seville Orange curd is one of my splurges, when I’m involved in an adventurous baking day at home. Everything goes with the popular lemon curd, so I decided to try a new recipe with Seville Oranges, which I kindly received from from Melissa’s Produce. Seville oranges come under the heading of Bitter oranges, which are too sour and astringent to eat raw. Instead, they are cooked in preparations such as marmalade and preserves, but also valued for their bitter peel which is often candied, and for their essential oils which are used to flavor foods as well as special liqueurs. I know what you’re thinking this is a totally English post, but that’s why I love curd of any kind, we don’t have it in the Greek Diet! Oranges are so common in everyday Greek cooking, and this scone combination with curd is so perfect for a tea with girlfriends or for a morning treat!
Seville oranges, or Bitter Oranges are perfect in making marmalade.
Native to Southeast Asia, most citrus experts believe them to be (most likely) a cross between a pomelo and a mandarin orange.
What makes Sevilles so special? Because Seville Oranges have a higher amount of pectin than regular sweet oranges, and therefore giving a better set and a higher yield, they are prized for making the best orange marmalade!
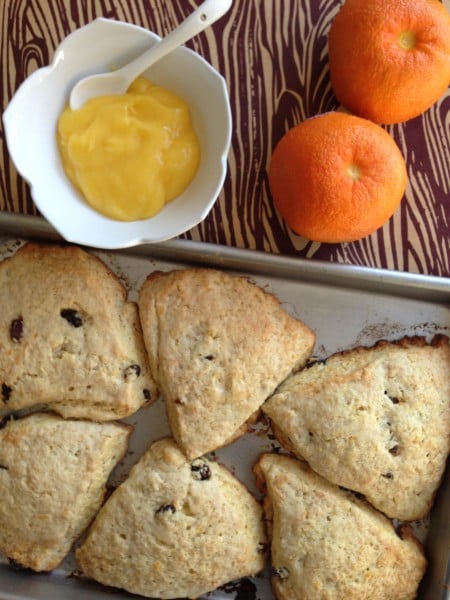
The sweet-sour tang of the Seville orange sets this curd apart from all others. Serve with these freshly baked scones for an afternoon tea with friends. Use oranges or lemons in place of Seville's for a perfect curd.
Course
Breakfast or Afternoon Tea
Cuisine
California Greek
Keyword
orange curd, scones, seville oranges
Servings12
AuthorMary Papoulias-Platis
Ingredients
Curd
1/2cupunsalted butter
3/4cupsugar
1/2cupfresh Seville orange juice, or any orange
3tablespoonsfinely grated orange zest
Pinchof salt
6large egg yolks
Scones
3cupsflour
1tablespoonbaking powder
1teaspoonbaking soda
1teaspoonsalt
1/2cupsugar
3/4cupcold butter, cut into 1/4 inch cubes
1cupbuttermilk
1/2cupraisins or walnuts
1tablespoonorange zest
1/2cuporange juice
1/4cuporange juice for topping
1tablespoonsugar for topping
Instructions
Curd
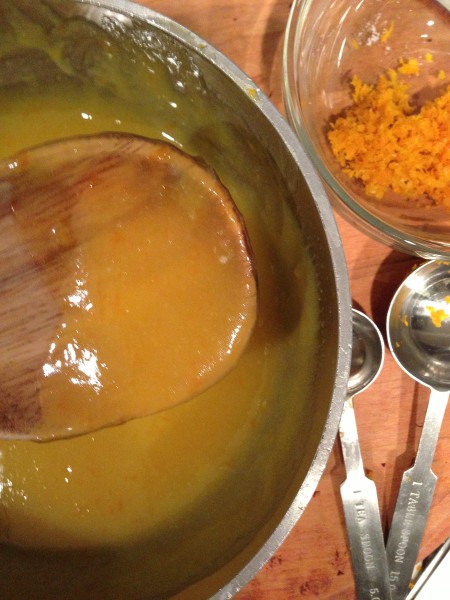
Melt the butter in a heavy saucepan over medium-low heat.
Remove the pan from the heat and whisk in the sugar, orange juice, orange zest and salt. Whisk in the yolks until smooth.
Cook the mixture whisking often (do not let boil) until it thickens and leaves a path on the back of a wooden spoon when a finger is drawn across it.
Pour the orange curd through a strainer into a bowl. Let cool. Refrigerate covered until ready to serve. Makes 1 1/2 cups
Scones
Heat oven to 400 degrees.
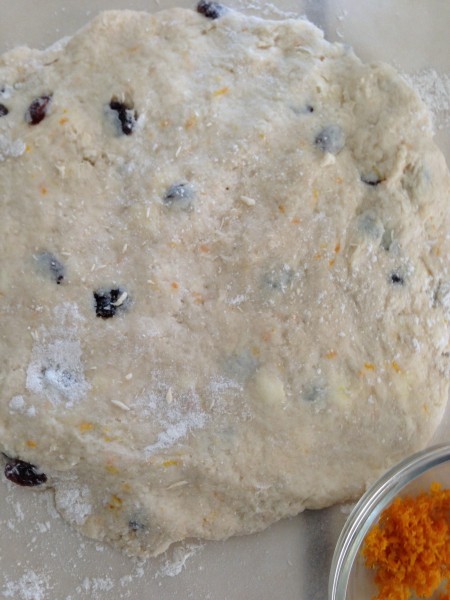
Sift all the dry ingredients in a large bowl. Cut in the cold butter with two knives, or use hands to mix. Stir in raisins, orange juice, and zest.
Make a well in the center of the bowl and add buttermilk. Mix with a spoon until combined. Do not overmix.
With floured hands, on a floured surface pat into a circle 3/4 inch thick. Cut into triangles or use a cookie cutter.
Place on a greased sheet pan or parchment paper. Brush each scone with orange juice and sprinkle with sugar.
Bake for 14-18 minutes. Serve warm.
Recipe Notes
Seville oranges, tangerines, or any orange can be substituted in this recipe. Tip: The original recipe calls for 12 sugar cubes dipped in orange juice and pressed into each scone before baking. This makes a delicious scone if served alone.
When making the curd stir continually, and do not bring to a boil or the eggs will cook. Quickest method for knowing the curd is ready: take the back of a wooden spoon , dip it in the curd and run your finger across the back of the spoon and if it stays it’s ready!
When ready to form dough, flour hands and pat onto a floured wax or parchment sheet to form a large circle.
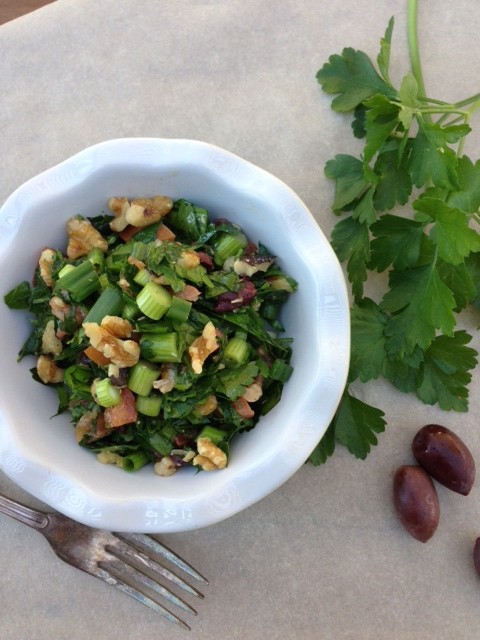
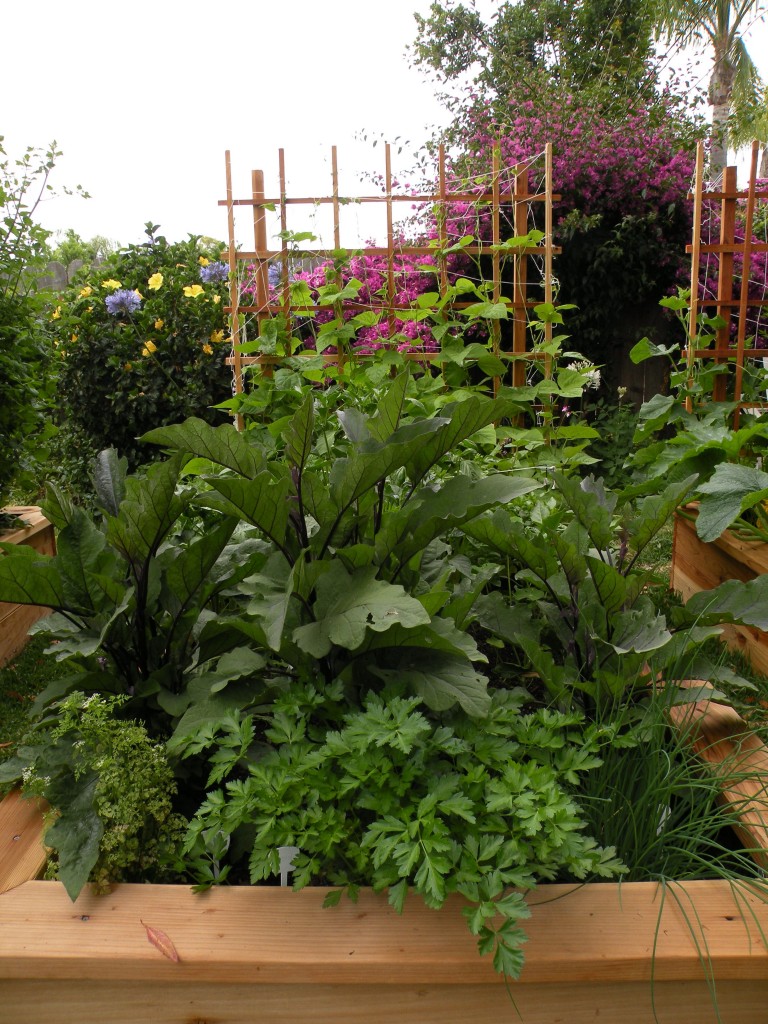
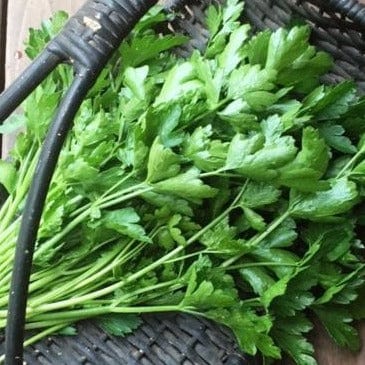
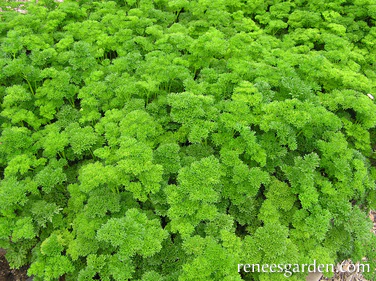
This year I decided to plant parsley as a winter crop and it worked! To my amazement it did beautifully and is still growing profusely – so here’s a quick and easy Greek Parsley salad, served best chilled or soon after you assemble it. Parsley is very a common herb used in Greek recipes and comes in as a close tie to oregano. It has many health benefits and at times it’s overlooked. When it comes to the nutritional value, parsley contains an excellent source of vitamin A and C. There are more than 30 varieties of this herb including the most available to us, the curly parsley and Italian flat-leaf parsley. I prefer the Italian for it’s more rich flavor, but either one will do. Parsley stems and leaves are used in dishes such as soups and salads, just make sure you finely chop the stems because they can be a little tough at times. Bundled together with other spices often called ” bouquet garni” in French (parsley tied together with a bay leaf and thyme) it can add a peppery fresh-grassy taste to any of your soups and stews.
In Greek History, parsley wreaths were made as a ceremonial act and placed as a remembrance on graves of loved ones. Today, Kolyva is passed out at funerals as a small bite to honor the deceased with the food of life.
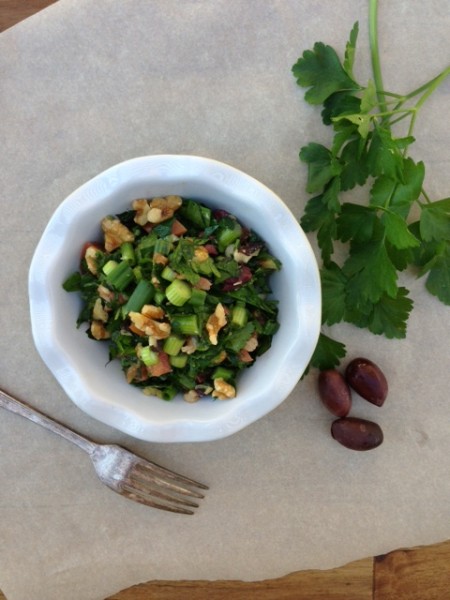
Such a quick and easy salad that can be made for four or a large crowd, served chilled. Refreshing for an outdoor picnic or party.
Course
Salad
Cuisine
California Greek
Keyword
Greek, parsley, salad
Servings8
AuthorMary Papoulias-Platis
Ingredients
2bunches fresh parsley
1cuppitted kalamata olives
1cupwalnuts
1bunch green onions, coarsely, chopped
2large tomatoes, peeled and seeded
1/3cupextra virgin olive oil
1/3cupred wine vinegar
1/2teaspoonsalt
1/4teaspoonpepper
Instructions
Wash and dry parsley, remove the thick stems, and finely chop. Place in a large bowl.
Seed and chop the olives and tomatoes. Add to the parsley.
Chop the walnuts and add to the salad.
Chop the green onions and add to the salad.
Add the olive oil, red wine vinegar, salt and pepper.
Taste for seasoning, salt and pepper.
Serve immediately, or chill and serve later.
I prefer flat-leaf parsley than the curly variety, because it has a more potent flavor. I do use the stems in all my dishes, just make sure that you chop them finely. Both work in all recipes. I but my parsley from Renee’s Garden for their exceptional quality.
I hope you try and grow your own parsley, and make this deliciously fresh
Hello from California Greek Girl. I’m the owner of Ethos Culinary located in the beautiful city of Carlsbad. Join me as we explore California’s bounty of foods, farmlands, and culinary experts. I’m looking forward to bringing you Greek, Mediterranean and Plant-Forward Cuisines. OPA!


 Hello from California Greek Girl. I’m the owner of Ethos Culinary located in the beautiful city of Carlsbad. Join me as we explore California’s bounty of foods, farmlands, and culinary experts. I’m looking forward to bringing you Greek, Mediterranean and Plant-Forward Cuisines. OPA!